Protect
The Protect module analyses payment data and looks for indicators of potential error or fraud and will warn you of suspicious activity or data anomalies. Protect enables you to set up deny lists of accounts you deem high risk, and should not be seen within a payment file.
Risk management criteria can also be set up against a payment profile to ensure you are warned about the creation of a payment file that contains duplicate account details, duplicate instruction values or first time use of an account.
Protect contains the following features:
- The option to enable Protect functionality per user role.
- Ten deny lists that are used by all payment profiles, where each list contains a list of accounts to be used when analysing payments.
- The option to add accounts to a deny list either manually or bulk update via an import file.
- A risks log that contains an entry for each of the payments that have been identified as potentially being an error or fraudulent.
- Risk rules that are used when identifying a possible fraudulent payment, configurable per payment profile.
- Number of risk items identified included in payment notification email sent to a user.
Setup
To use the Protect features, you must:
- Enable Protect permissions (Risk logs and Edit deny lists) for a user - see the section Setting Up Roles.
- Configure risk rules per payment profile - see the section Protect within Administrators.
- Enable deny lists per payment profile - see the section Protect within Administrators.
- Configure deny lists for a company - see the section Deny lists.
Payments
When a payment file is created in Autopay Online Plus it is checked against the risk management criteria.
A payment file that contains risk data can continue if the risk rule is set to Disabled or Alert, if the risk rule is set to Block it cannot continue and can only be archived.
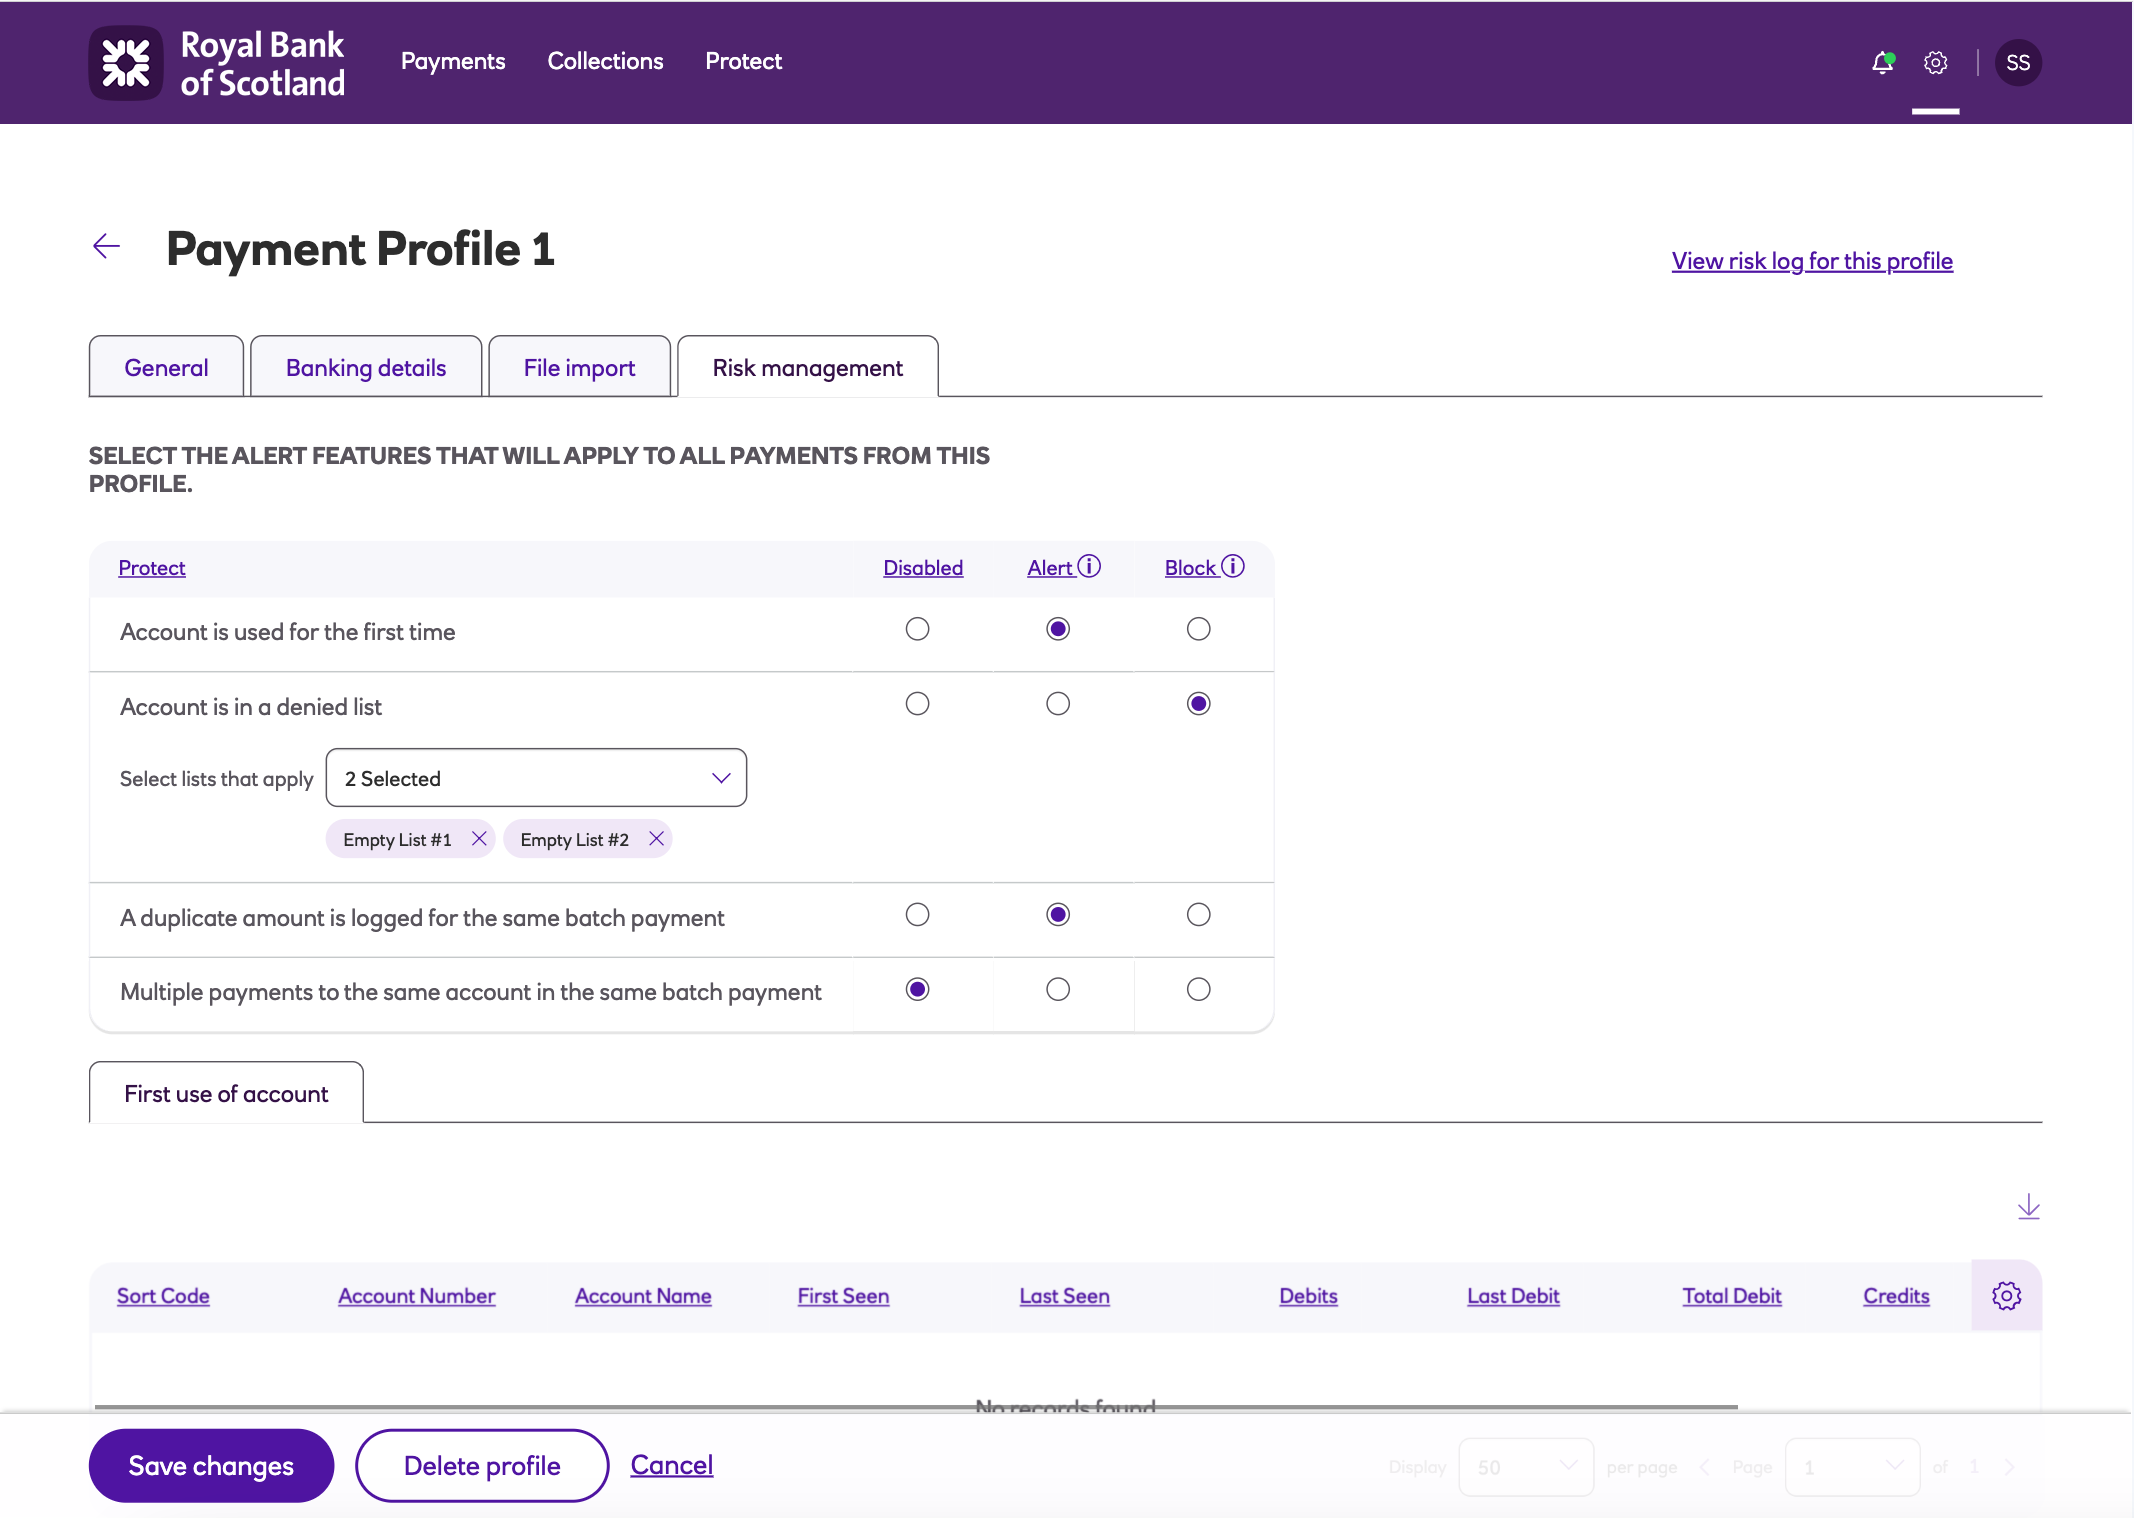
The example below is for a payment profile that is set up to block the payment if an account is in a deny list.
- The payment profile is set up with the following risk management settings:
-
An account with sort code 200000 and account number 55555557 is added to a deny list.
-
The deny list is assigned to the payment profile.
-
A new payment file is created against the payment profile.
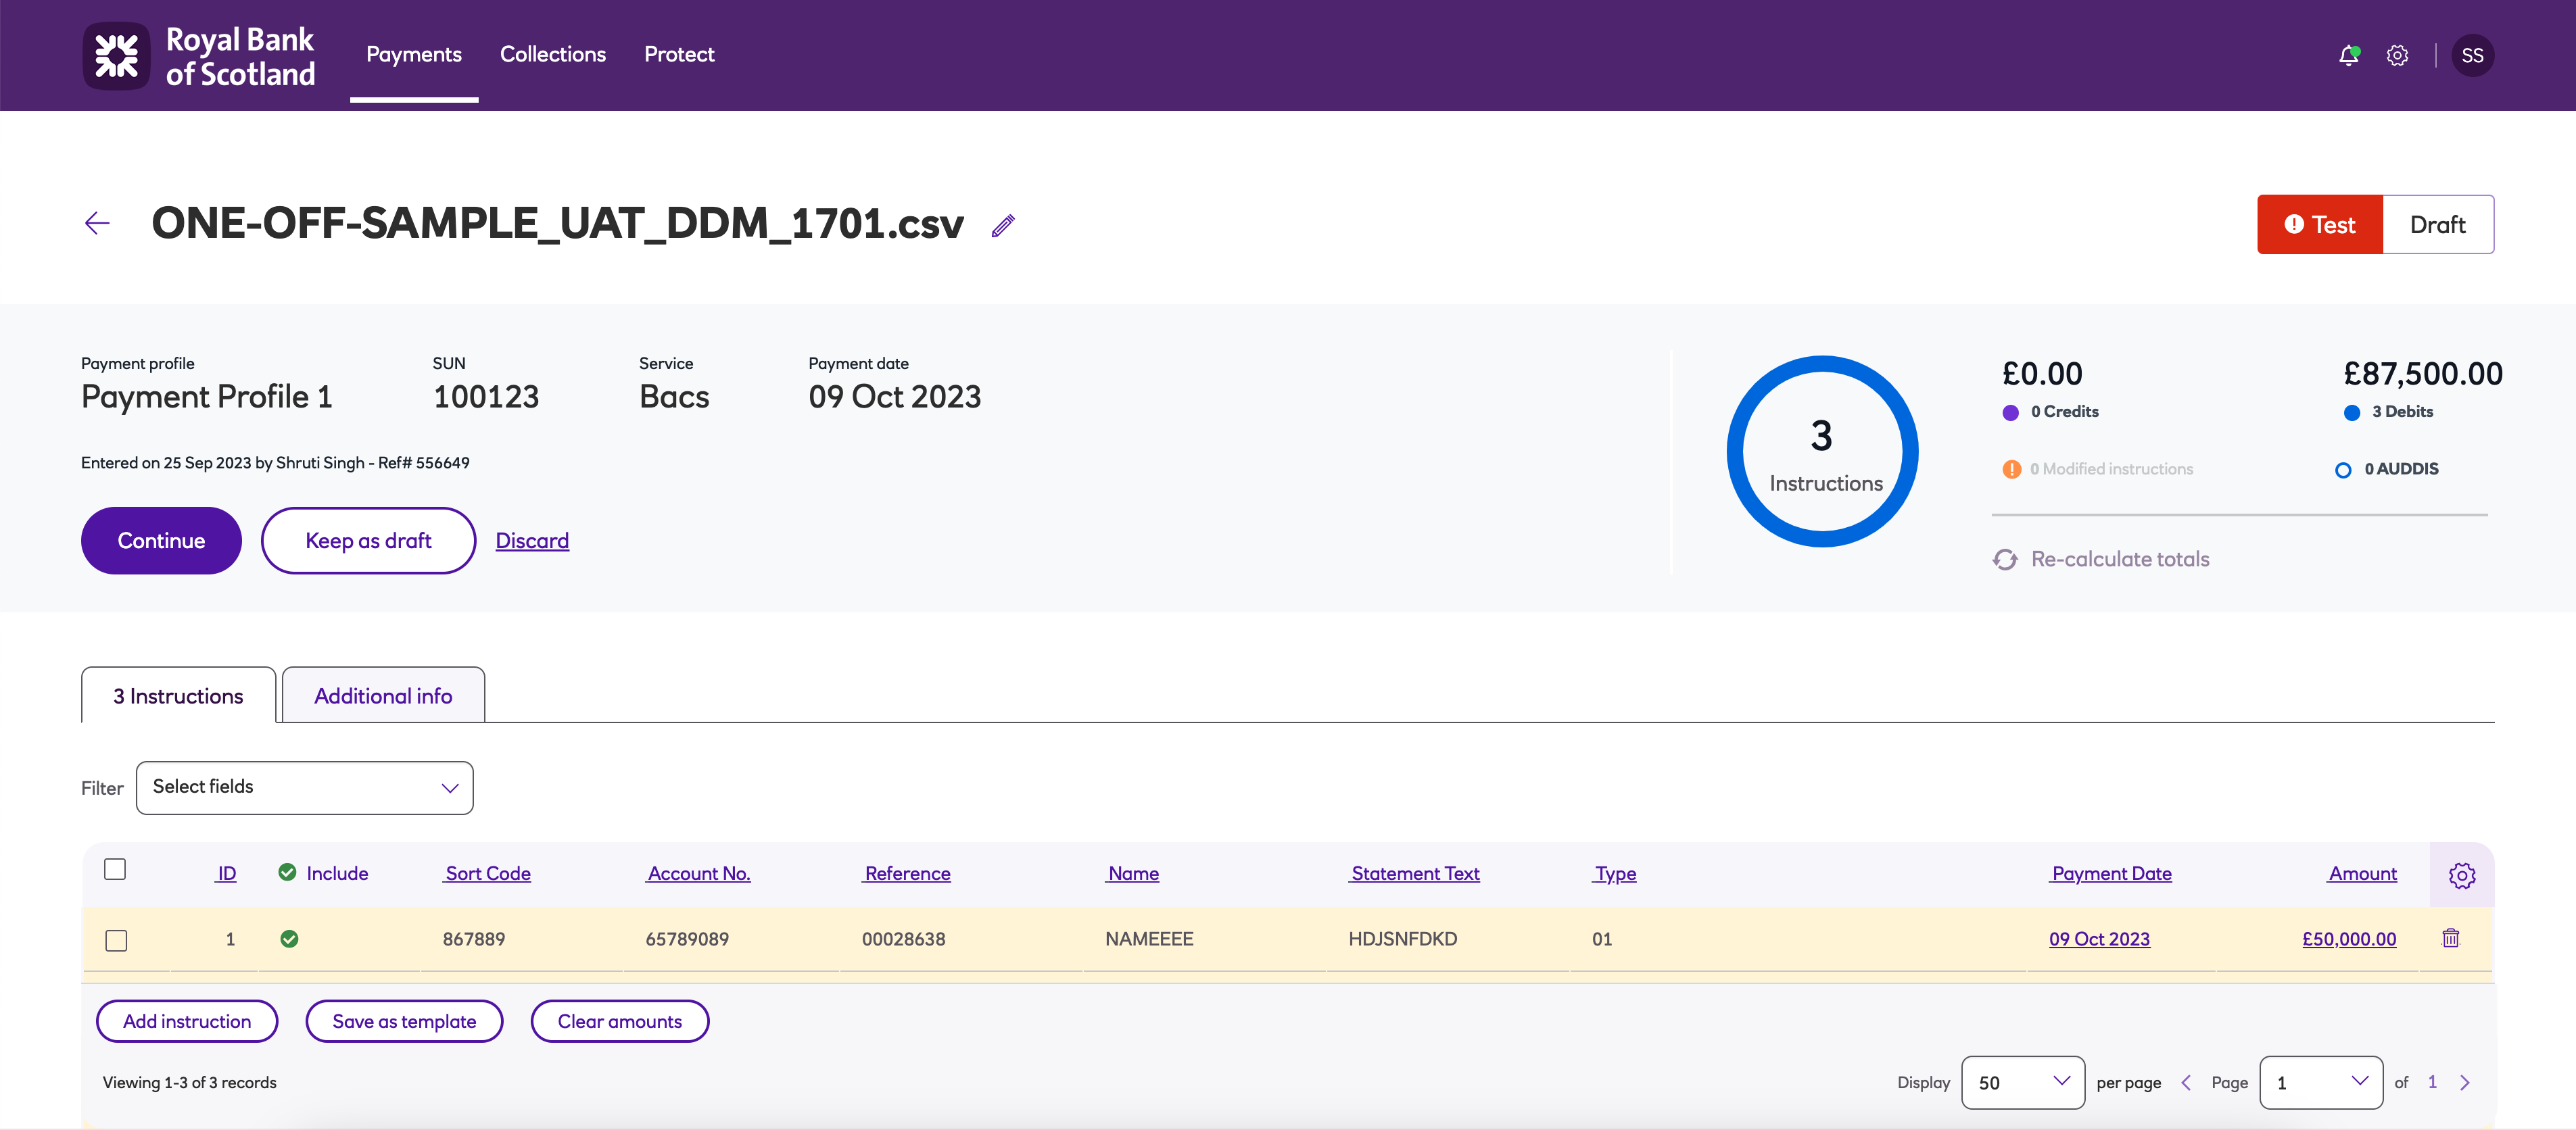
- There are ten risks, one alert and one block that have been identified.
- The payment file is rejected by the solution because it contains an instruction for the account that is denied.
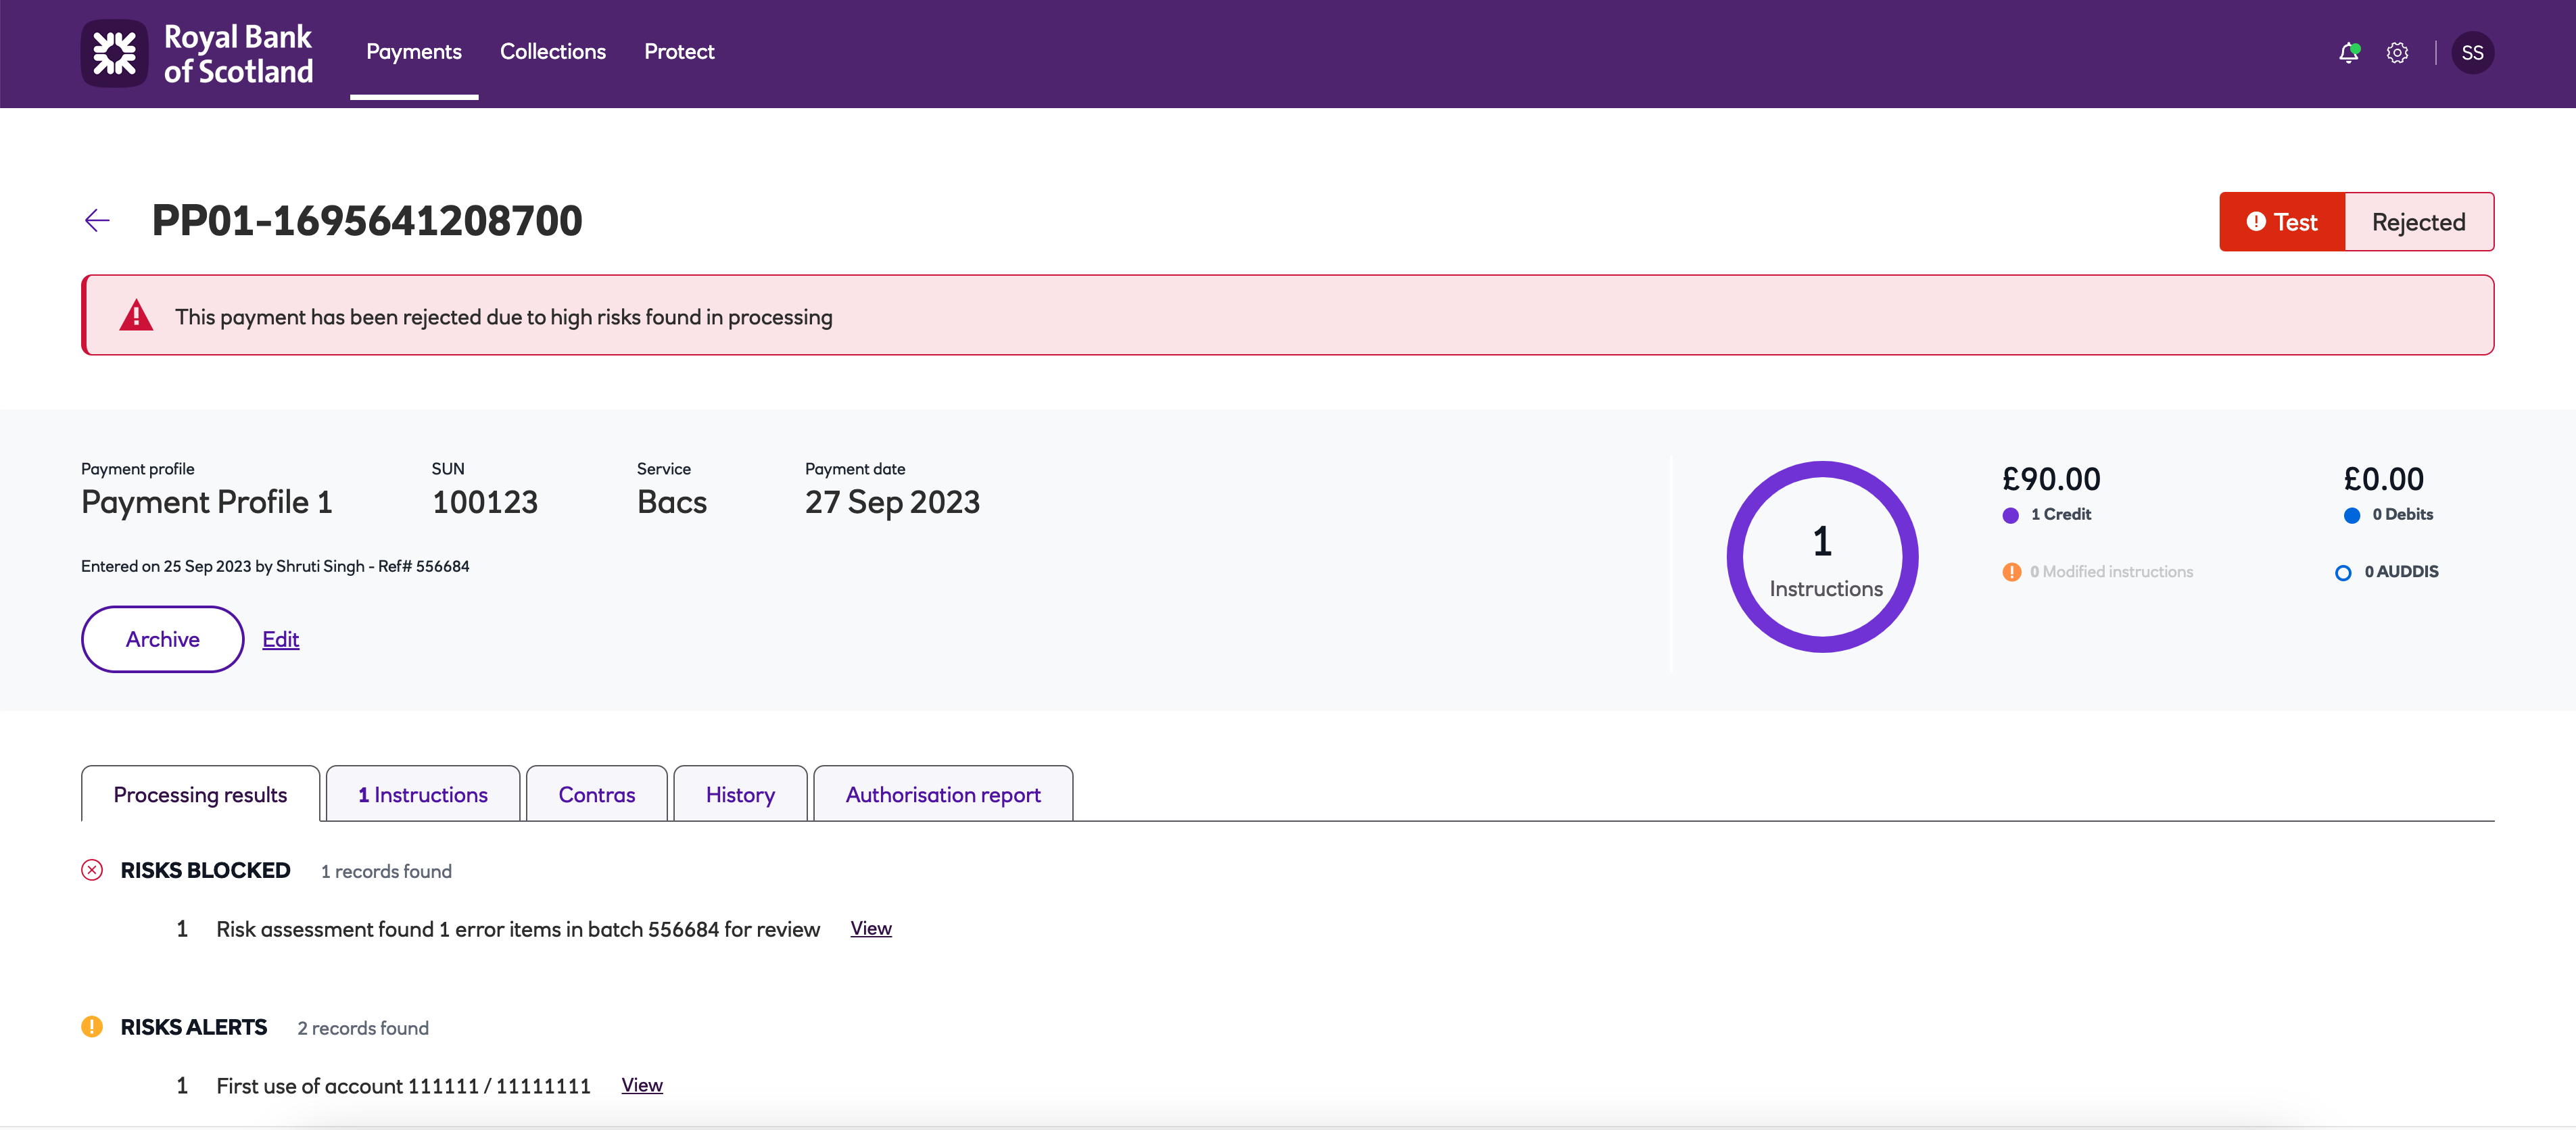
- Details of the risks alerts can be found on the Processing results tab.
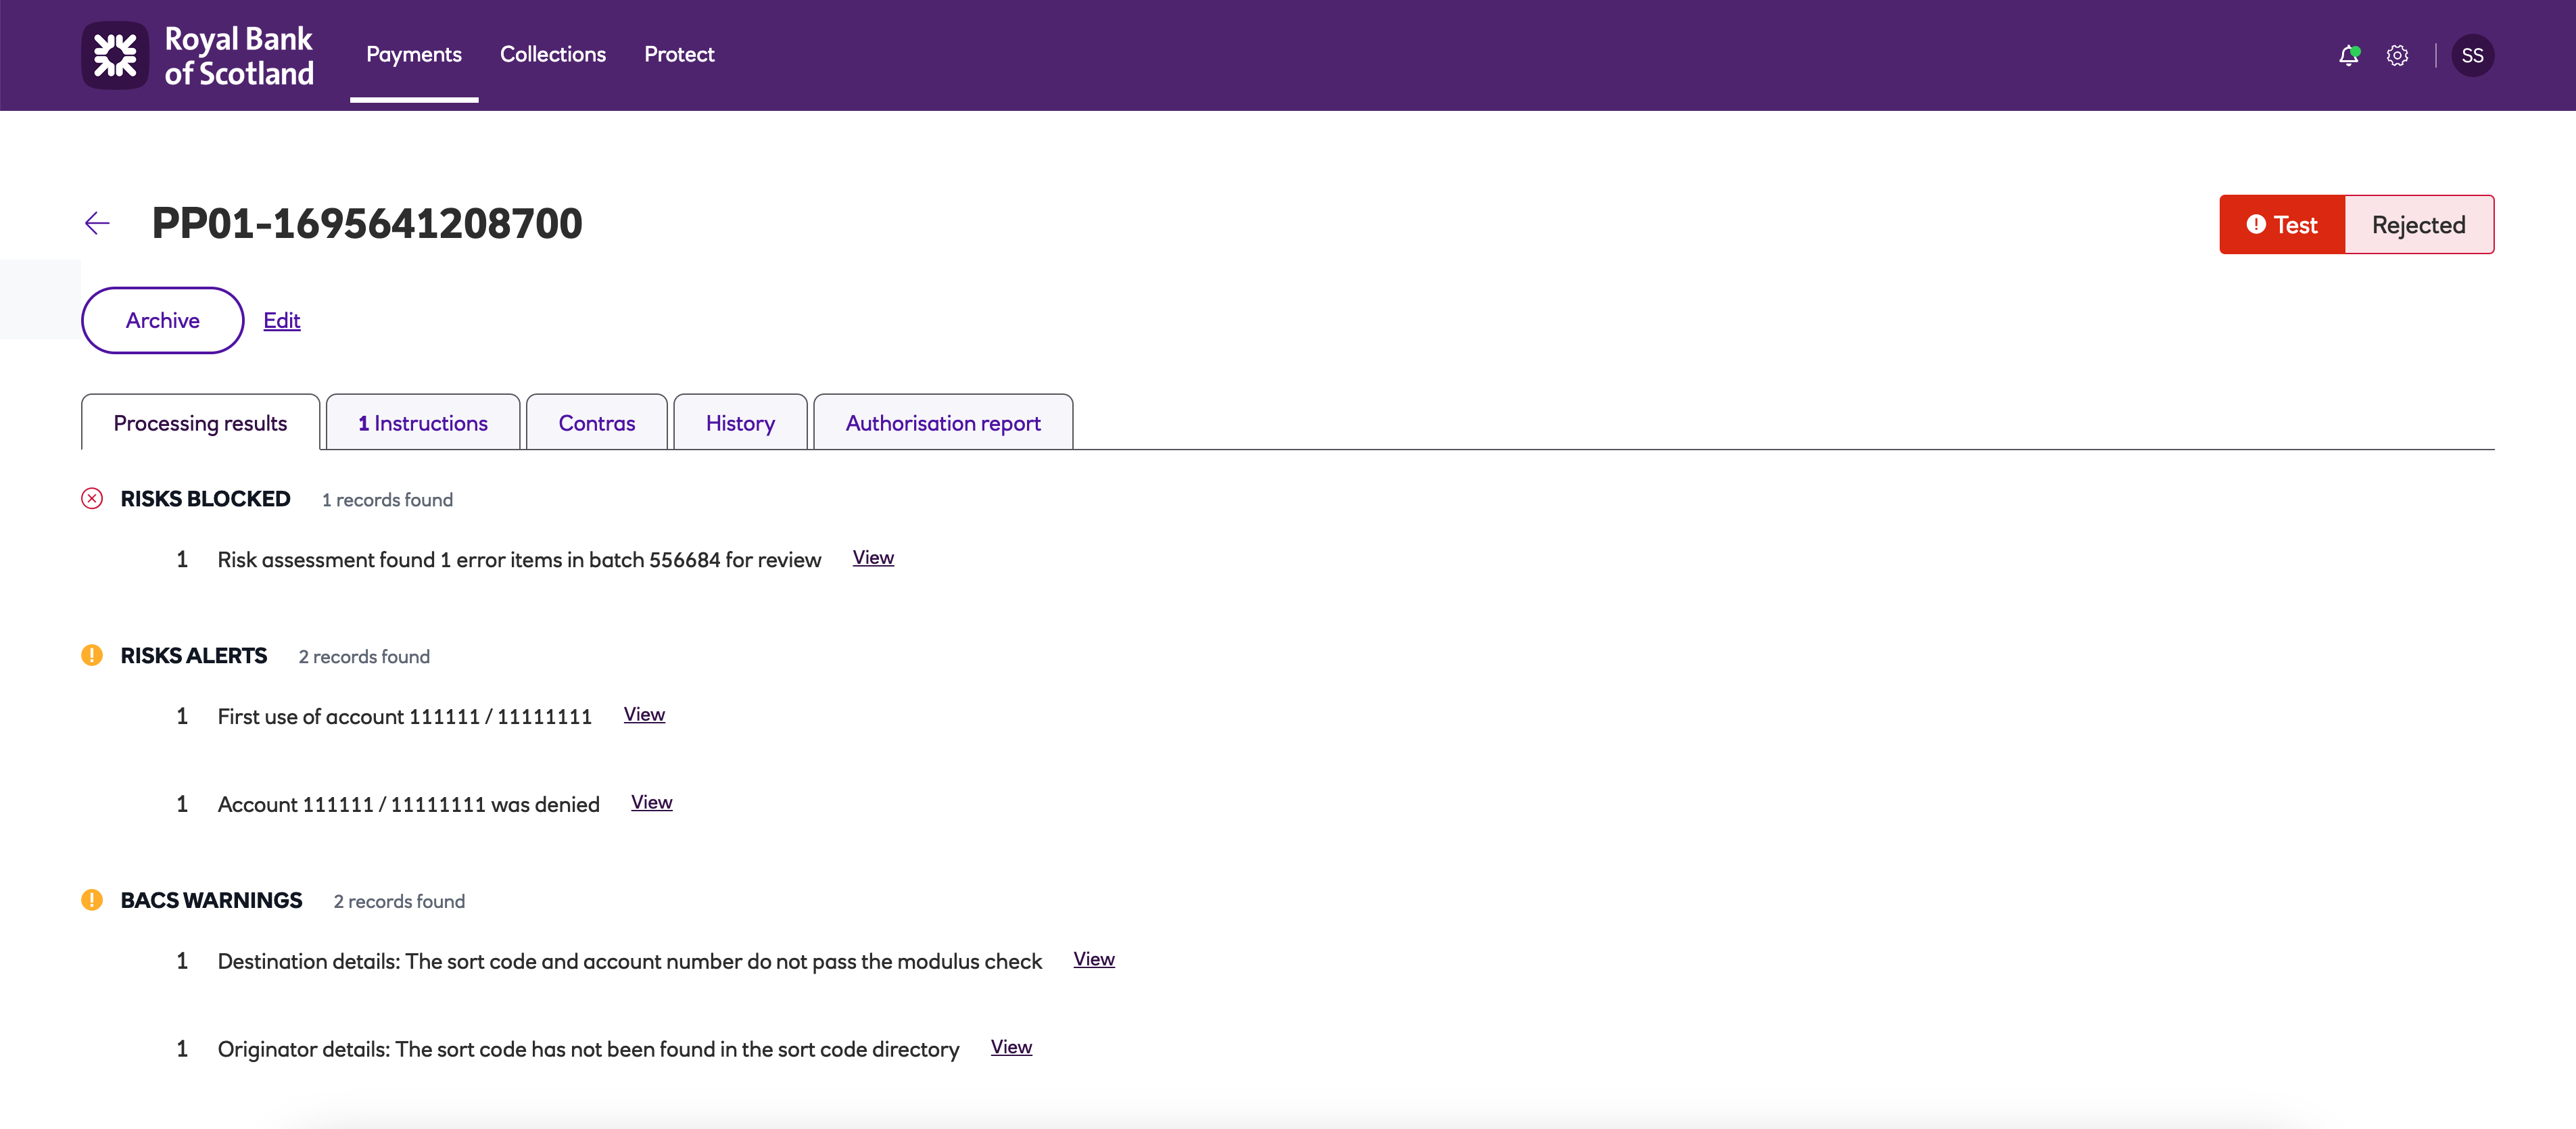
- Risks can also be found by clicking View risk log for this profile within the payment profile.
- The payment file cannot continue and can only be archived.
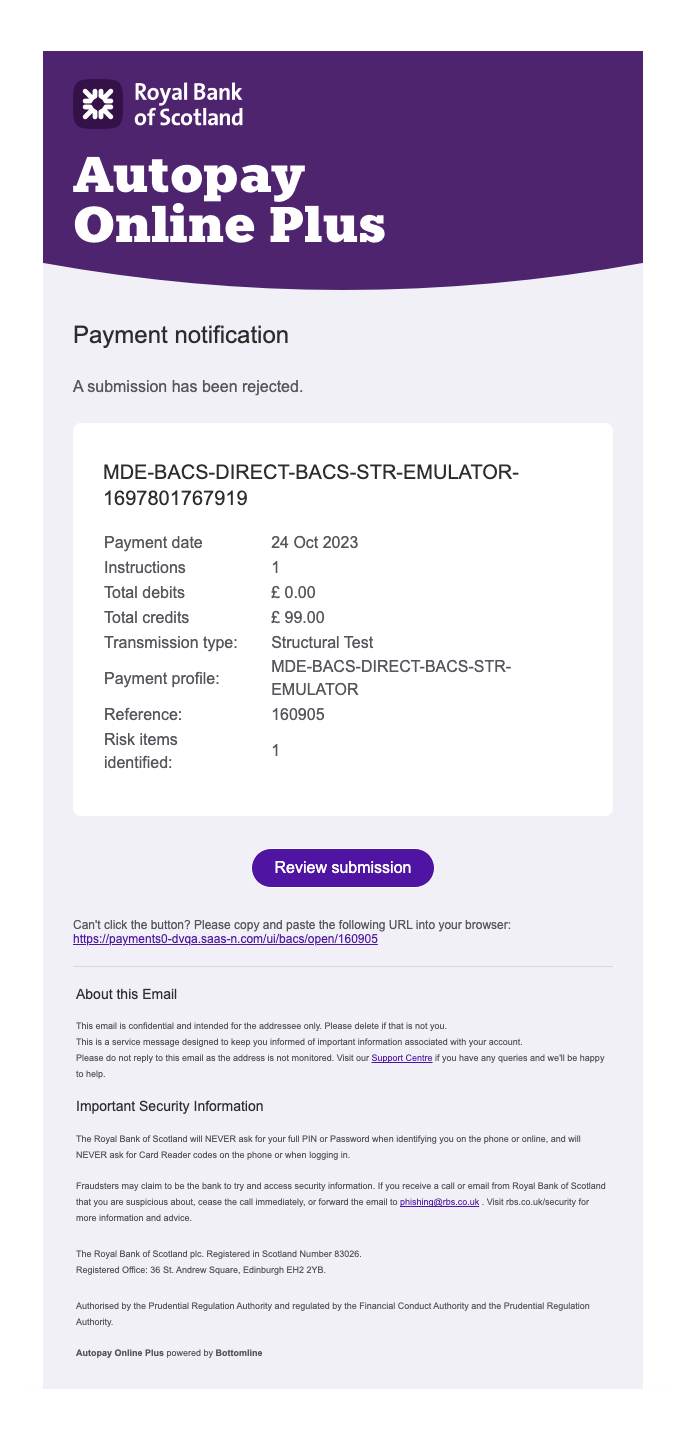
- A rejection email will also be sent to any user with access to this particular payment profile, highlighting that risk items were identified.
Deny lists
Deny lists contain any pre-populated combinations of sort codes and account numbers, deemed high risk.
Protect provides ten deny lists per company which are used by all payment profiles. Each list contains the list of accounts for which Autopay Online Plus will check against.
For details on assigning deny lists to payment profiles see the section Risk management within Administrators.
Accounts can be added to a deny list either manually or using an import file.
Setting up deny lists manually
-
Navigate to the Protect menu and click Deny lists.
-
In this window, there are 10 lists that you can add accounts to.
-
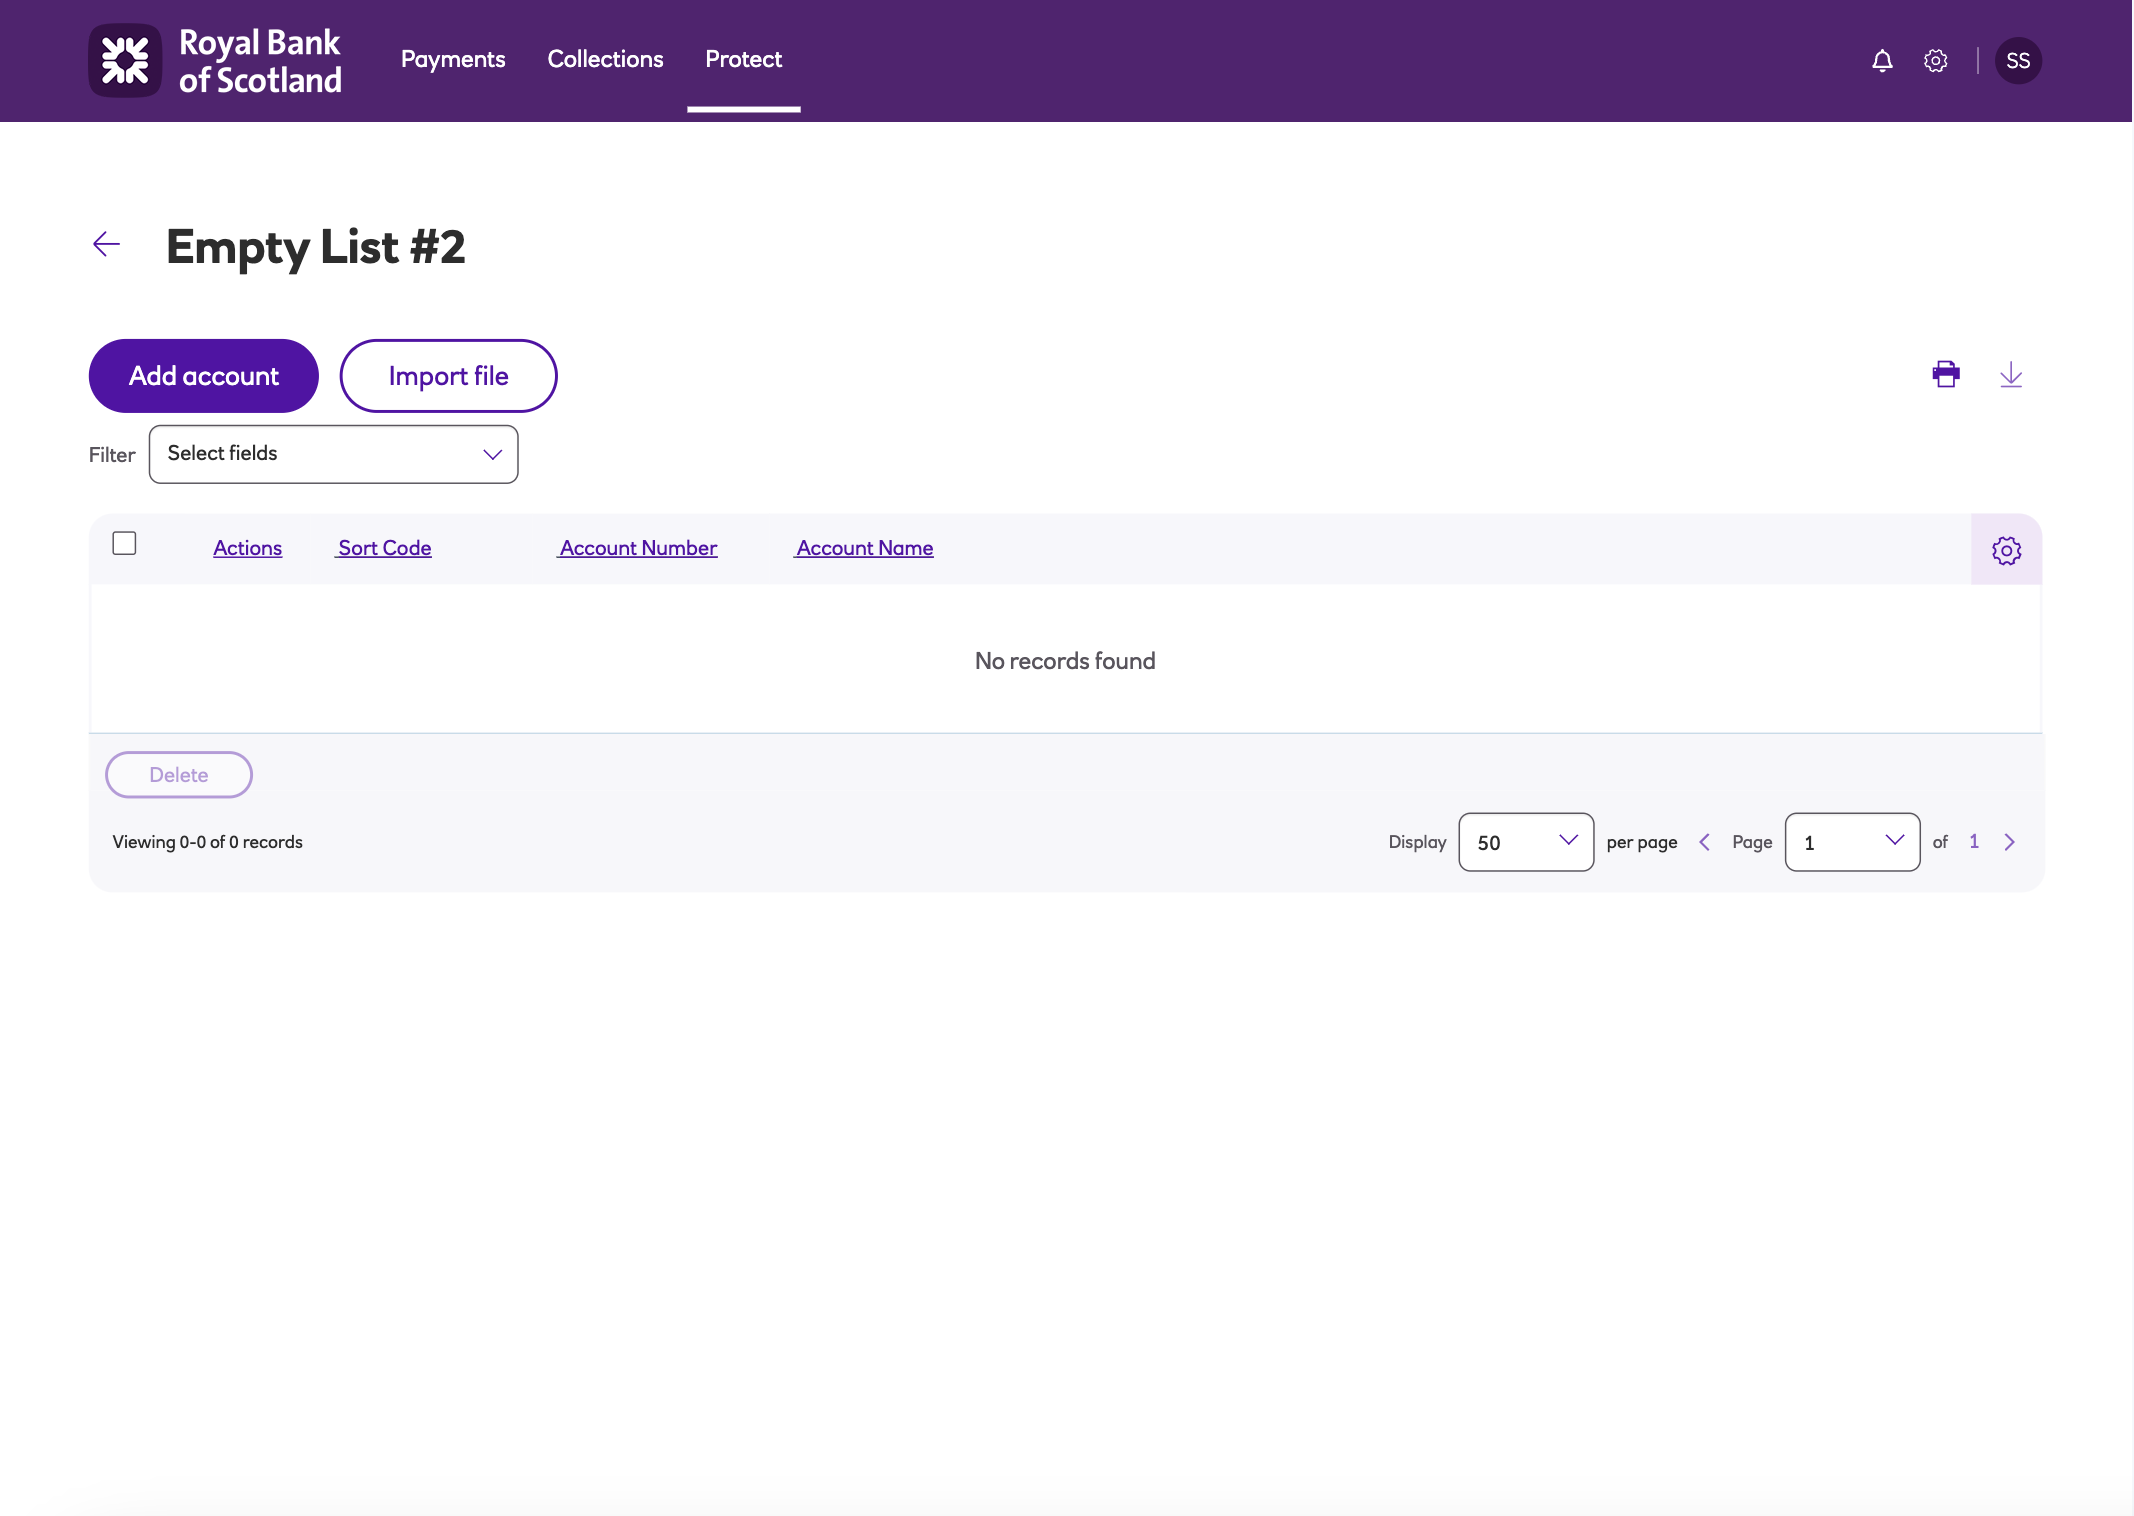
Click View to edit the selected list.
-
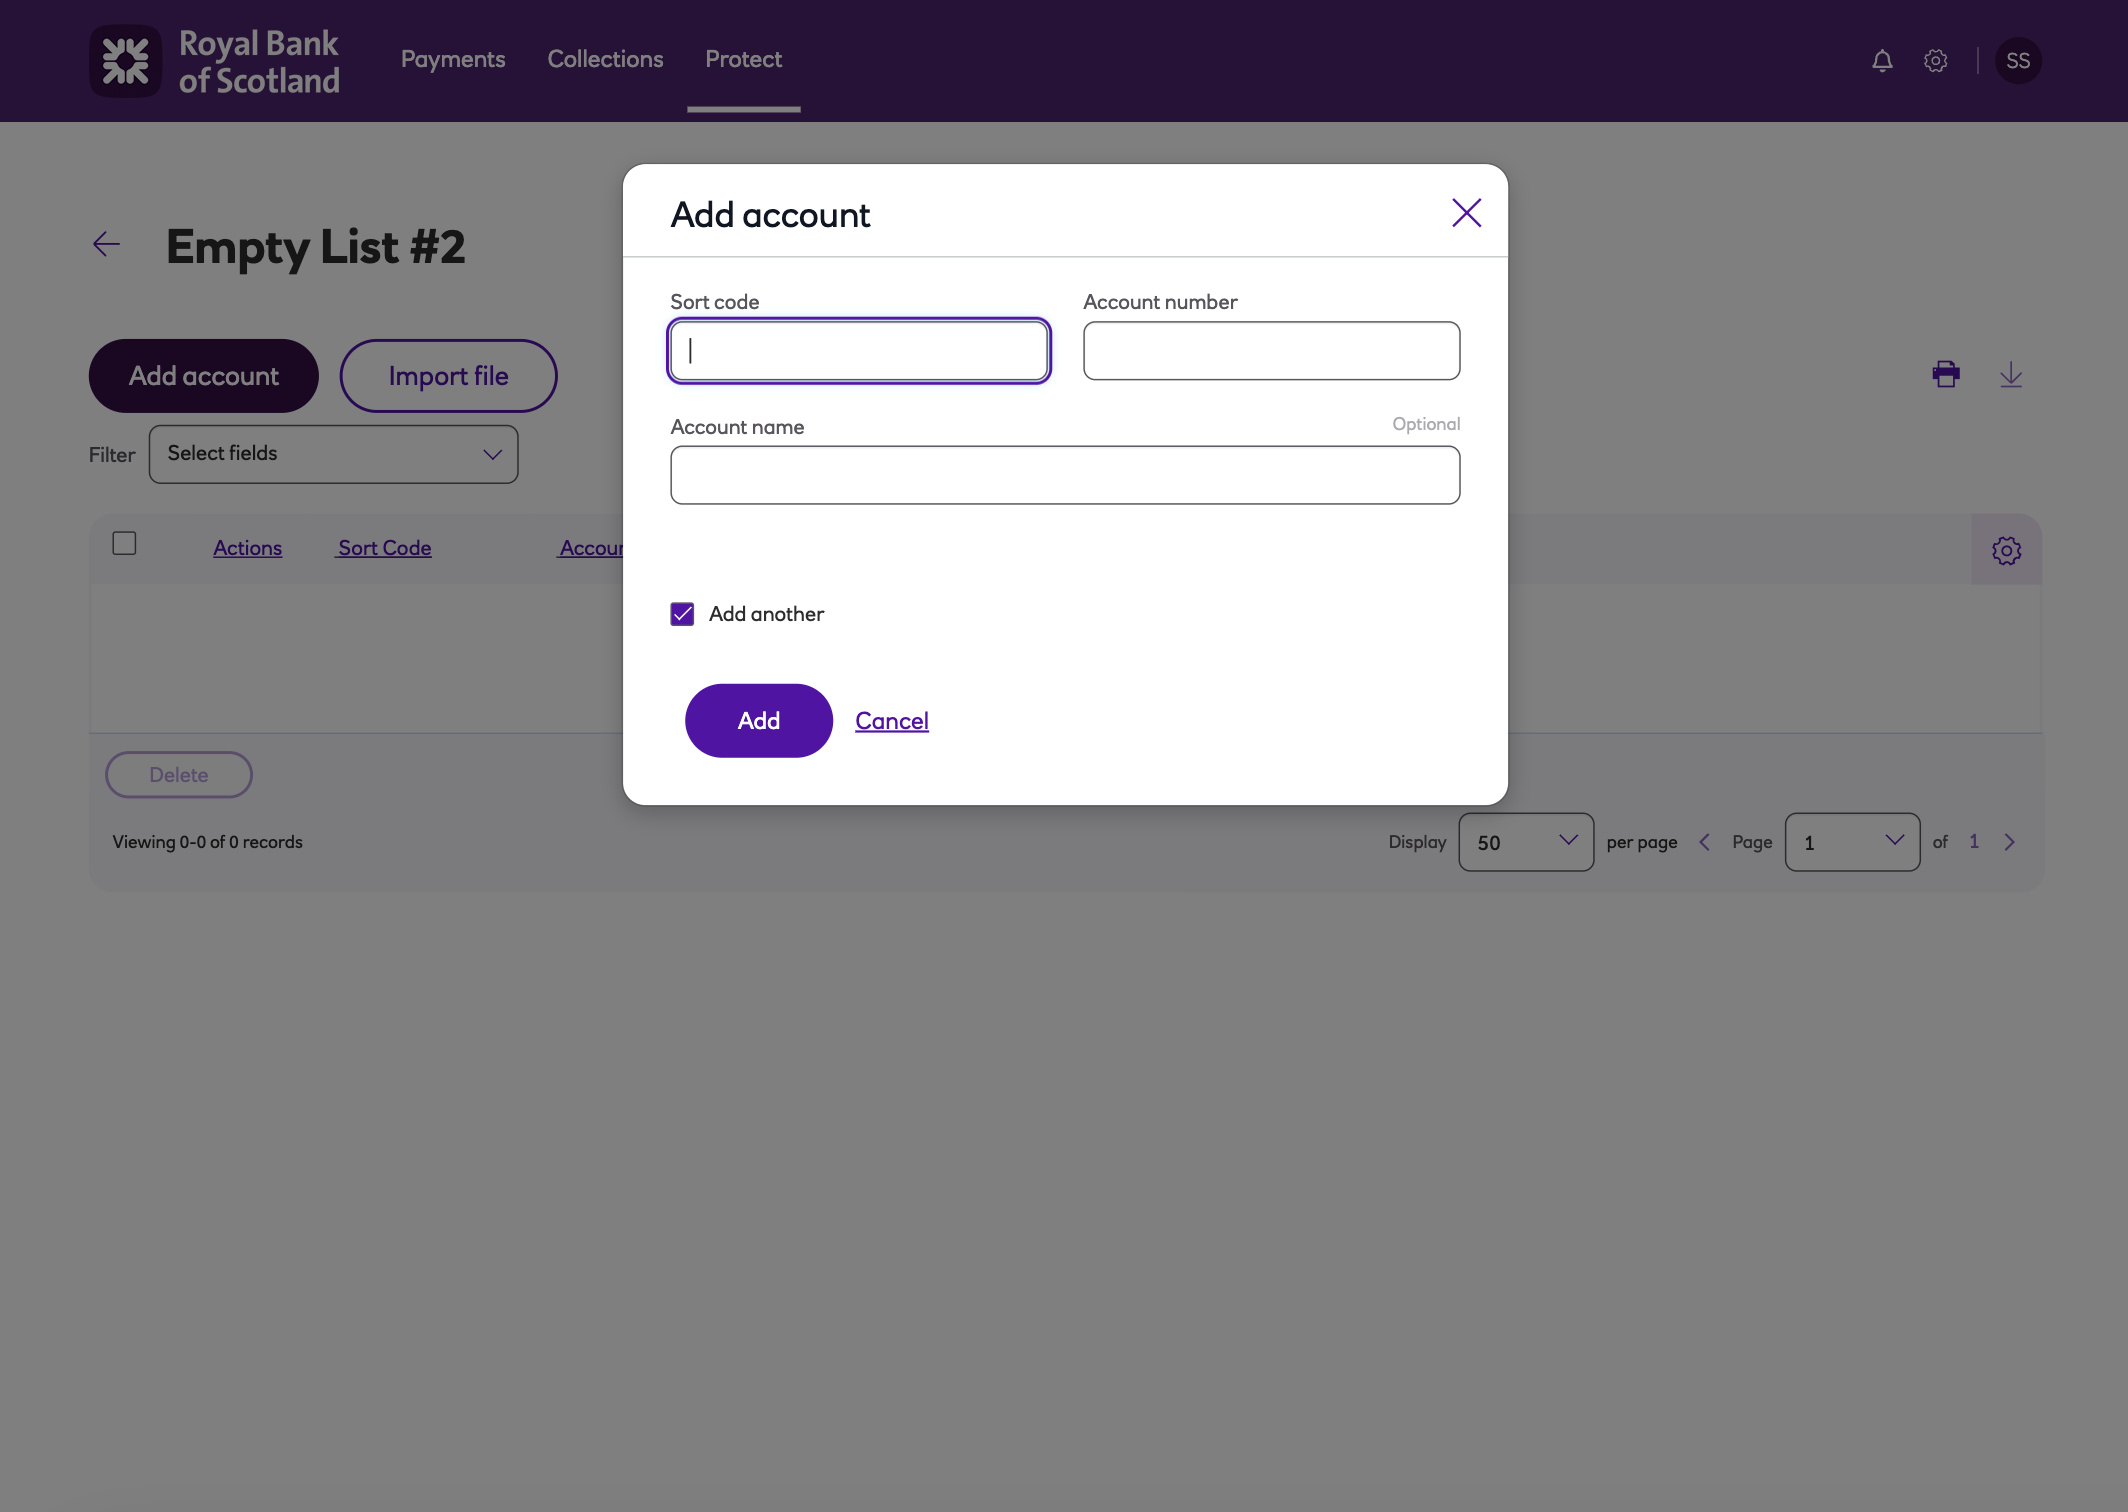
To add to this list, click Add account then enter the bank account details for the beneficiary that needs to be denied.
-
To include another beneficiary’s bank account details click Add another. Your previous beneficiary’s bank details are saved in the background while you continue.
-
When you’ve added your final beneficiary/payer to the payment deny list, untick Add another and click Add once more to complete your list.
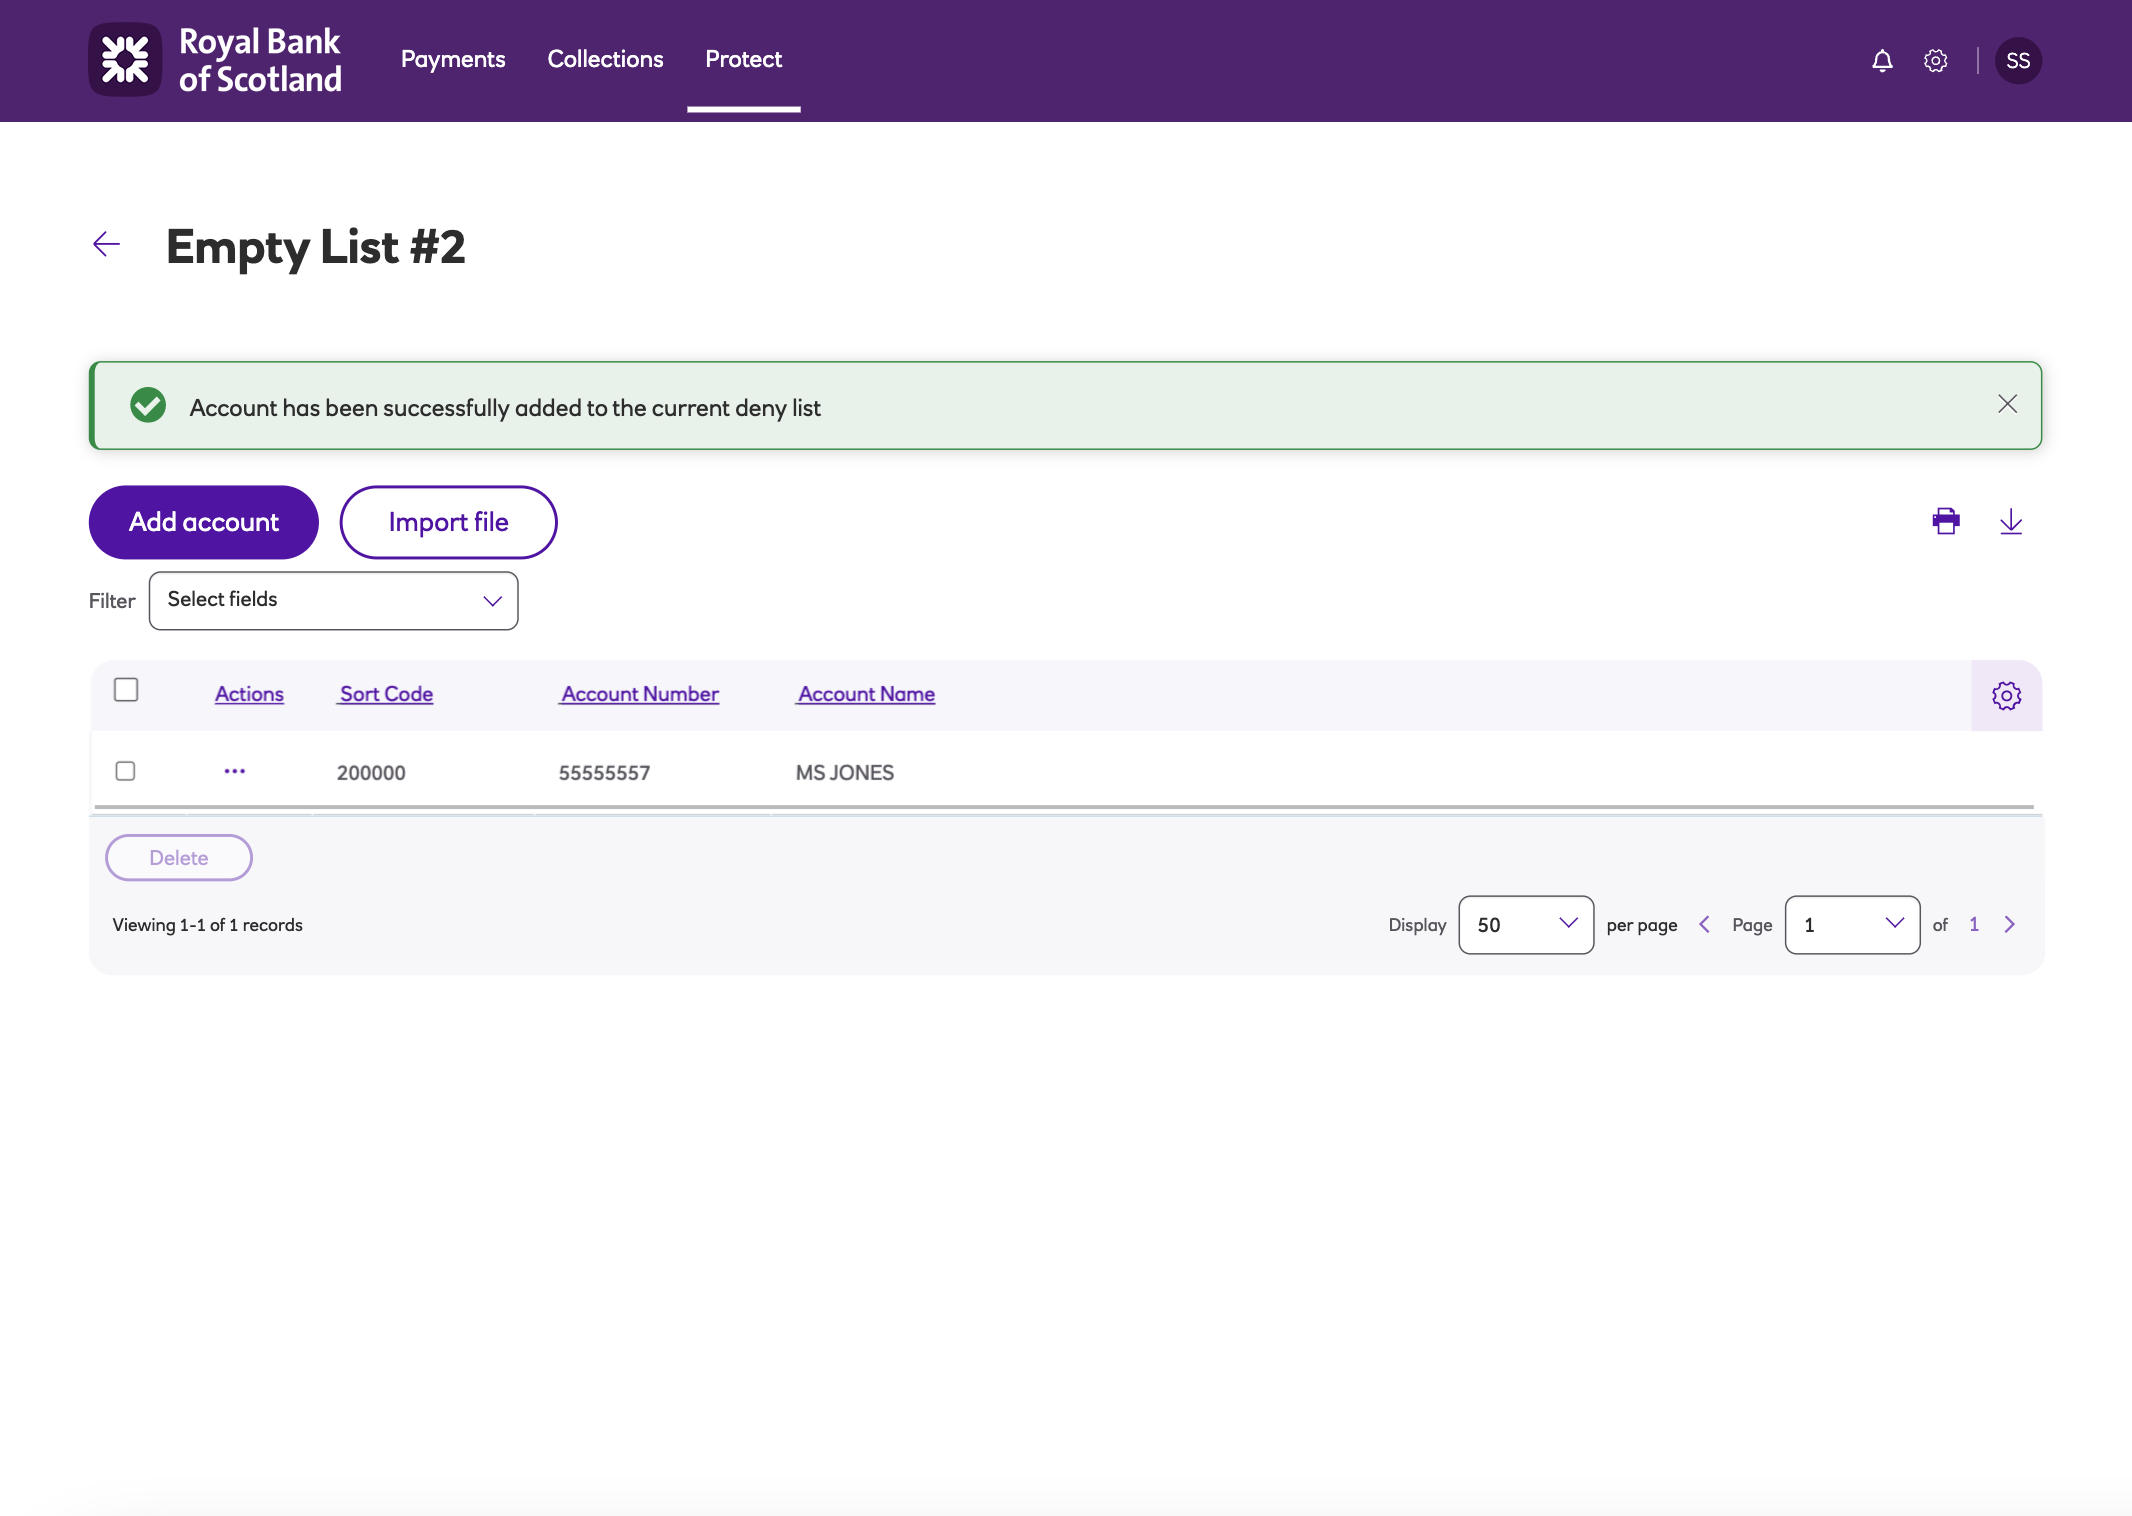
- The entry can now be seen in the list.
- From the Deny lists screen you can rename or clear a list from the options on the arrow next to View.
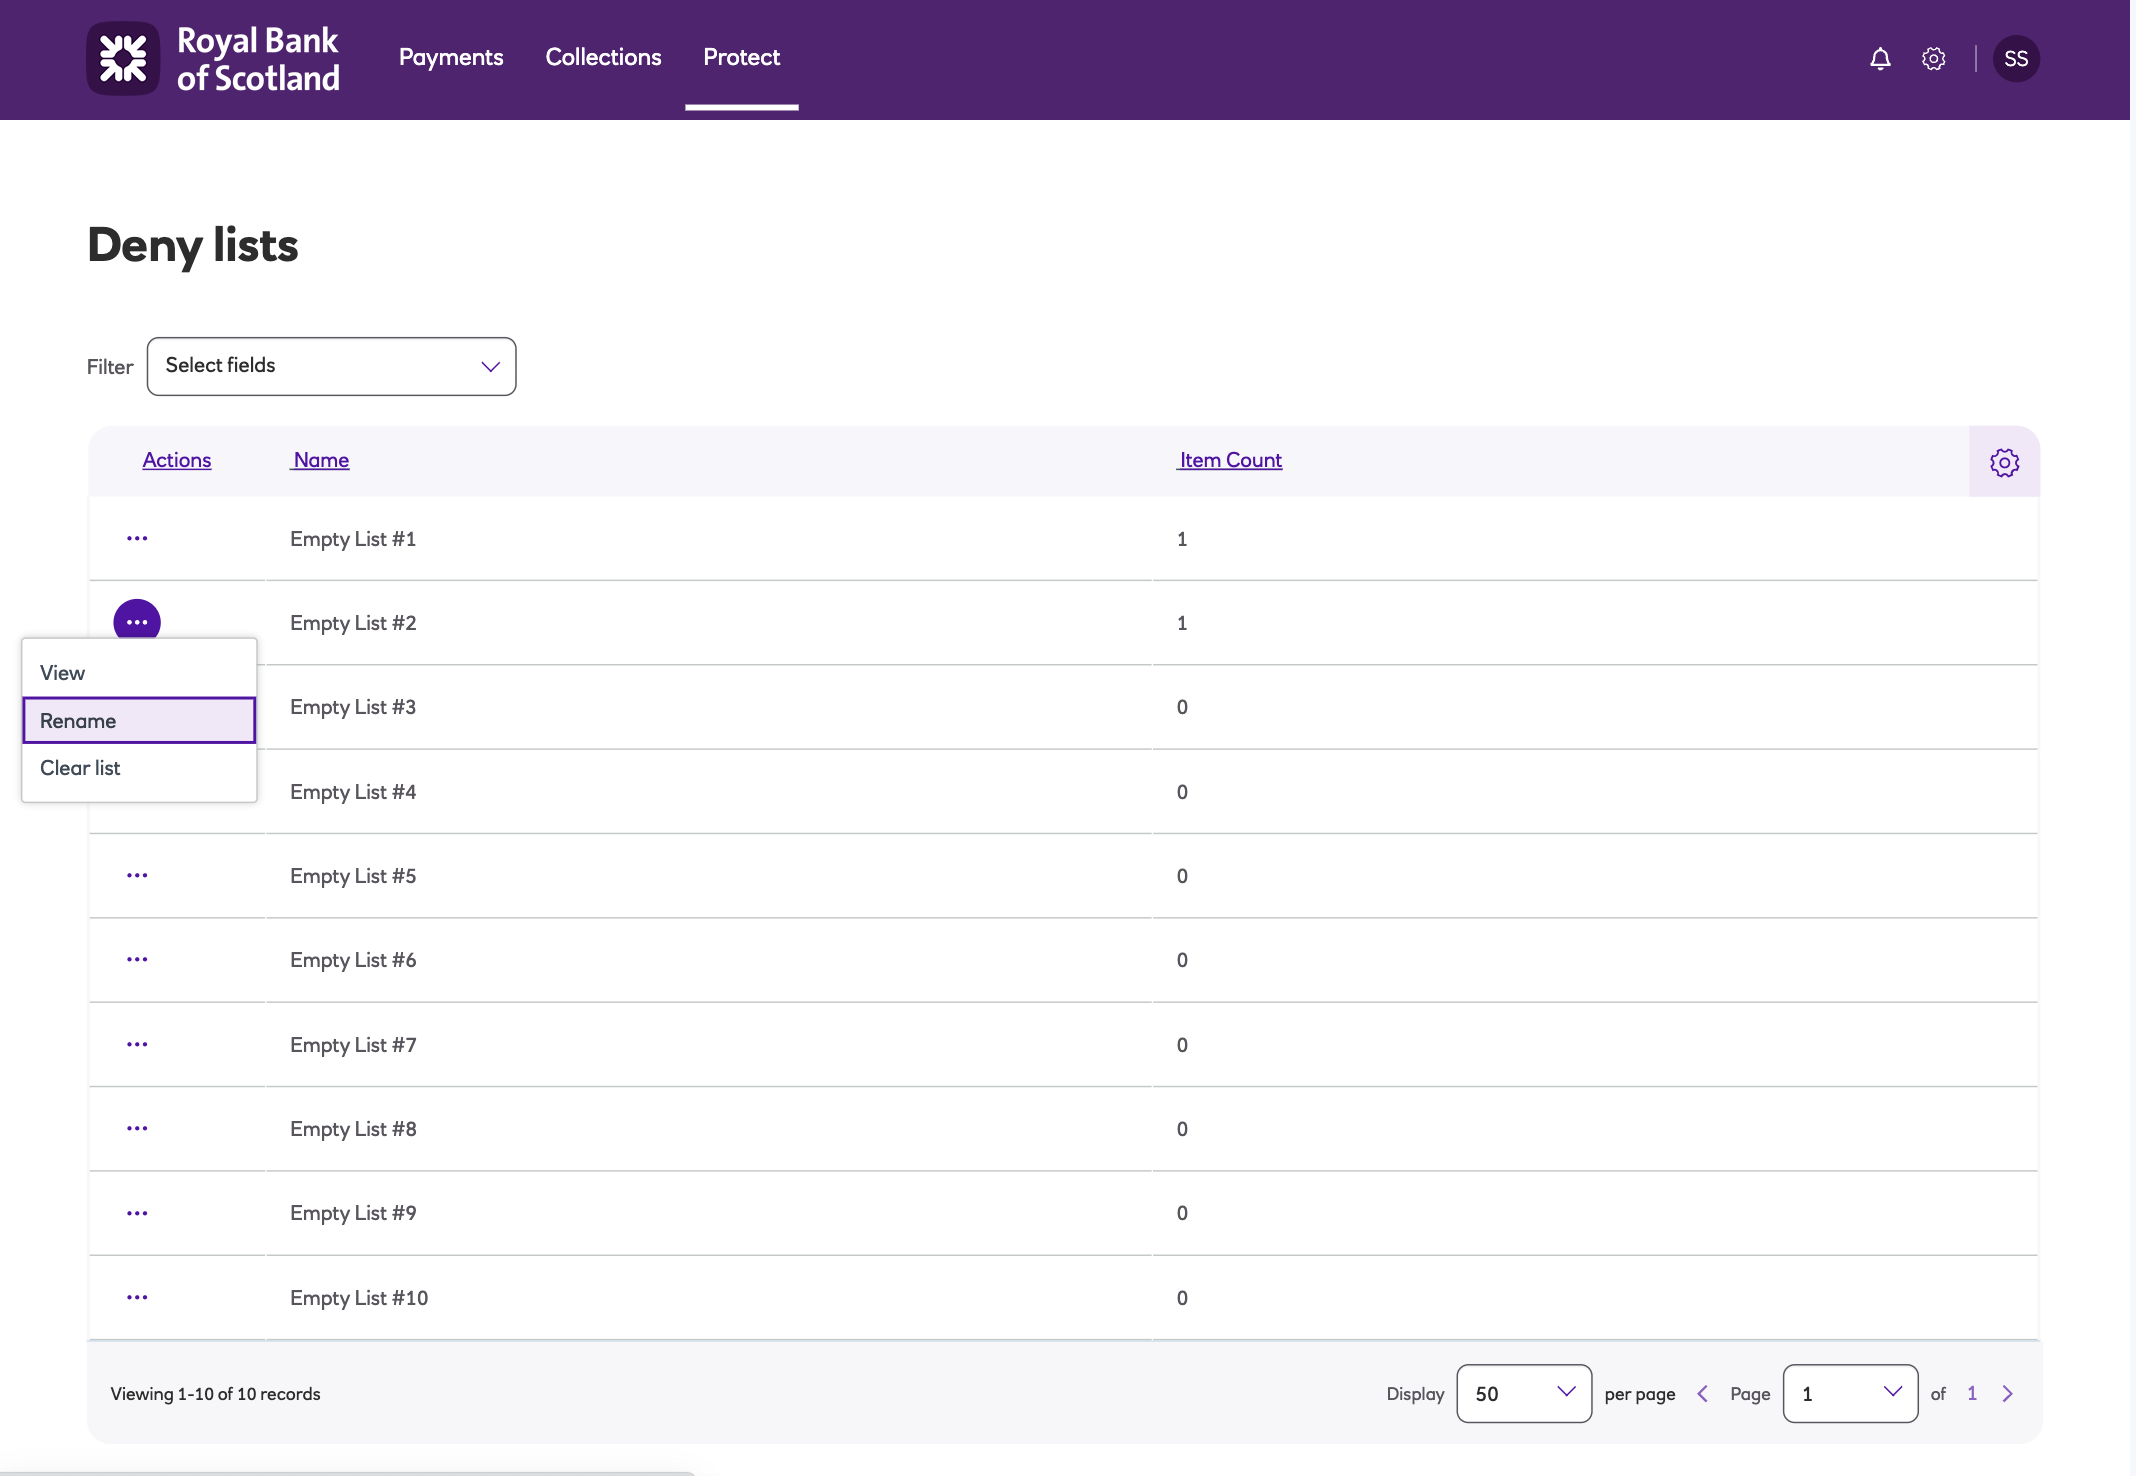
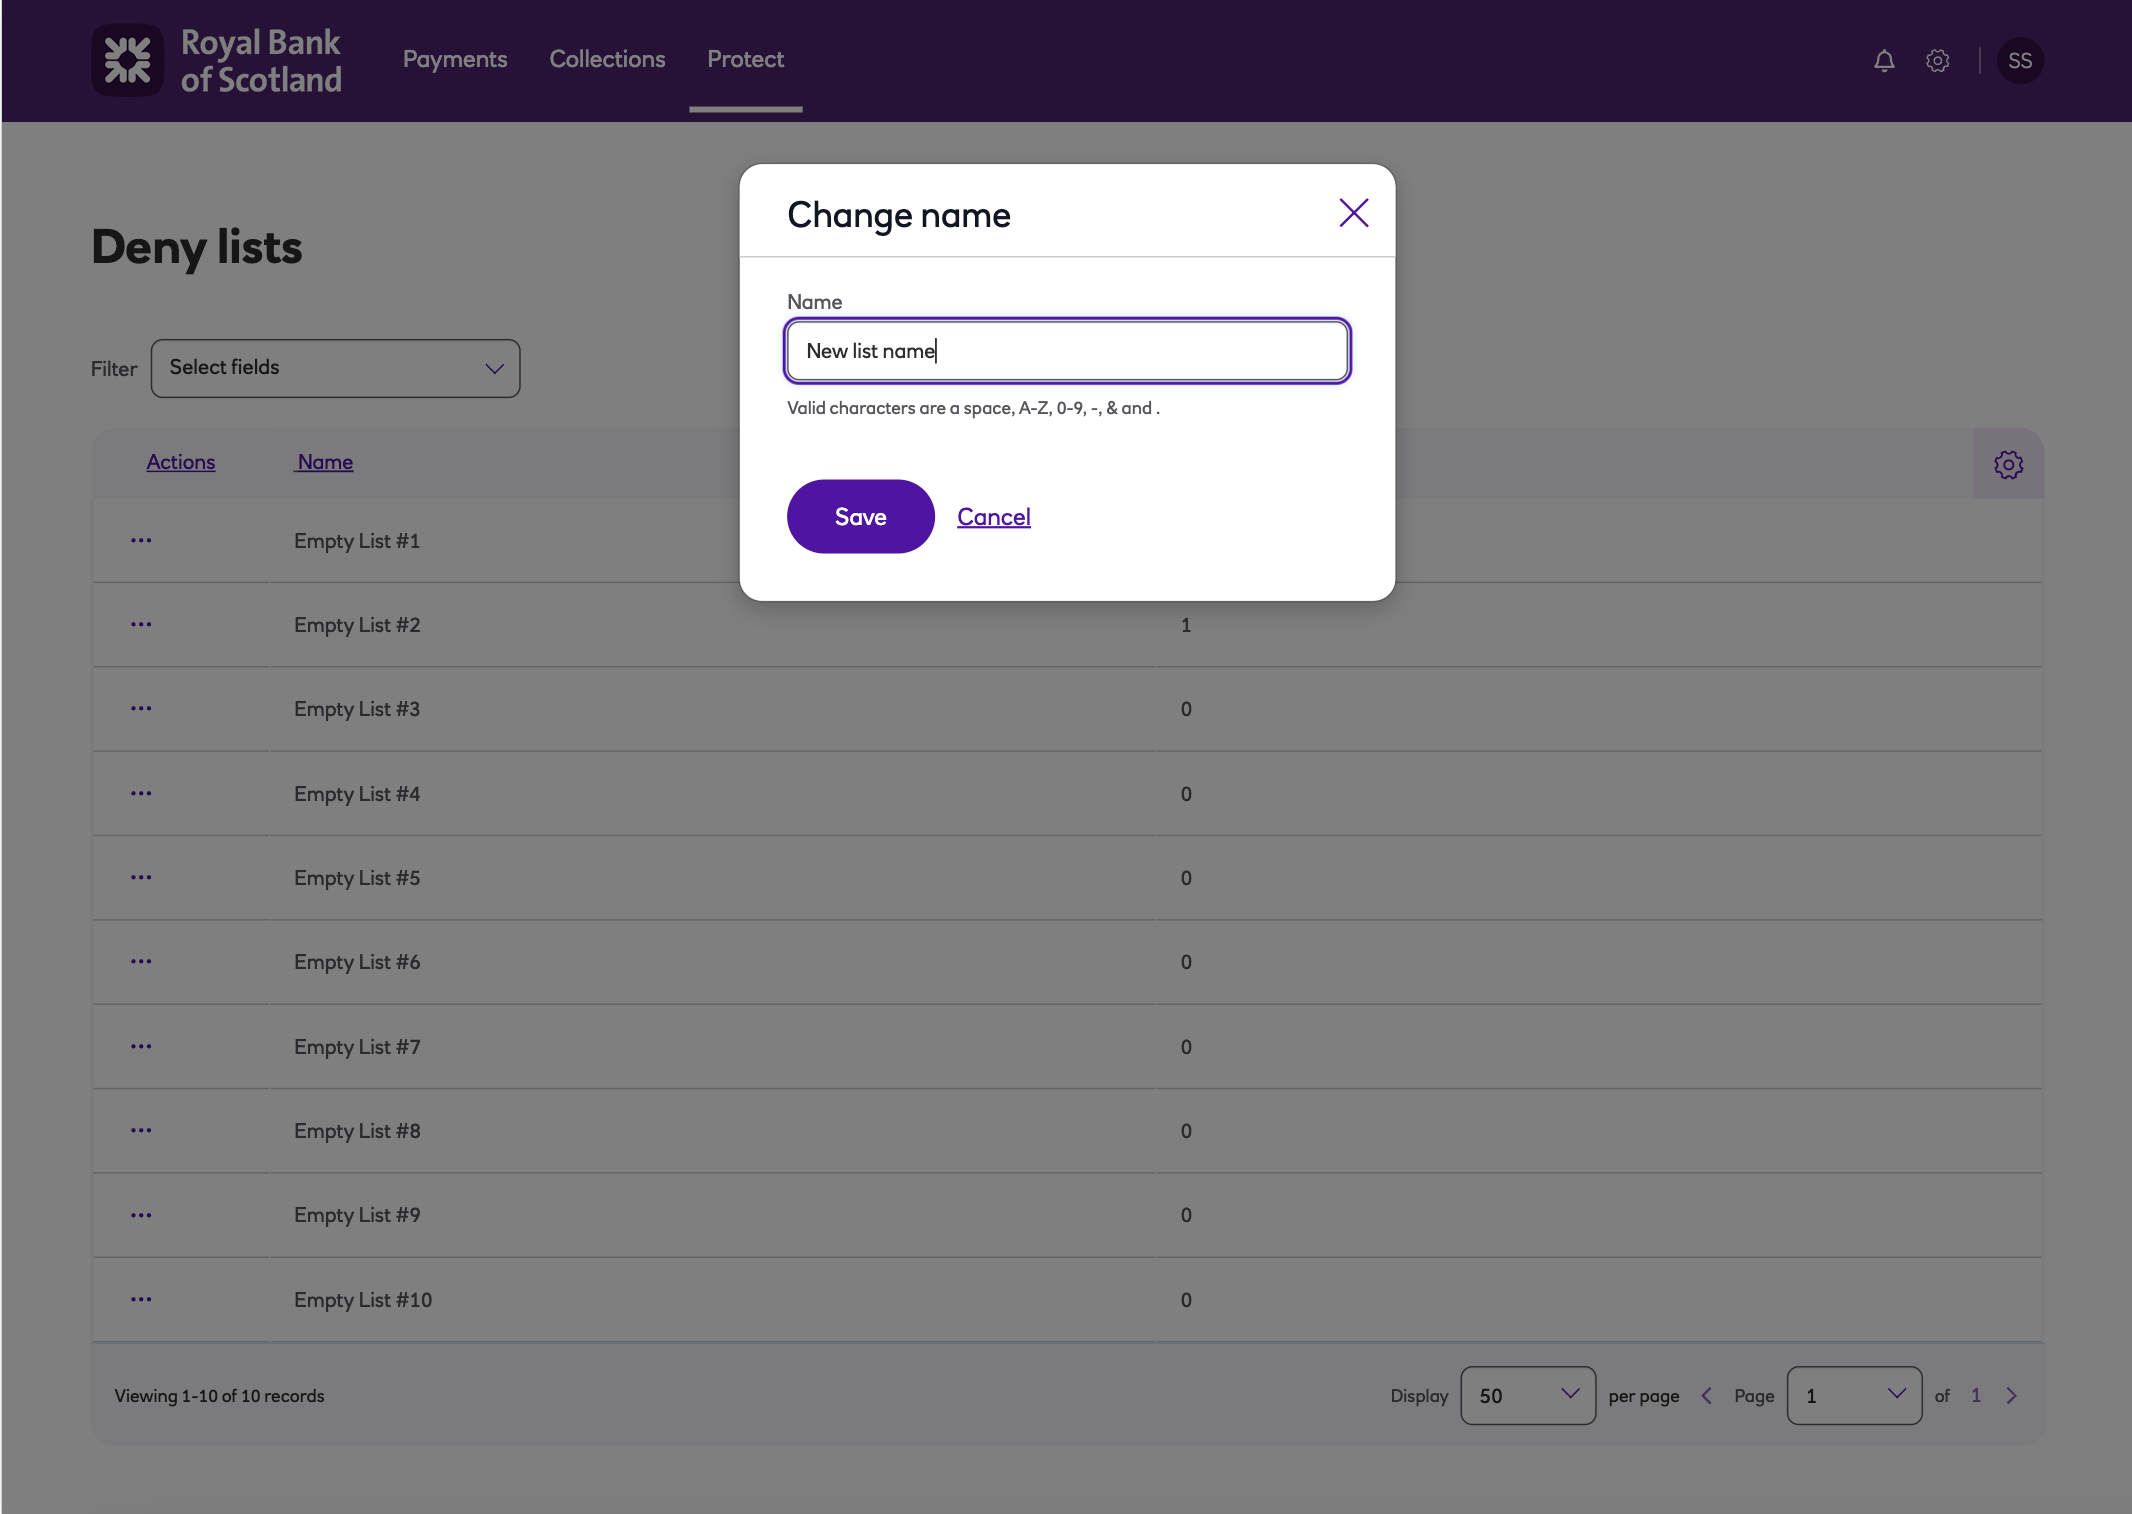
- To rename a list click, enter a name and click Save.
- To clear an existing deny list, click Clear list.
Importing deny lists in bulk
To import a list of beneficiaries in bulk, you can create an Excel file.
Ensure the file is formatted in the order below:
- A - Sort code
- B - Account number
- C- Account name
Once the list has been completed – save this as a .csv file.
-
Navigate to the Protect menu and click Deny lists. Click View on the list you want to import to.
-
Select Import file and navigate to the location where the .csv file has been saved to.
-
Highlight the required file and click Open.
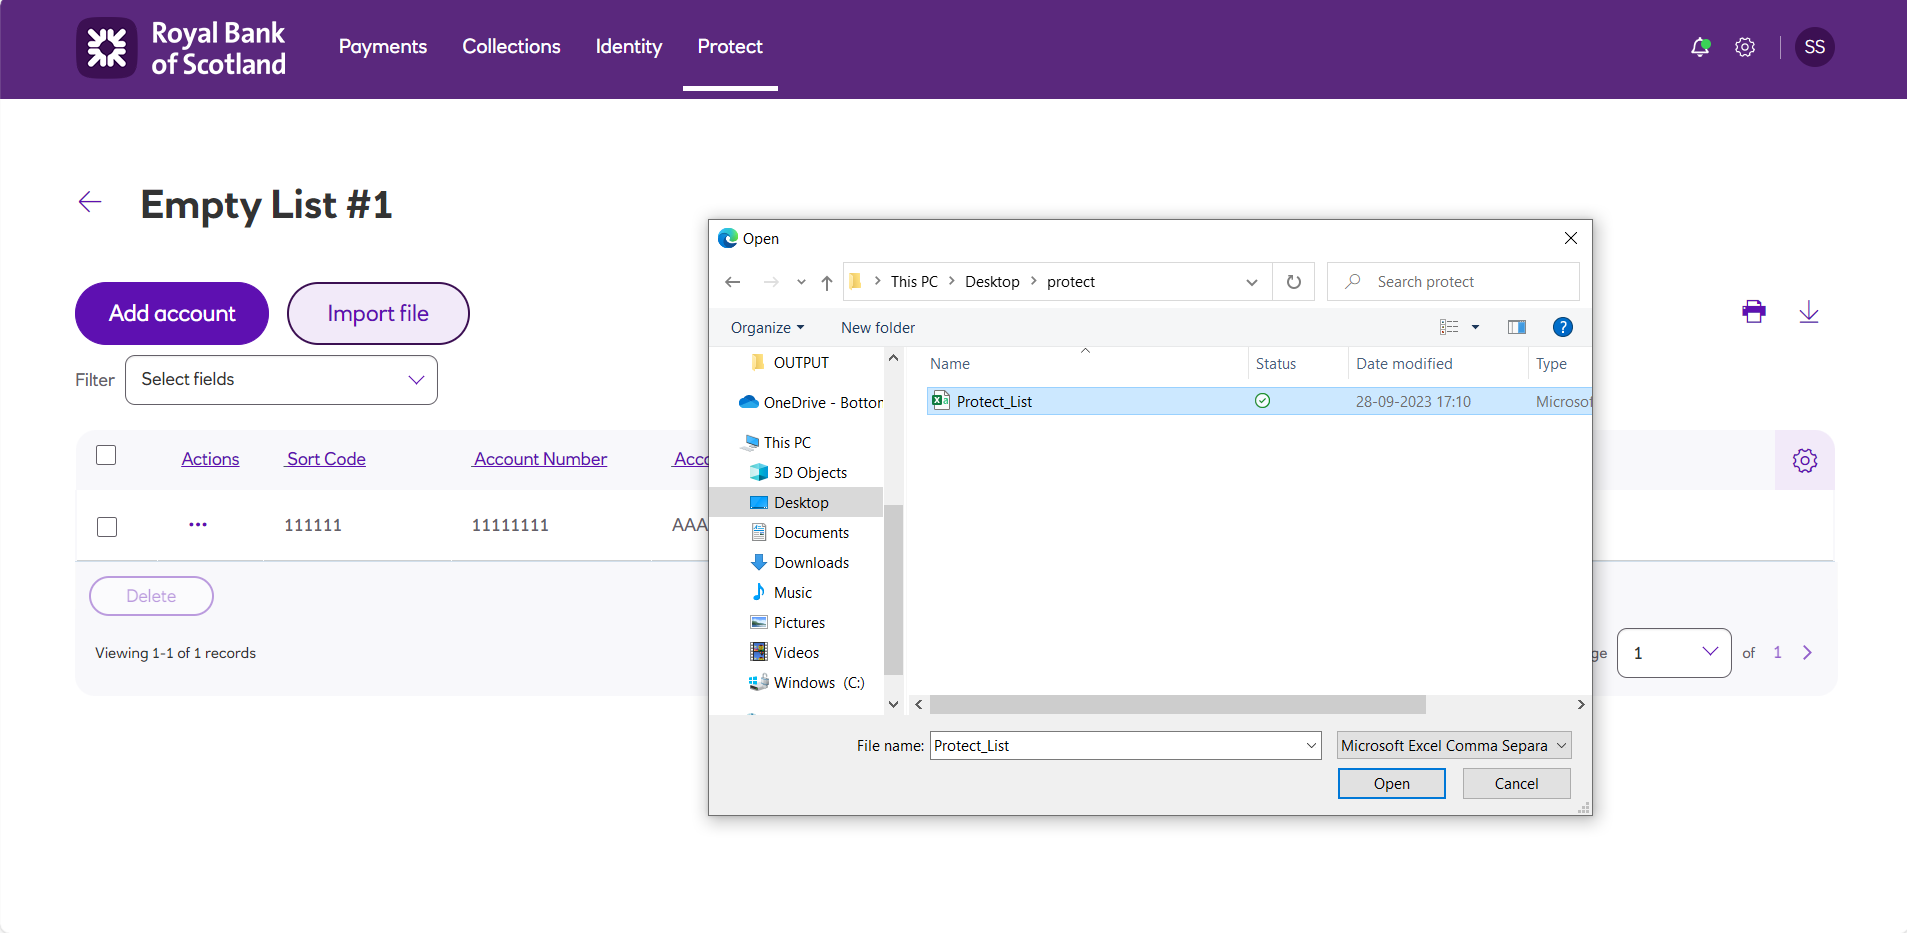
- The list will now be imported and you will see the list displayed on success.
Risks logs
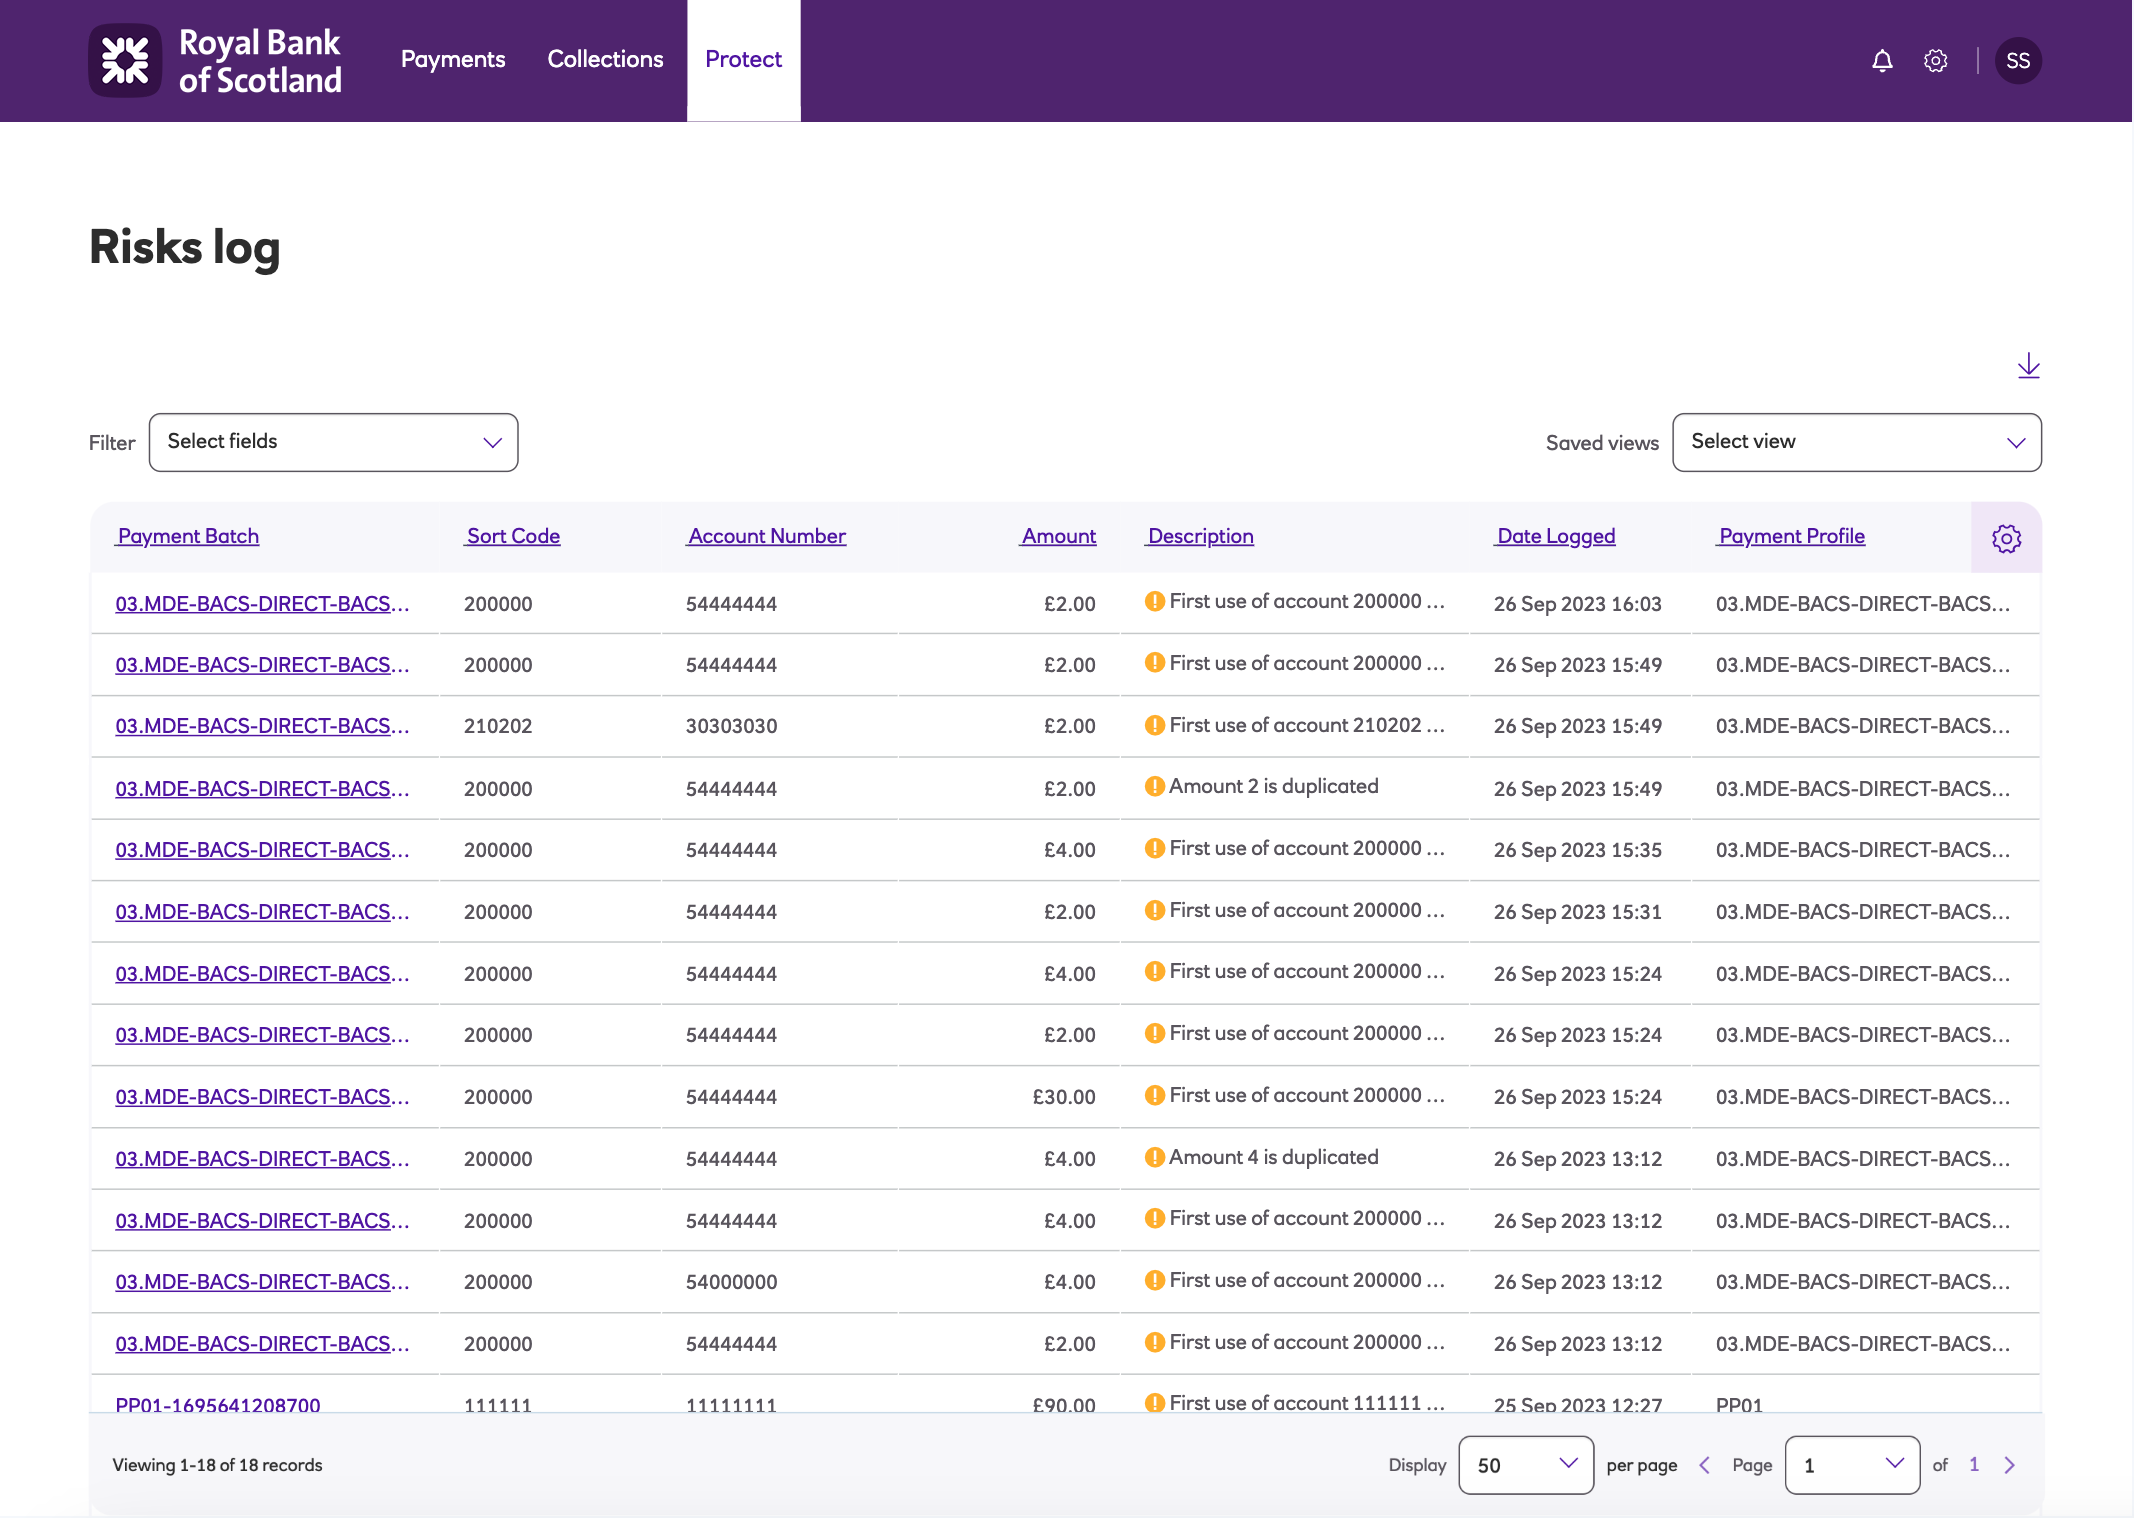
Risk logs contain the history of all items that have been processed, based on your payment profile Risk management settings, when manually creating or importing a payment file.
This information will be visible for as long as the payment file itself remains within the system (up to 12 months).
Note
Risk logs can also viewed from the Risk management tab for a payment profile, see the section Protect within Administrators.
-
Navigate to the Protect menu and click Risks log.
-
Risks log entries contain the following information:
- Sort code - bank sort code.
- Account number - bank account number.
- Amount - payment value.
- Description - risk details.
- Date logged - date that risk was identified.
- Payment profile - profile that the payment belongs to.
- Payment batch - batch that the payment belongs to.
-
For easy reporting, the Filter menu will allow you to locate particular items based on each header.
-
The Risk log can be exported for internal auditing purposes where required.
Updated 3 months ago
