Collection profiles (coming soon)
Collection profiles contain all the information that the Direct Debit Management system needs for processing Direct Debit payments.
Before you can set up a Direct Debit mandate you must have a payment profile and a collection profile set up.
A collection profile consists of six tabs General, Email, Document, Correspondence triggers, Scheduling and File import.
To create a collection profile:
-
Log into the system as an administrator.
-
From the settings menu ('cog' icon), click Collection profiles under View.
-
To create a new profile, click New collection profile.
General
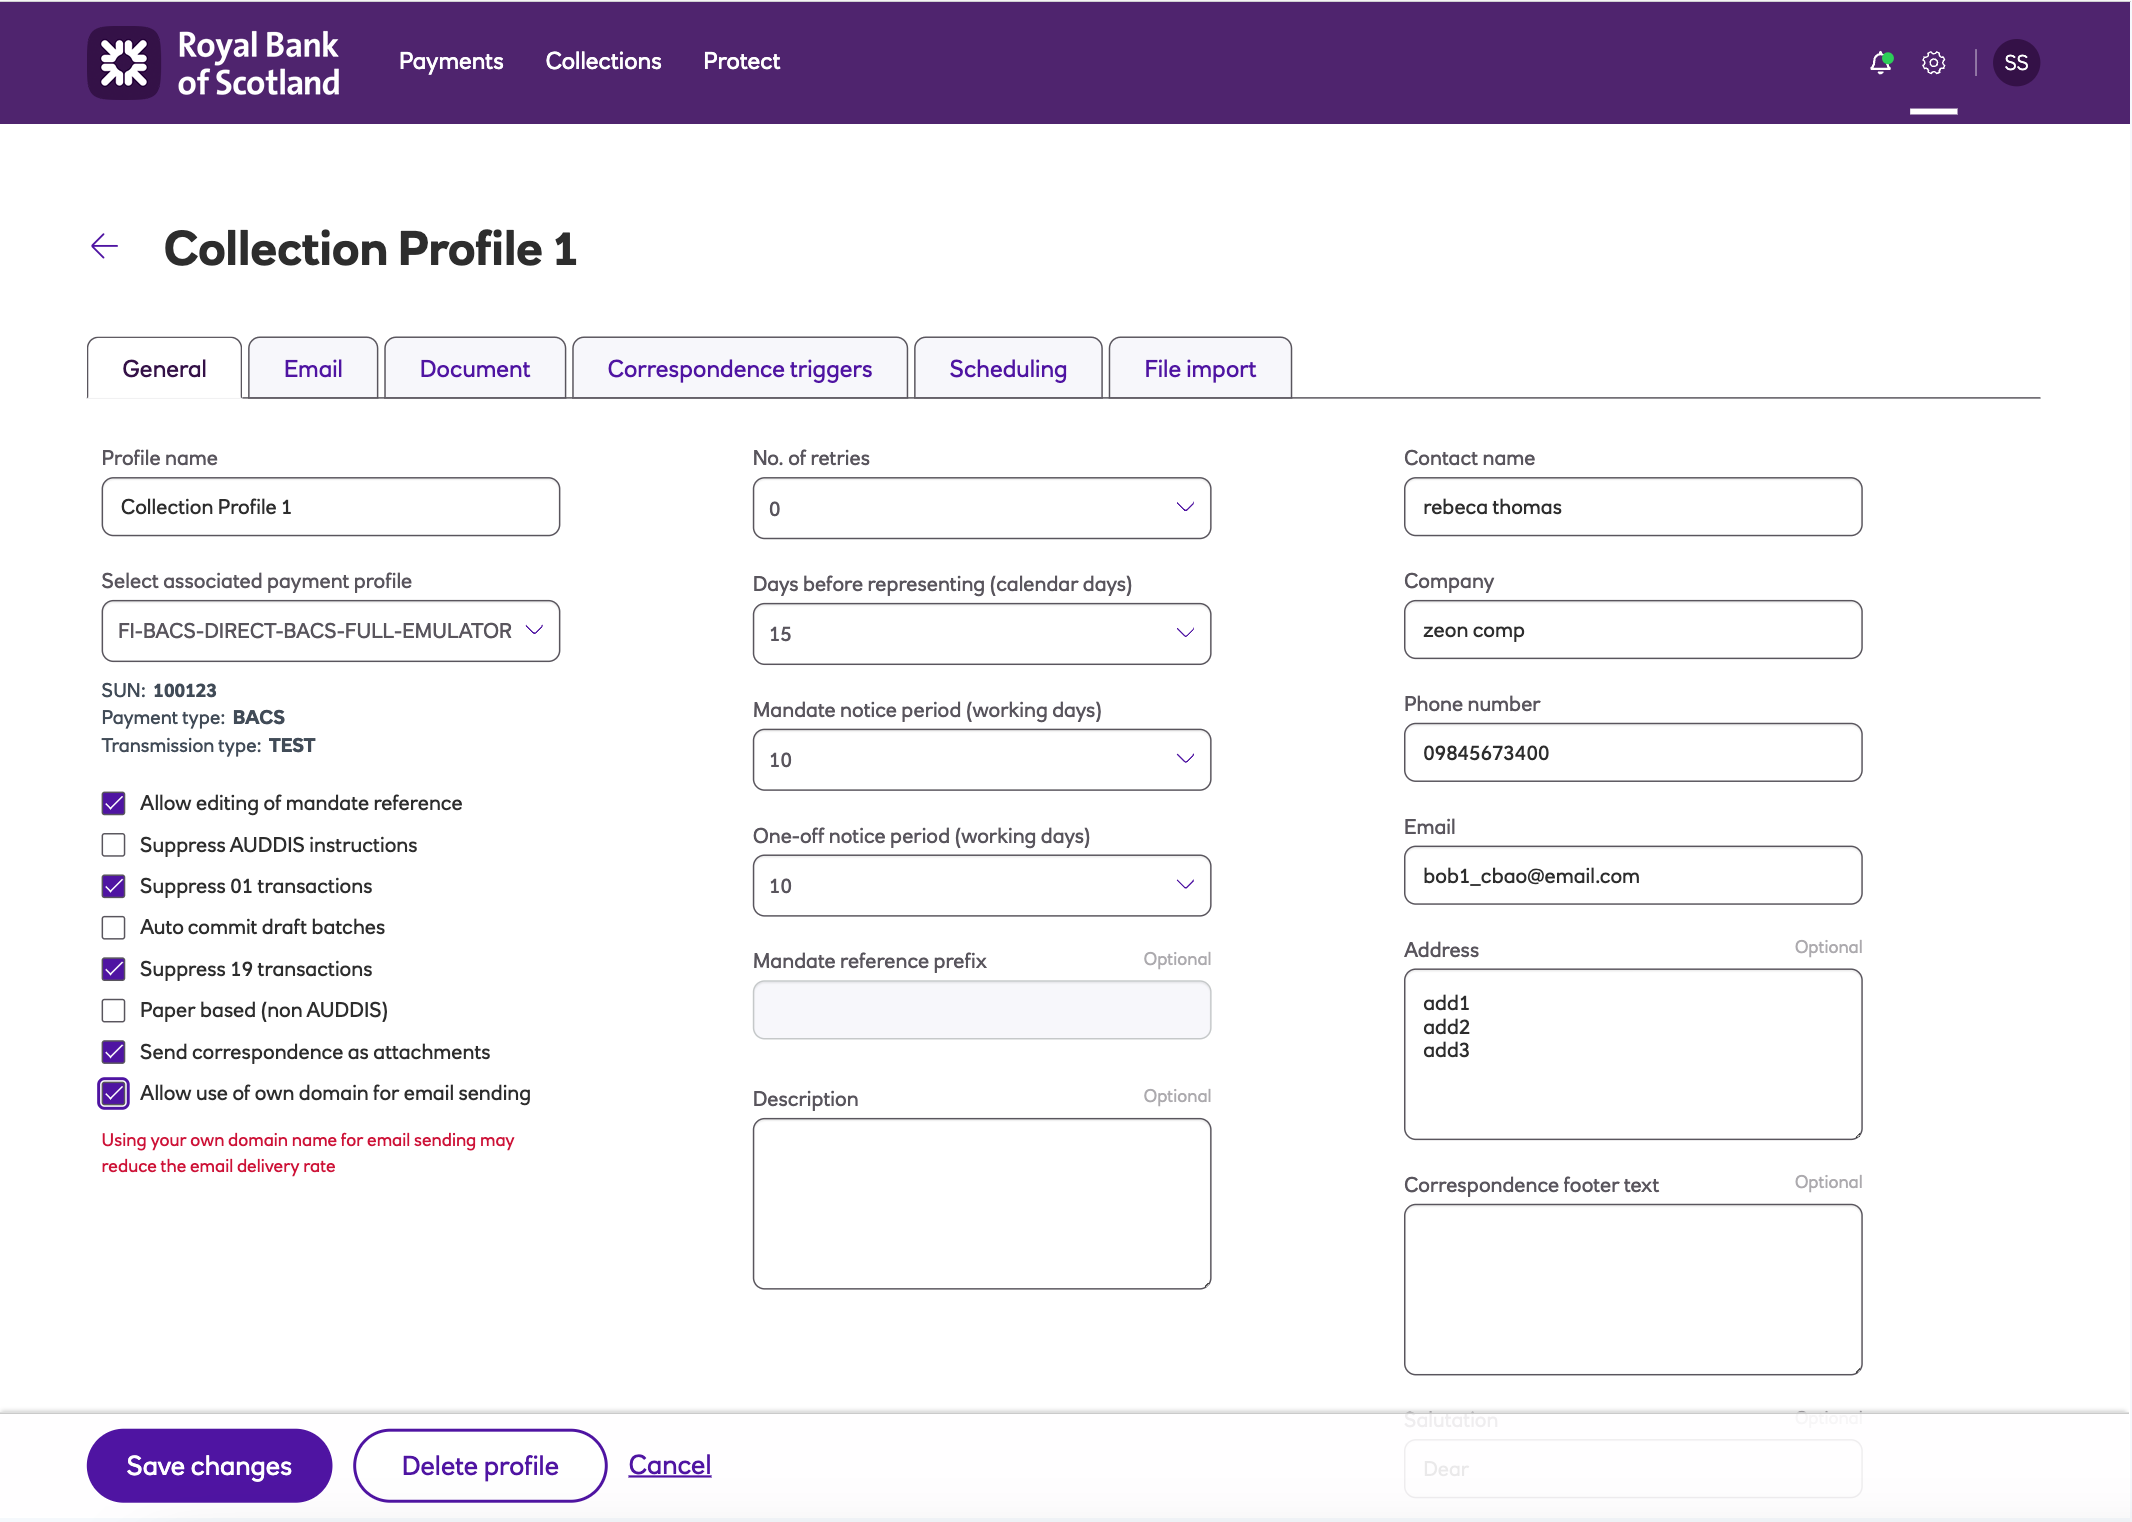
The General tab is the configuration information which details how your collection will be made.
-
Name - The name you’ve assigned to the collection profile corresponding to the payments you’ll submit.
-
You must enter Name (of profile), Name (of contact), Company, Phone number and Email as a minimum.
-
Select the associated payment profile from the drop down. This is the payment profile via which batches created through this collection profile will be available for submission.
-
Set the other options:
- Allow editing of mandate reference - if set false, you can enter a prefix, allowing Autopay Online Plus to generate a numerical reference from then on.
- Suppress AUDDIS instructions – used for migrating contacts into the solution that use paper Direct Debits.
- Suppress 01 transactions - used for migrating contacts into the solution that use paperless Direct Debits and do not require a first collection as the Direct Debit is already set up.
- Auto commit draft batches – if this is ticked then batches will automatically move from the draft state to the entered state.
- Suppress 19 transactions – used to suppress Direct Debit final collection.
- Paper based (non AUDDIS) – set for contacts that use paper Direct Debits.
- Send correspondence as attachments – this setting is the default for all contacts and if ticked can be unticked at the contact level.
- Allow use of own domain for email sending – set this to use your own email domain rather than the default domain.
Please note that using your own domain name for email sending may reduce the email delivery rate. - No. of retries – this is the number of times an unpaid Direct Debit will be automatically represented (default is 0)
- Days before representing (calendar days) – this is the number of days before an unpaid Direct Debit is represented (default is 15).
- Mandate notice period (working days) – the number of days before payment can be taken for a Direct Debit (default is 10)
- One-off notice period (working days) – the number of days before payment can be taken for a one-off payment (default is 10)
- Mandate reference prefix - prefix for mandate reference that the solution will use to generate a numerical reference from then on.
- Description - profile description.
- Address - address that the correspondence will be sent to.
- Correspondence footer text - text that will appear in the footer of the correspondence.
- Salutation - used to address the person being written to.
-
Click Save profile.
Email
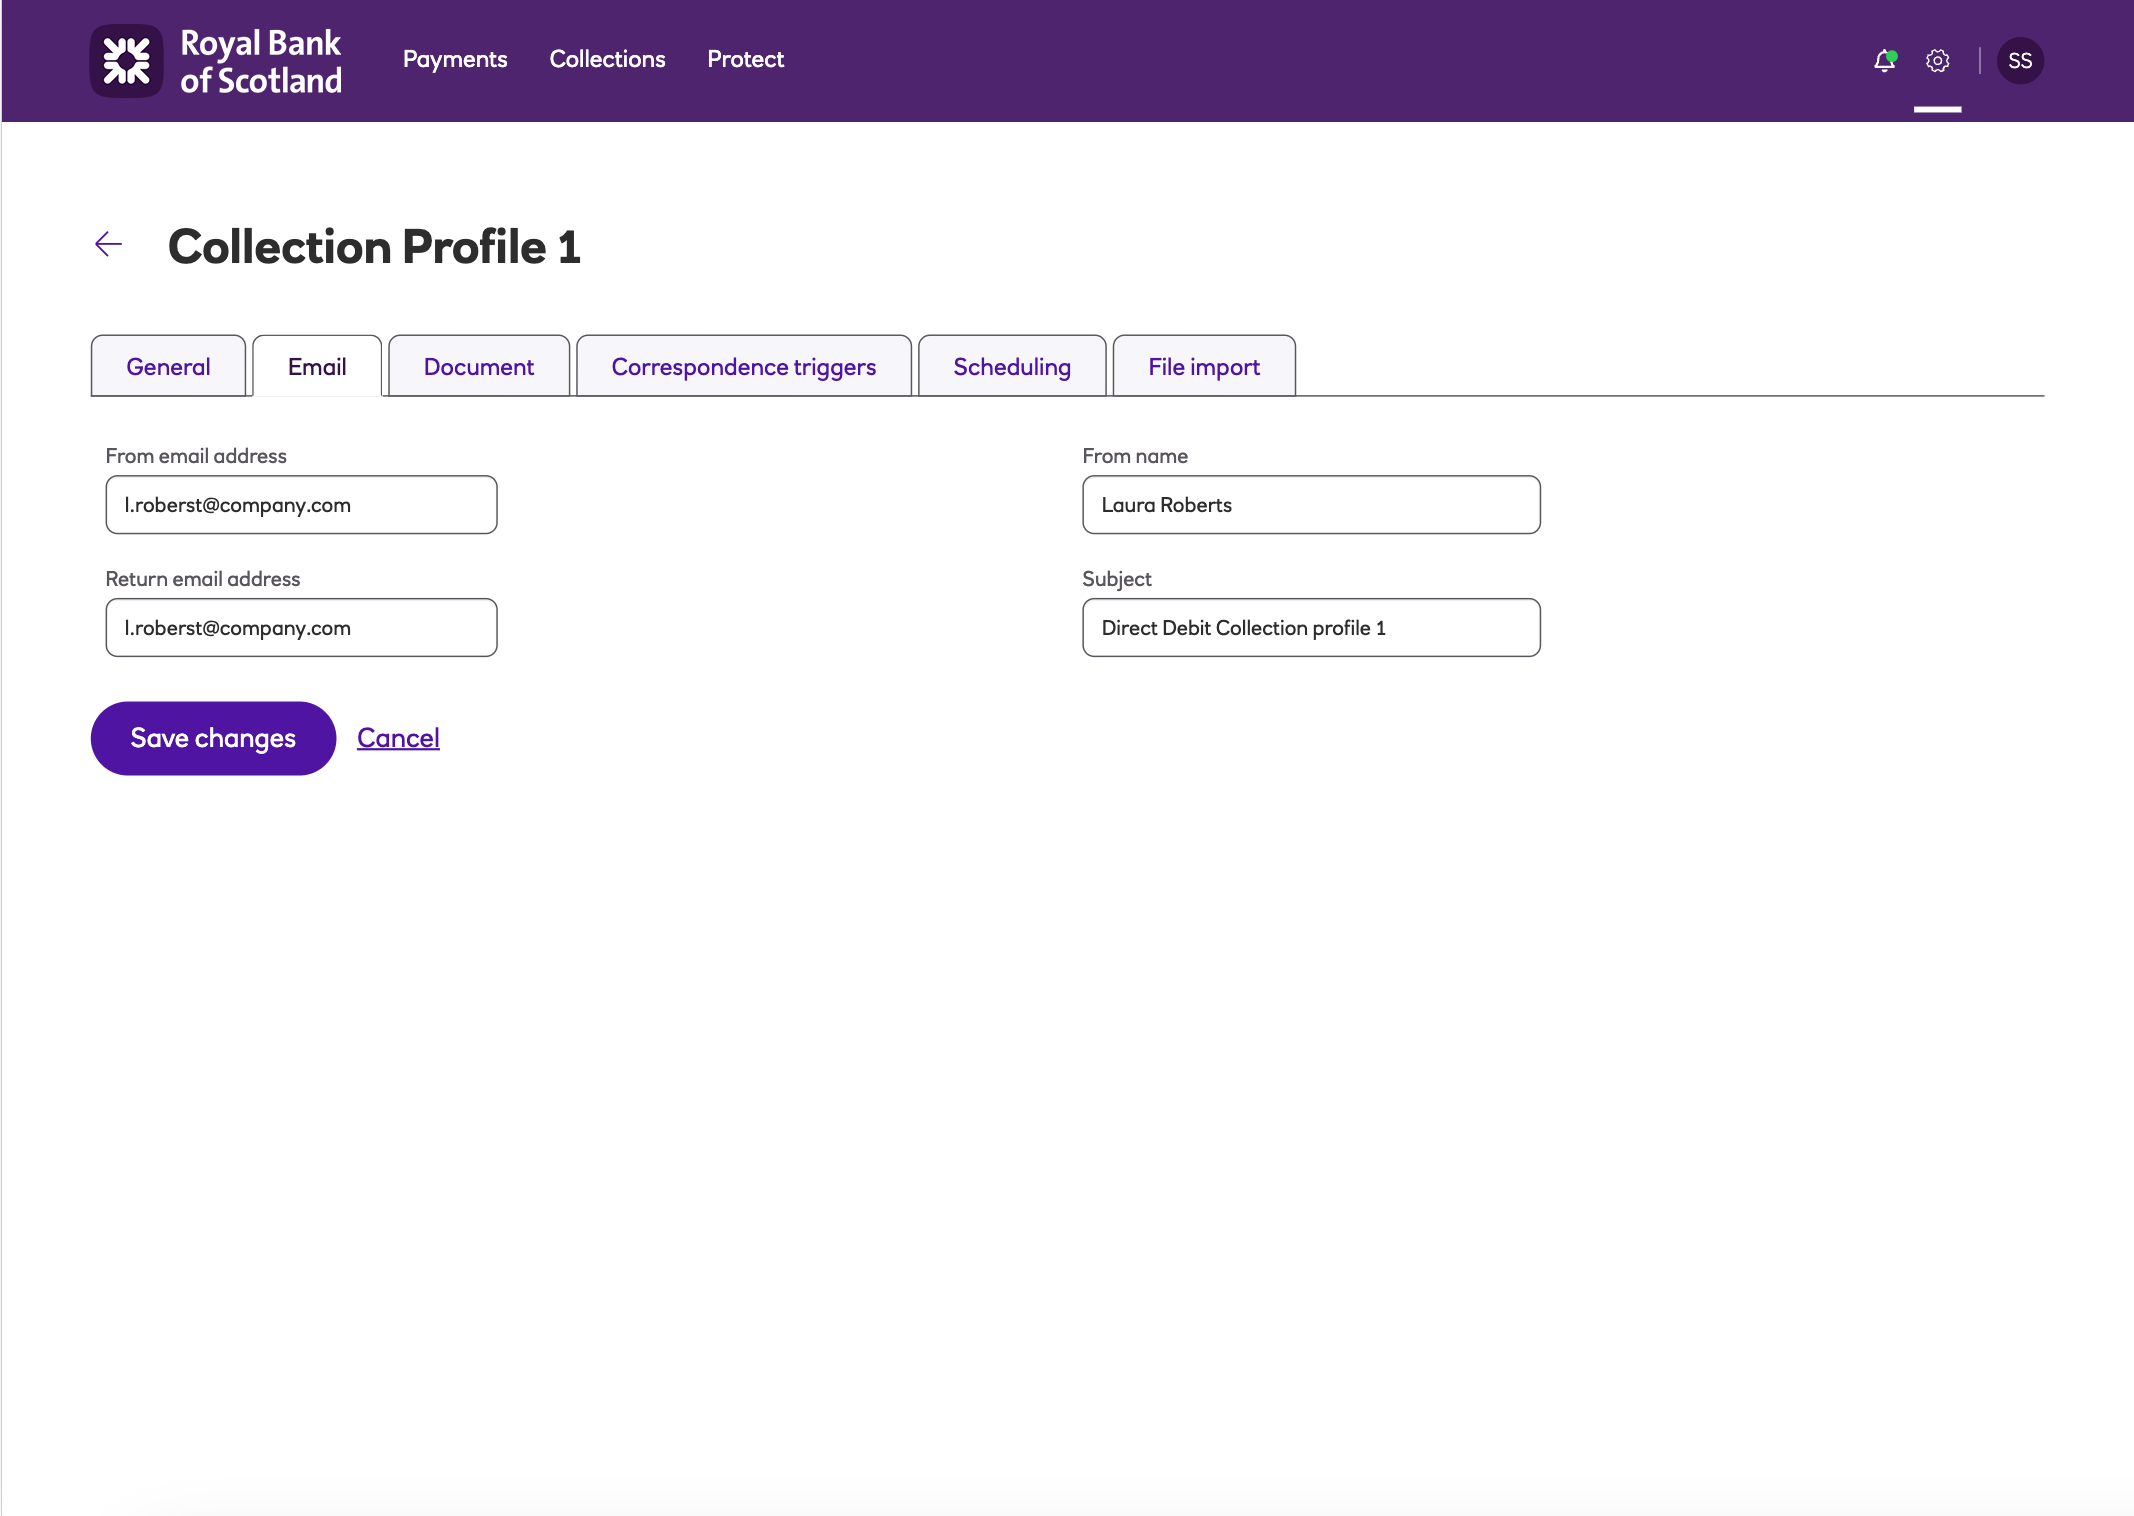
Email correspondence is sent from the solution to your customers (if the preference is set to email) automatically.
The Email tab contains the details for the email sent: From email address, Return email address, From name and Subject.
Document
The Document tab allows you to upload your company logo and position it to your specifications and add a signature on the correspondence that is generated.
Correspondence triggers
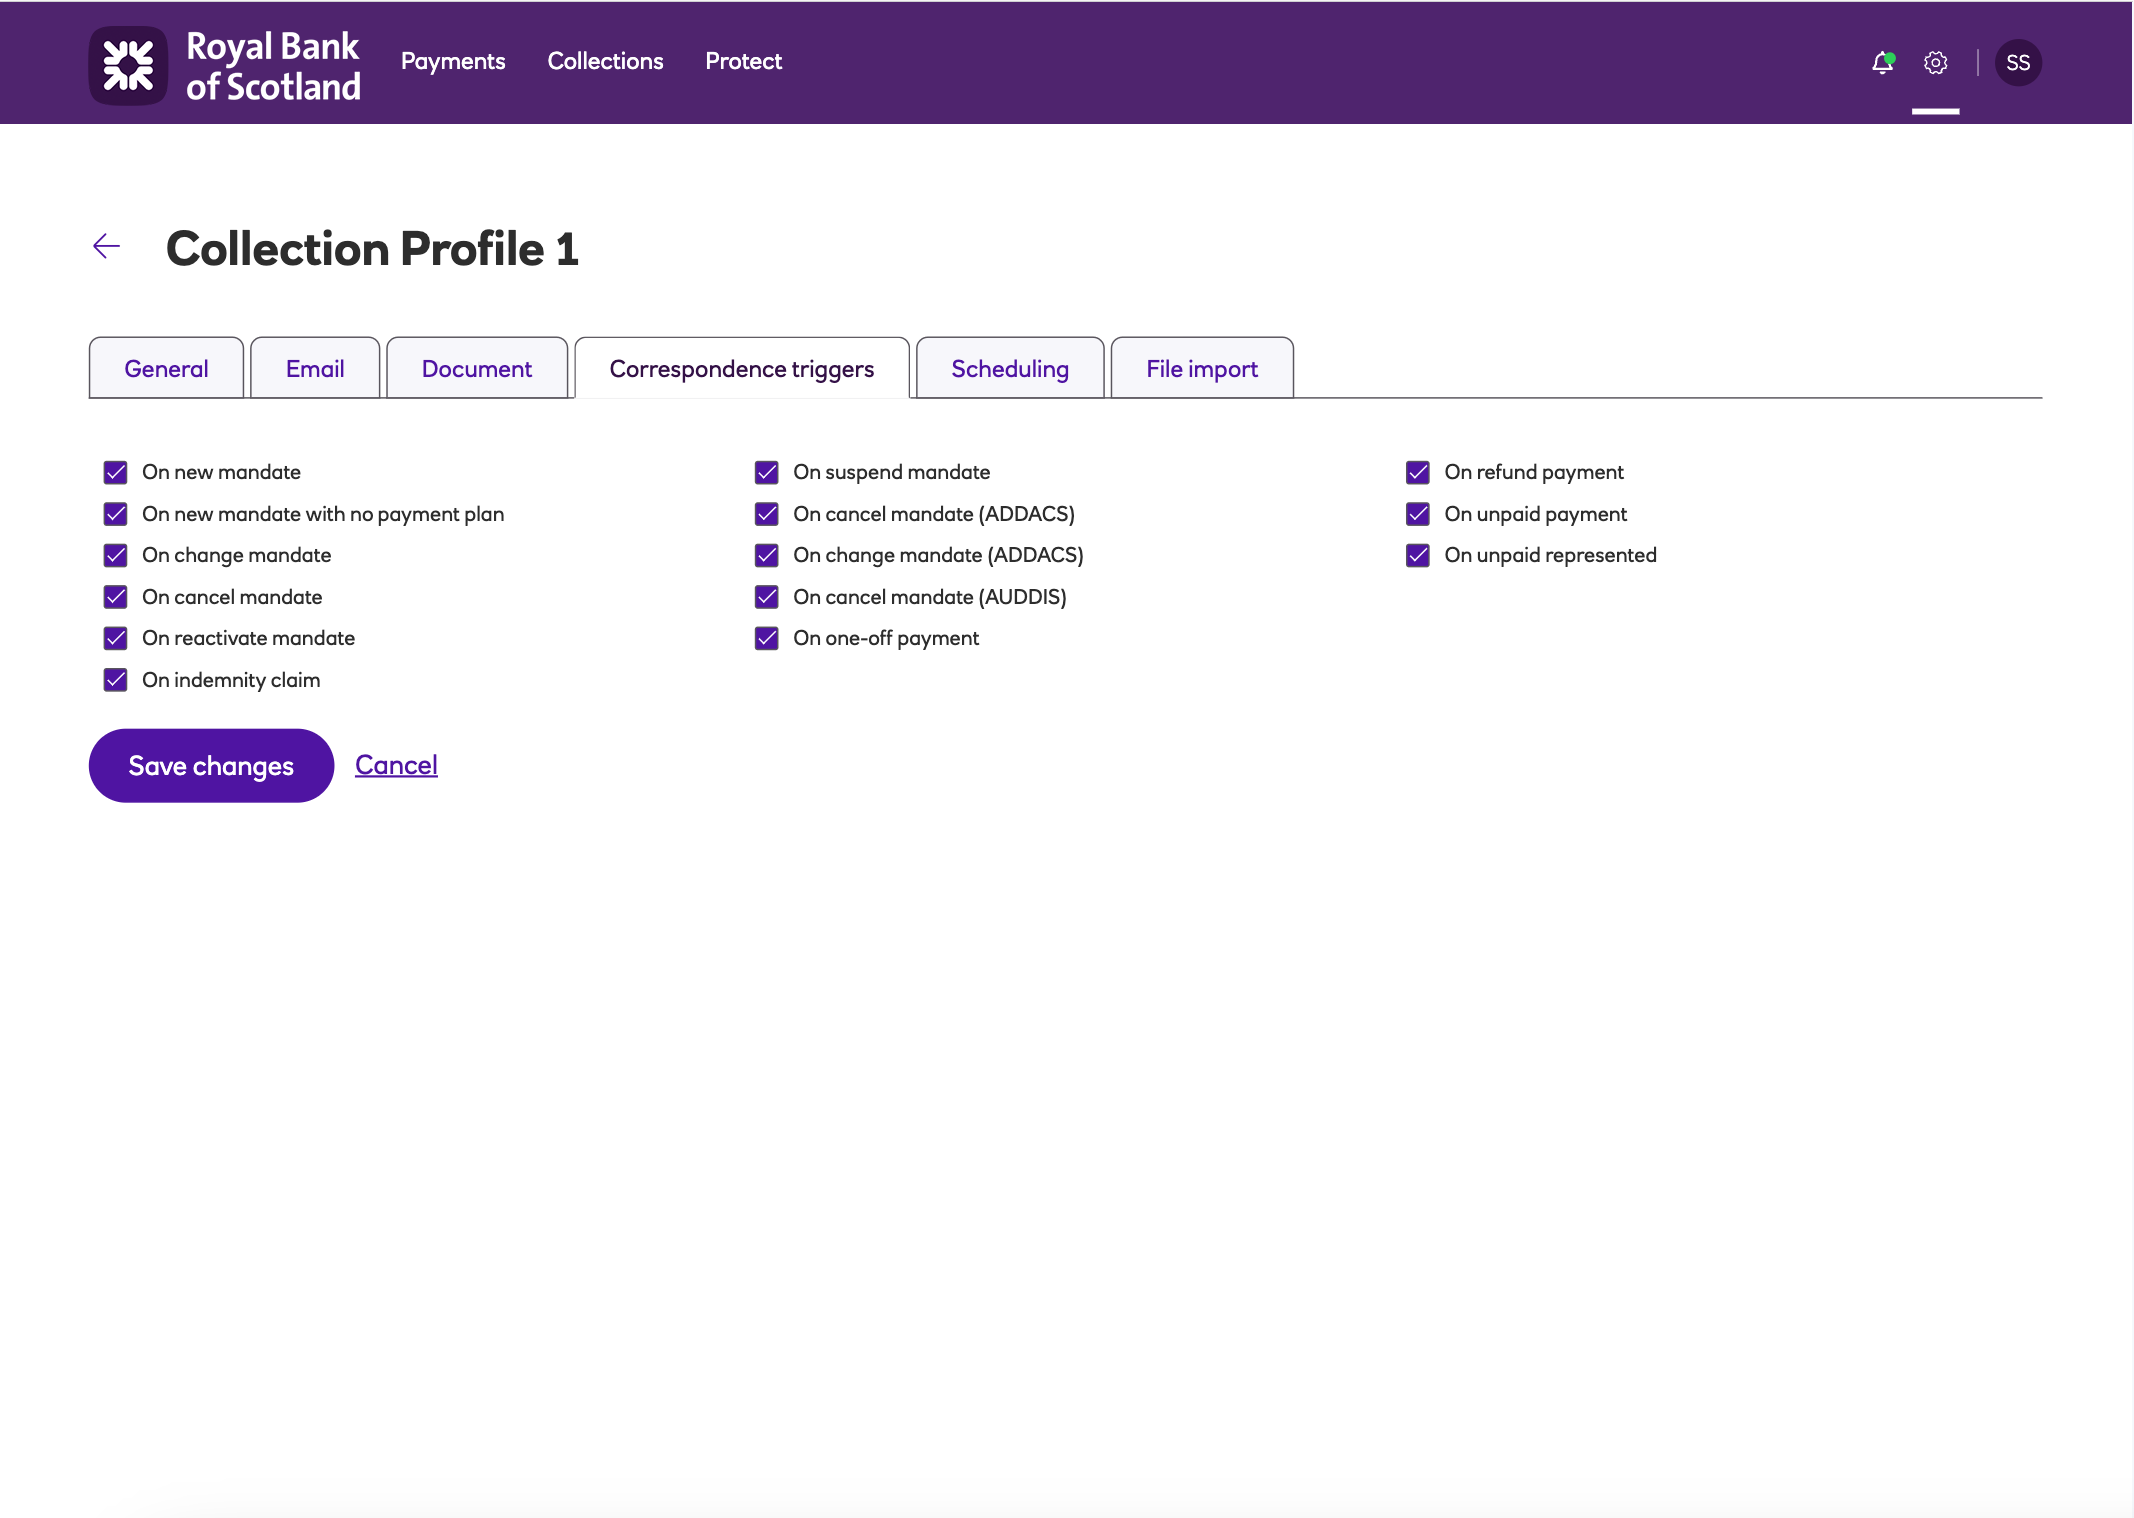
You can choose to enable or disable the triggers on which you want correspondence produced. This relates to the Direct Debit correspondence that Autopay Online Plus will produce, ready to be sent to your payers. By default all triggers are enabled.
Scheduling
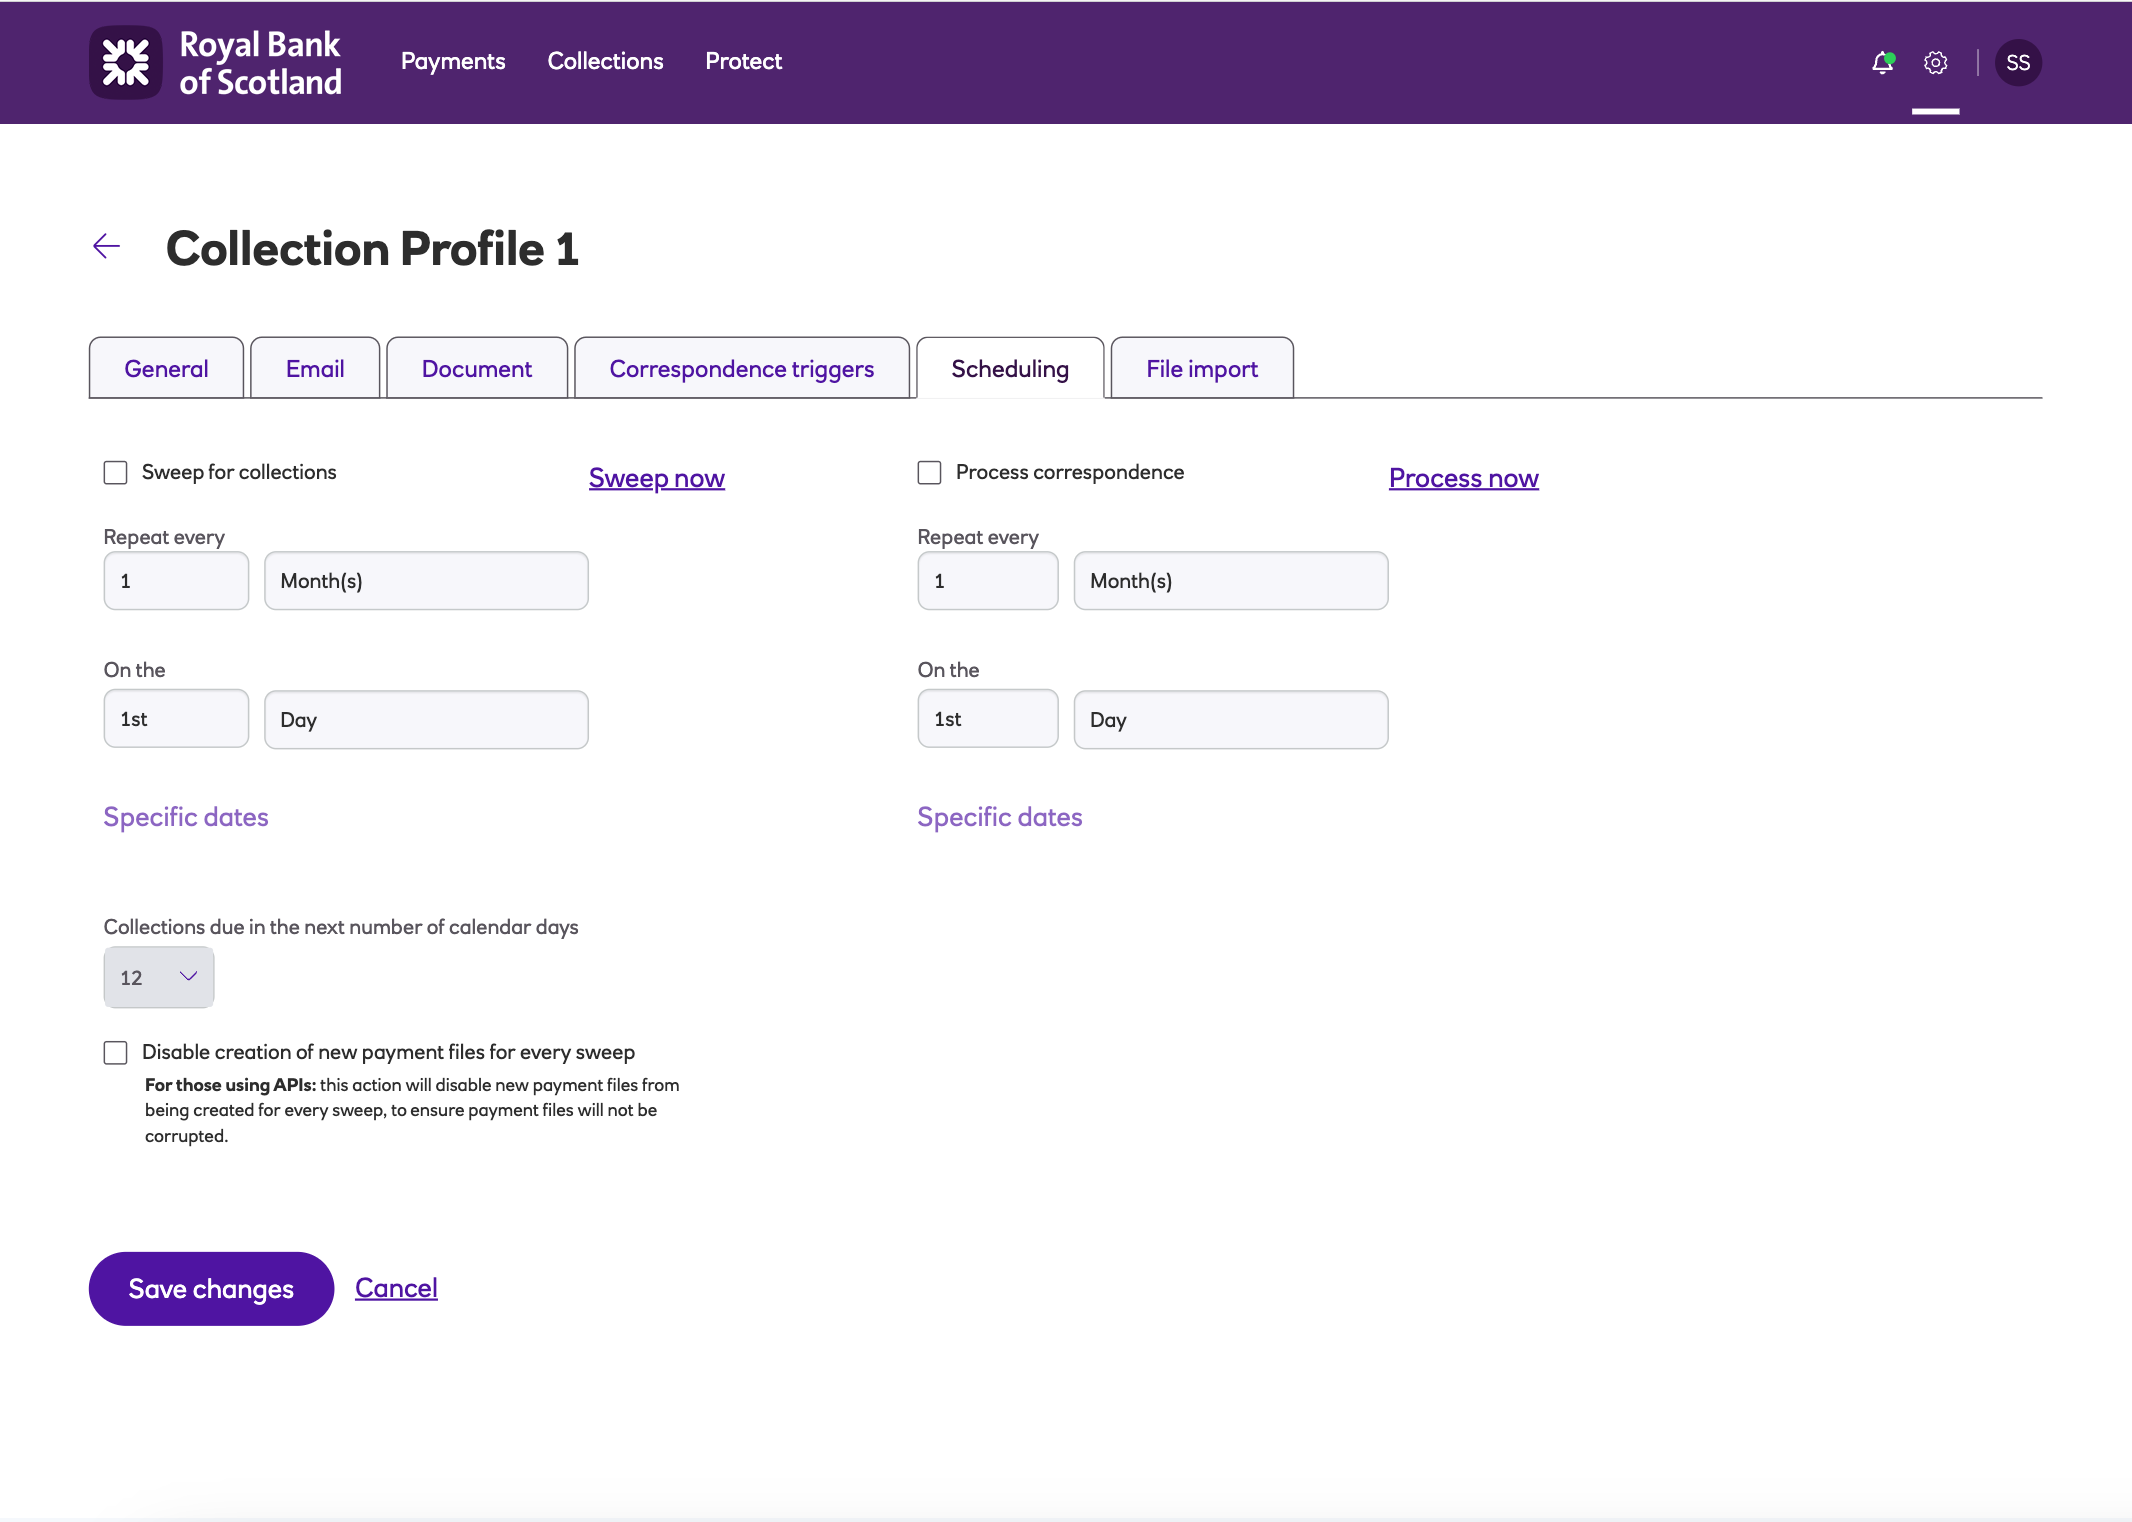
Autopay Online Plus will sweep the database for planned collections (and place them in your all Payments screen ready for your approval) and process the correspondence (send the emails) depending on the scheduling you set. Only set this tab once you are live.
File import
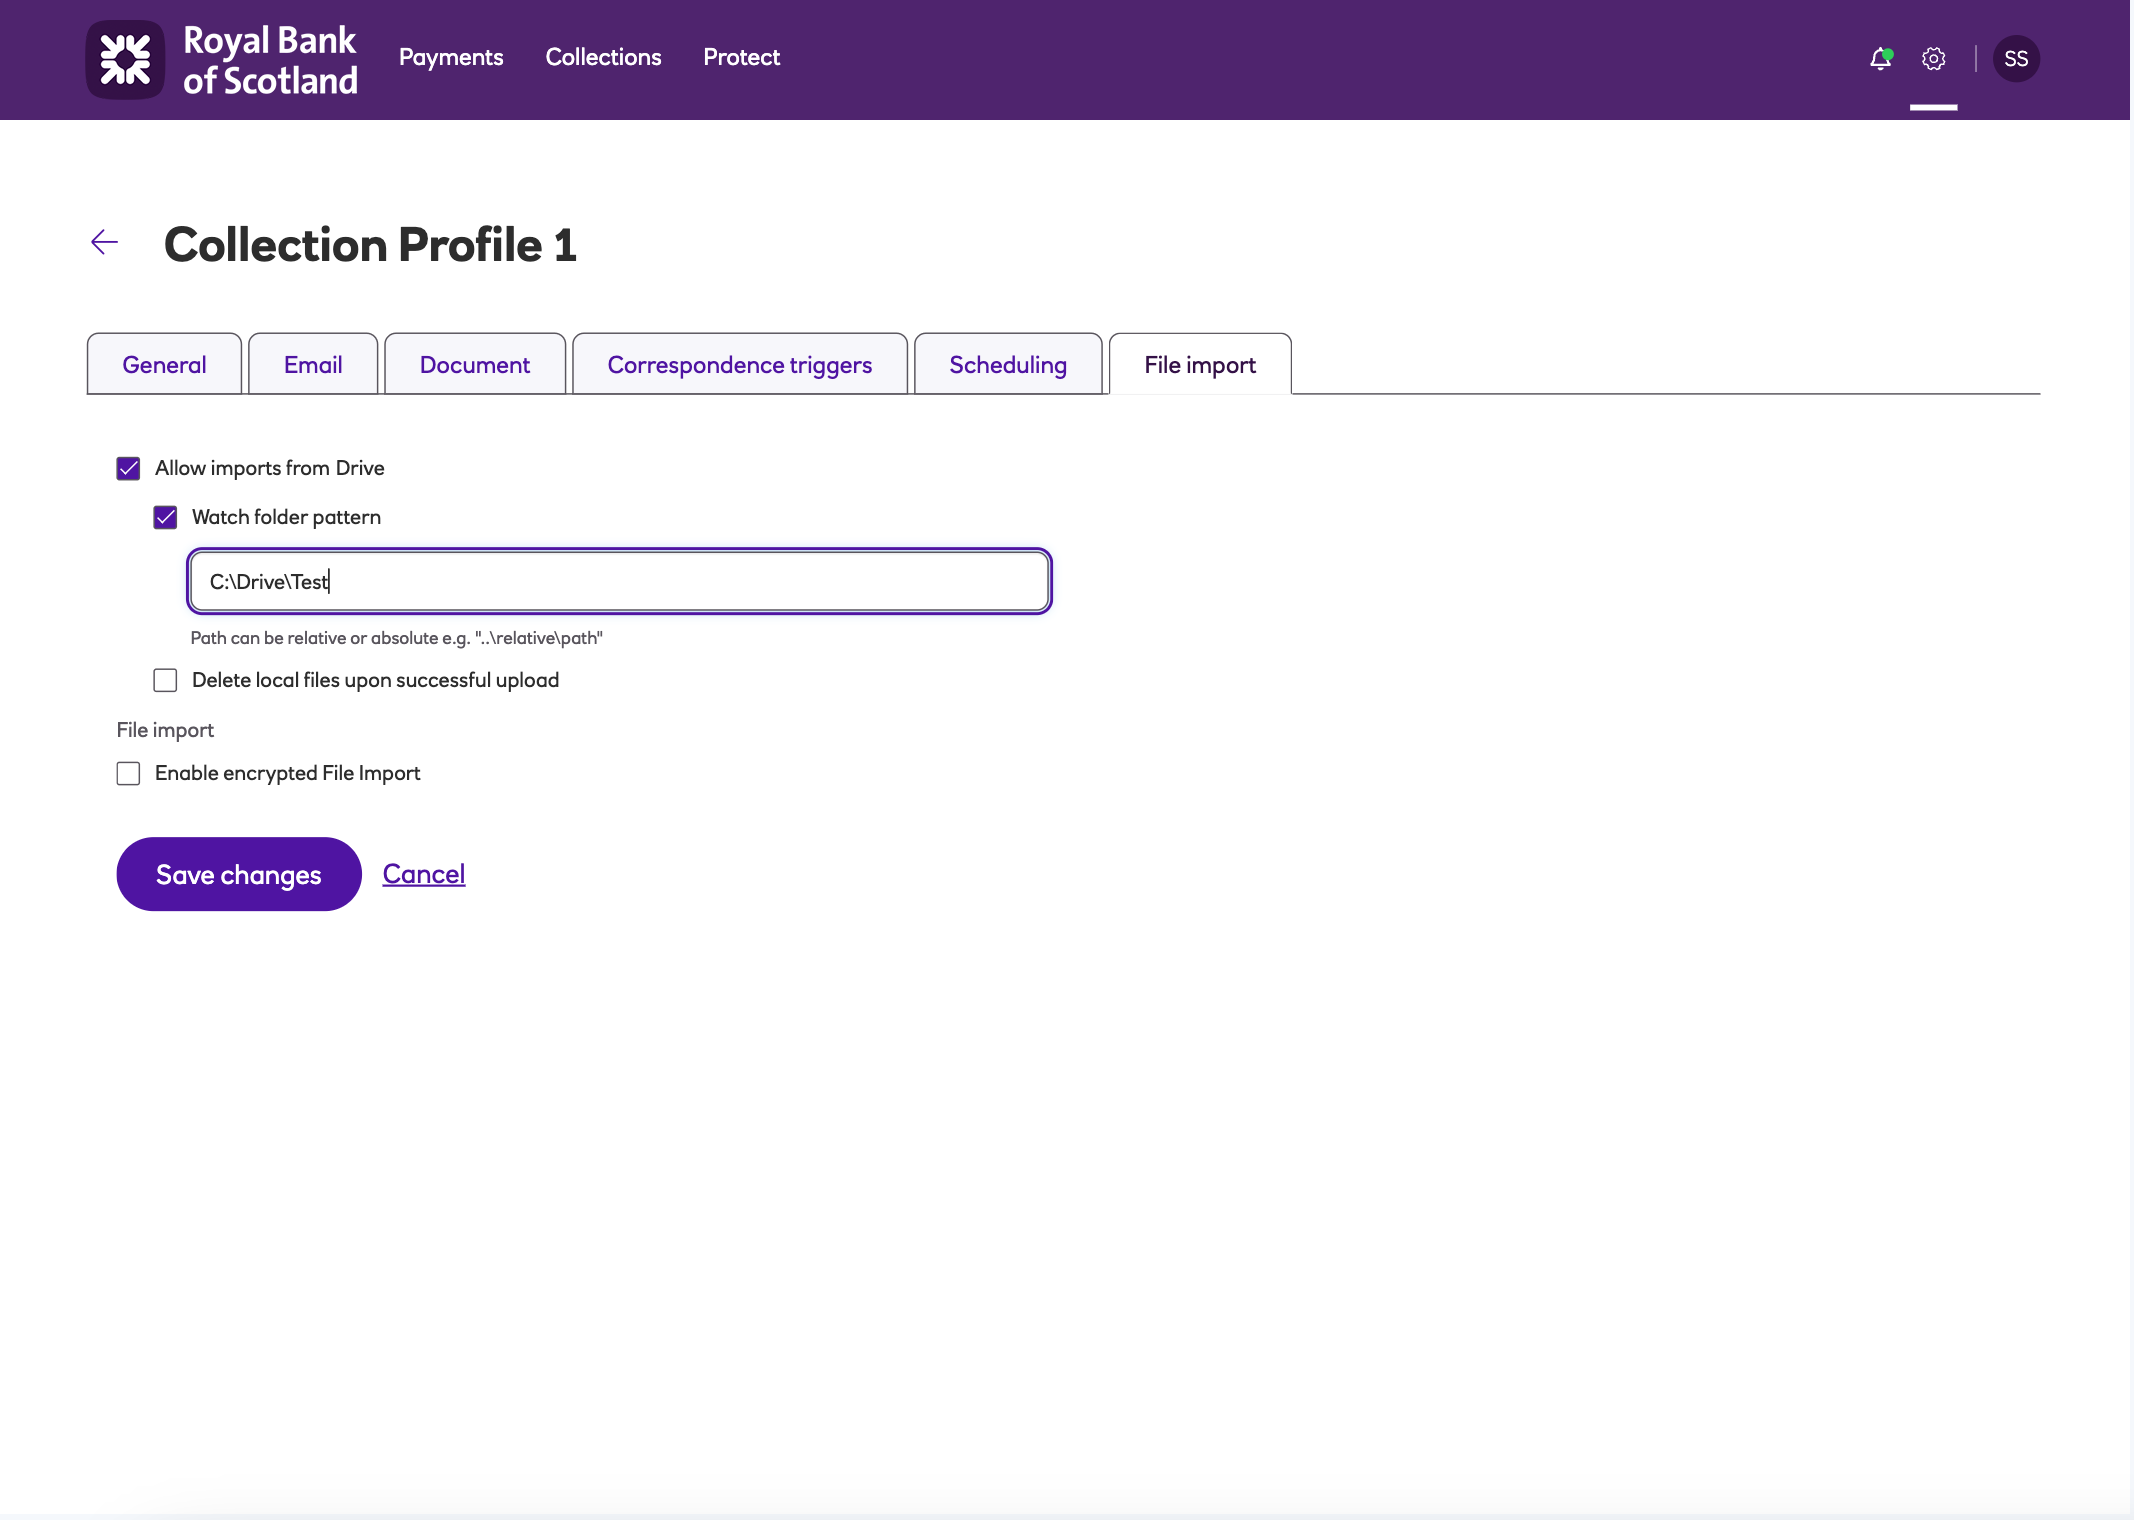
The File import tab contains the import settings.
- Allow imports from Drive – select this option and data can be uploaded to Autopay Online Plus using Drive.
Note
By default, changes made to the collection profile options will not be picked up by Drive until it is restarted. However, settings on Drive enable auto-refresh based on the interval specified.
- Enable encrypted File Import – select this option and encrypted files can be uploaded to Autopay Online Plus.
Updated about 2 months ago
