
Creating a user
Note
Multi admin is an additional feature and if enabled on your tenant, administrator approval is required on any actions before they come into effect. It can be applied when managing users, payment profiles, and roles. See the section Multi admin for more details.
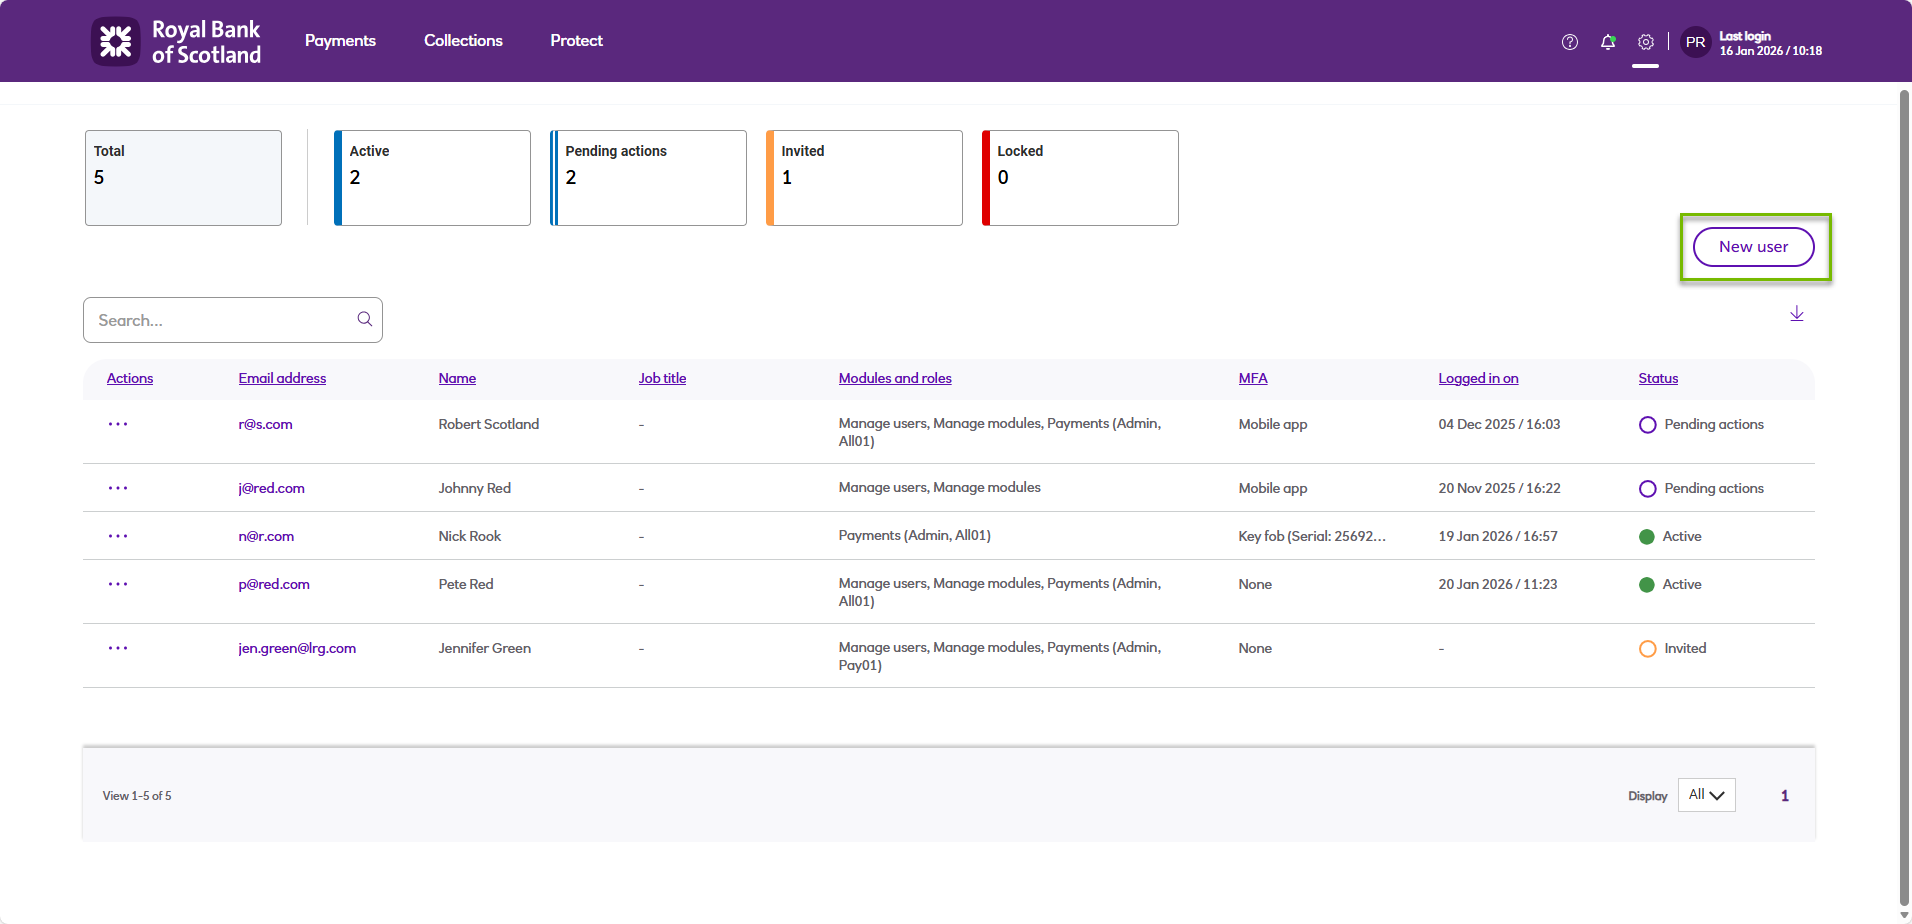
- Navigate to the Users screen and click New user (in the top right-hand corner).
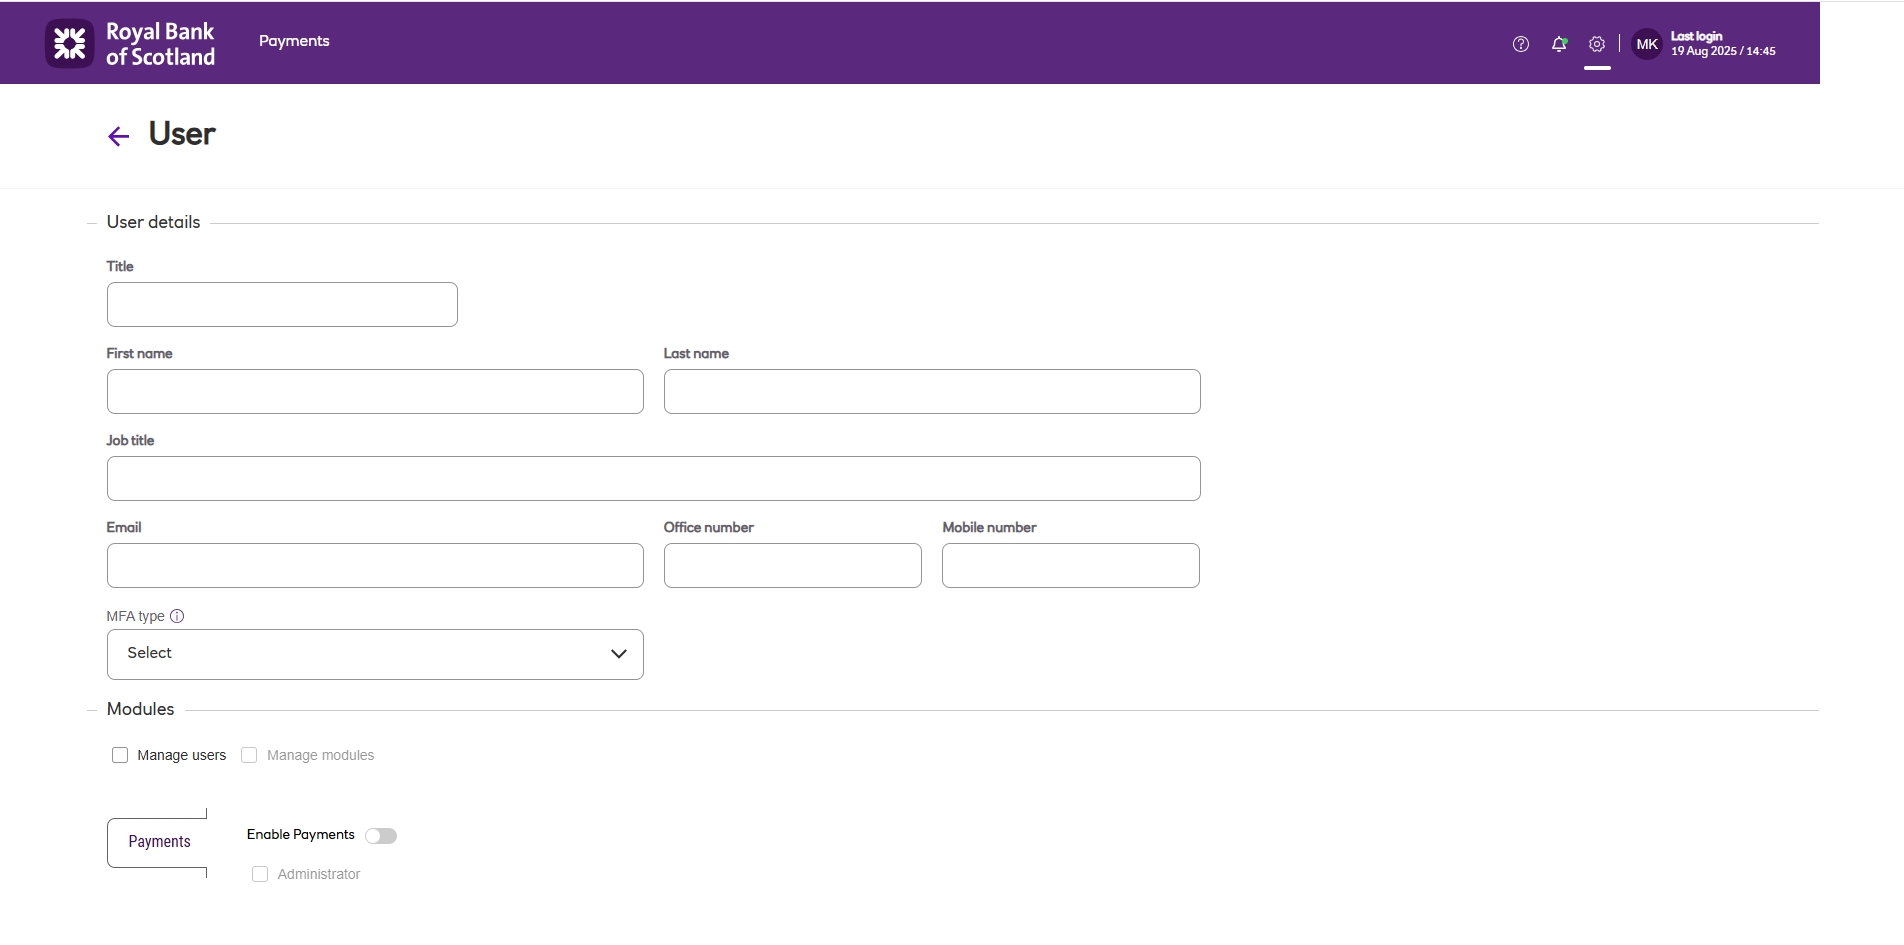
- A blank user page is displayed.
-
Enter the First name, Last name and Email address as a minimum.
-
Select the MFA Type required, from the drop-down list of MFA options available for your tenant. For further details, see the section Multi-Factor Authentication (MFA).
-
Enter the module settings and assign permissions for the user (see below).
-
Once you have completed all of these steps, click Create user. This will add your user to the list of users set up in the system. In addition, all of the administrators for the tenant will receive a notification email that a new user has been created.
-
The new user will receive a ‘Welcome’ email which will allow them to complete the sign-up process.
Assigning permissions to a user
Notes
Users cannot remove administrator privileges from themselves.
- <p style={"color":"#666"}>It is not possible to remove administrator privileges from the last user to have those privileges, as an account can never be left without an administrator.
Types of users
Within Autopay Online Plus, there are 3 types of users:
- Administrator (with user management) - requires the Manage users and Manage modules permissions, access to the Payments module, the Administrator option enabled, and a valid role assigned.
- Administrator (without user management) - requires access to the Payments module, the Administrator option enabled, and a valid role assigned.
- Non-administrator user - requires access to the Payments module, the Administrator option disabled, and a valid role assigned.
Permissions are assigned to a user within the Modules section of the User page, as follows:
-
When creating a new user: permissions are added via the User page as the final stage of the process. When complete, click Create user.
-
When editing the details of an existing user: navigate to the User page for the user concerned, make the necessary changes and click Save changes.
The process is identical in each case:
-
Tick the Manage users check box if the user is to have user administrator privileges. Such a user will be able to:
- Access the Users option from the Settings menu.
- Add and delete users.
- Assign Manage users and Administrator privileges (note that Manage modules permission is required in addition to Manage users, in order to assign module Administrator permissions).
- Edit user details.
-
Tick the Manage modules check box if the user will be assigning the Payments module to users. Such a user will be able to:
- Assign Manage modules privilege to a user (note that a user must have the Manage modules permission in addition to the Manage users permission in order to be able to assign Manage modules to another user).
- Assign a user to the Payments module and role (even if they do not have access to that module themselves).
-
Set the ENABLE MODULE toggle to YES to enable the Payments module. When selected, a white tick in a green circle appears against that module. Only modules that are licensed to the customer can be assigned.
-
Tick the Administrator check box if the user is to have access to the administration facilities for the Payments module. These facilities allow the user to view and configure the system settings relating to the Payments module. If specified, the user will be able to access these facilities via the Settings menu.
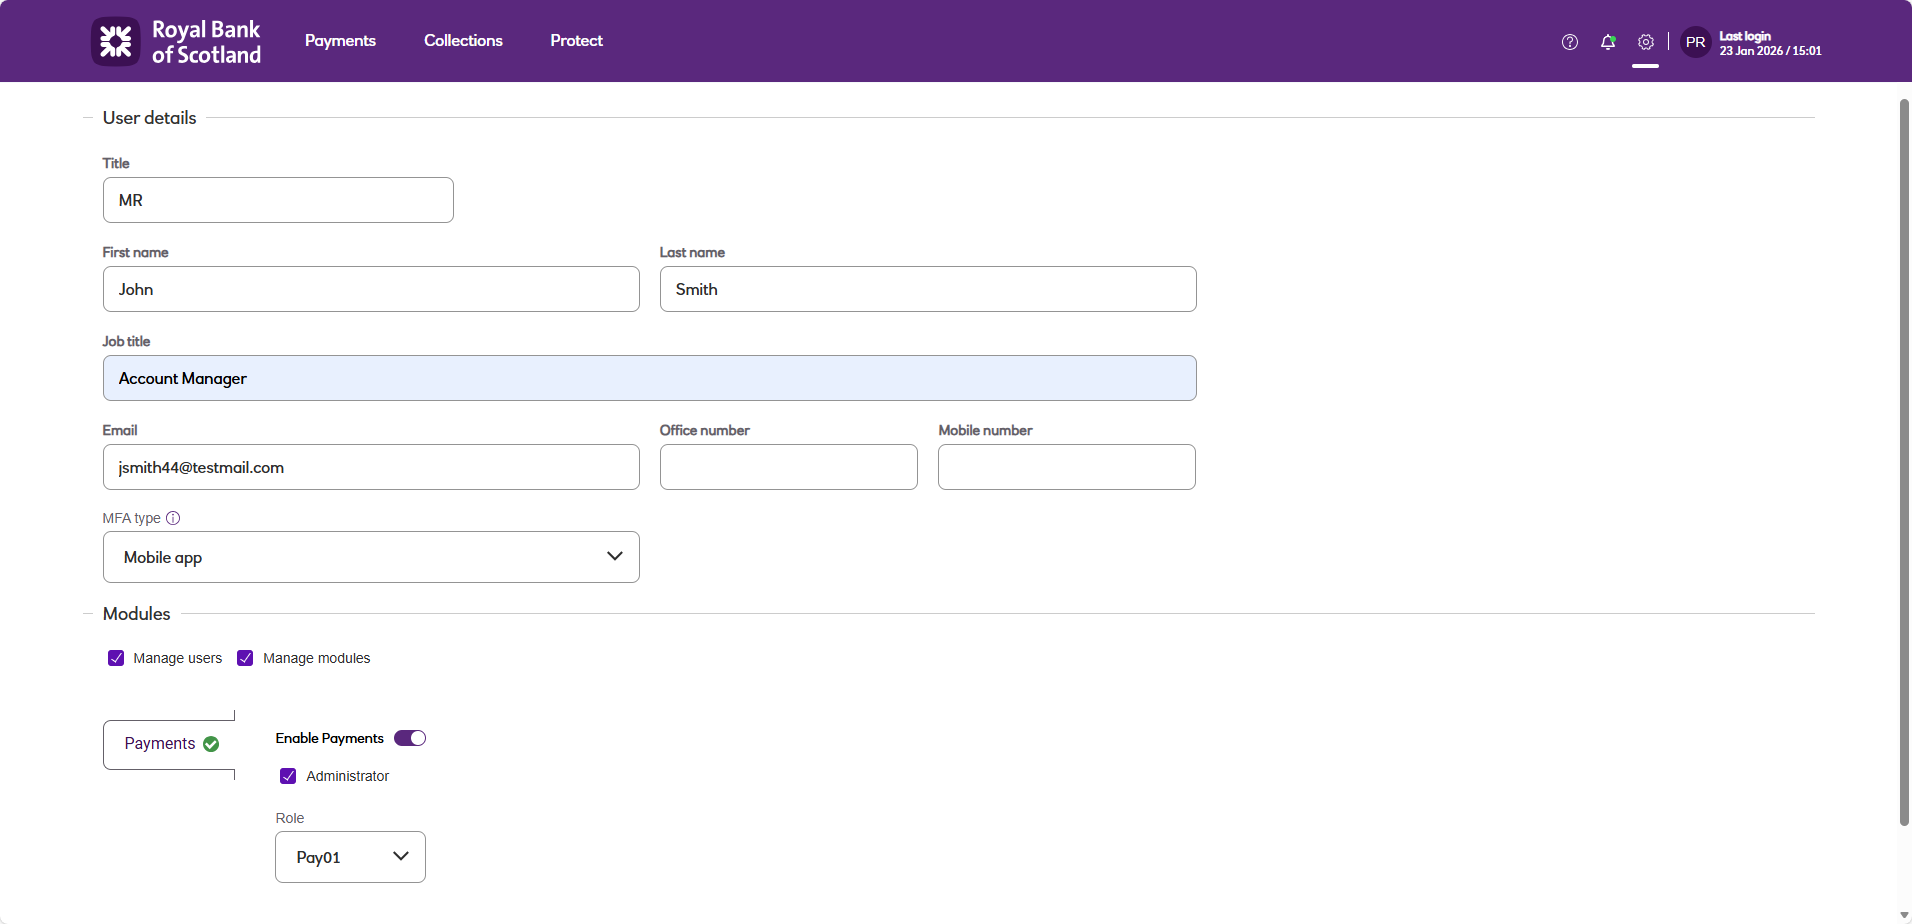
- If the user is not an administrator, you can specify a role for the user. A drop-down selector appears, listing all the roles currently defined. For instructions on creating and maintaining roles, see Setting up roles.
Note
To access the Payments menu on the UI, a role must be assigned to all users (admin and non-admin).
Updated 5 months ago