
Approving payments
When you need to pay beneficiaries, a file will be sent to Bacs. Part of that process involves you approving the file that’s going to be sent. You can have:
- one person approving a single file.
- up to three people approving the file.
- automatic approval, after the payment information has been entered, a user with the relevant privileges will be able to commit the payment.
By default, Autopay Online is set up with automatic approval for payments in place. Your administrator is required to set the approval permissions against the payment profile. As a user you’ll find instructions below on manually approving files. If you do not have the ability to approve payments, you will need to contact your administrator who can assist with your request.
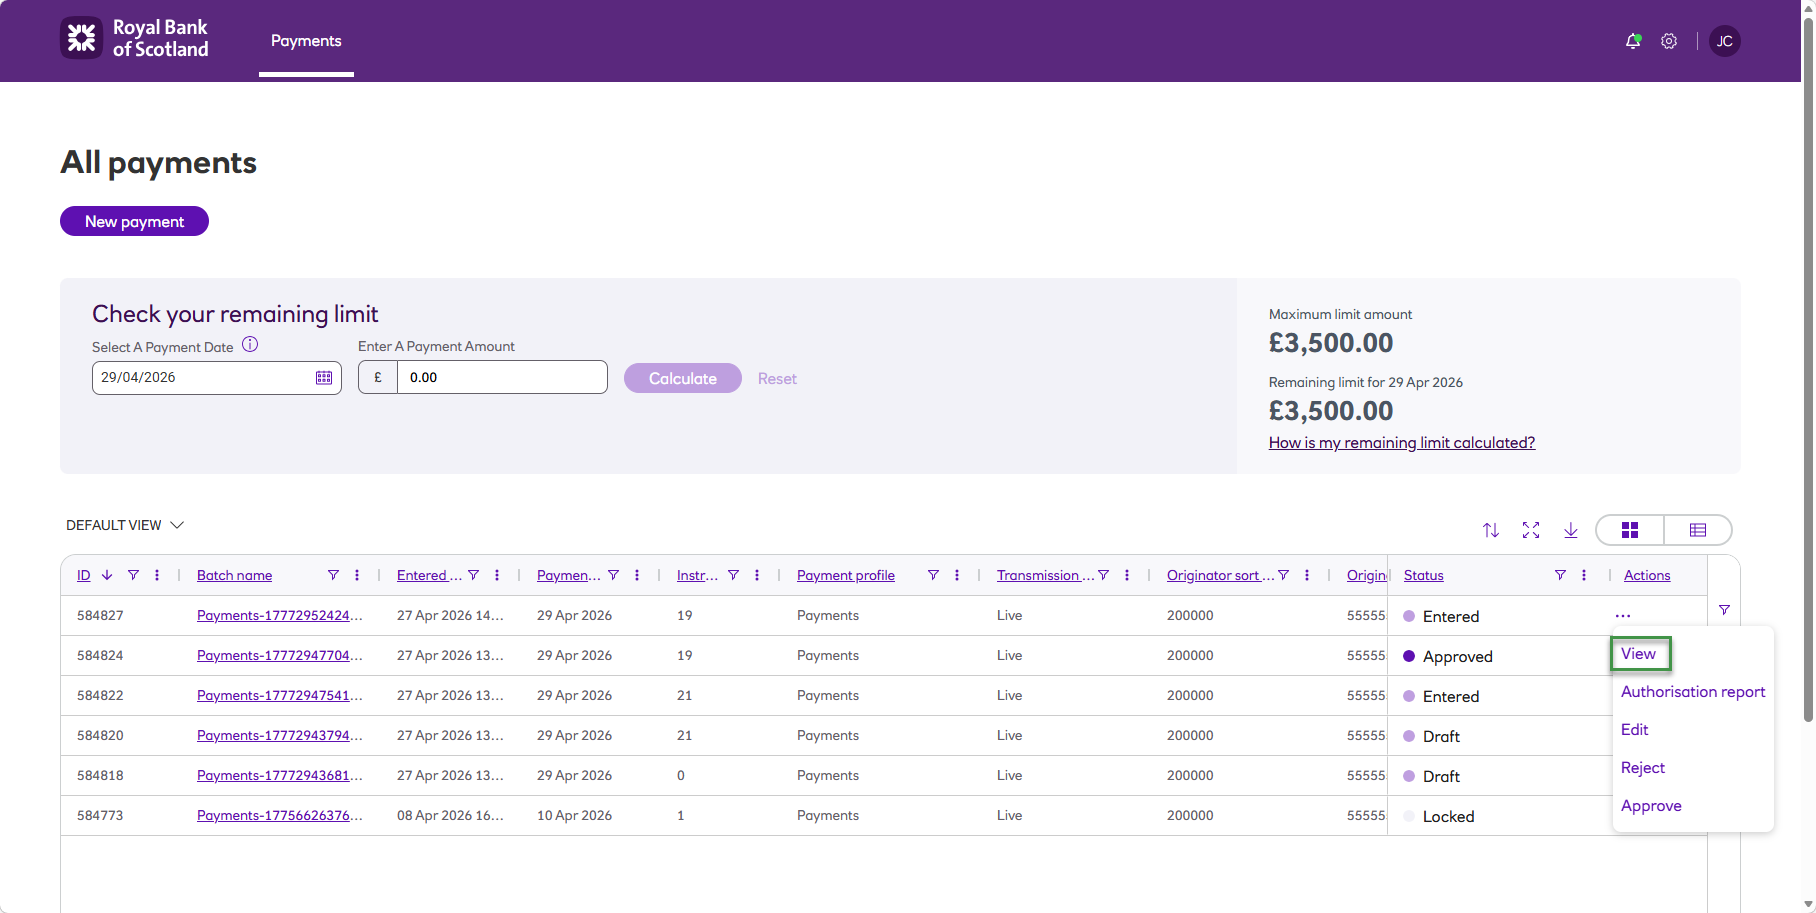
Single approval
-
Log in as a user who has the Approve role.
-
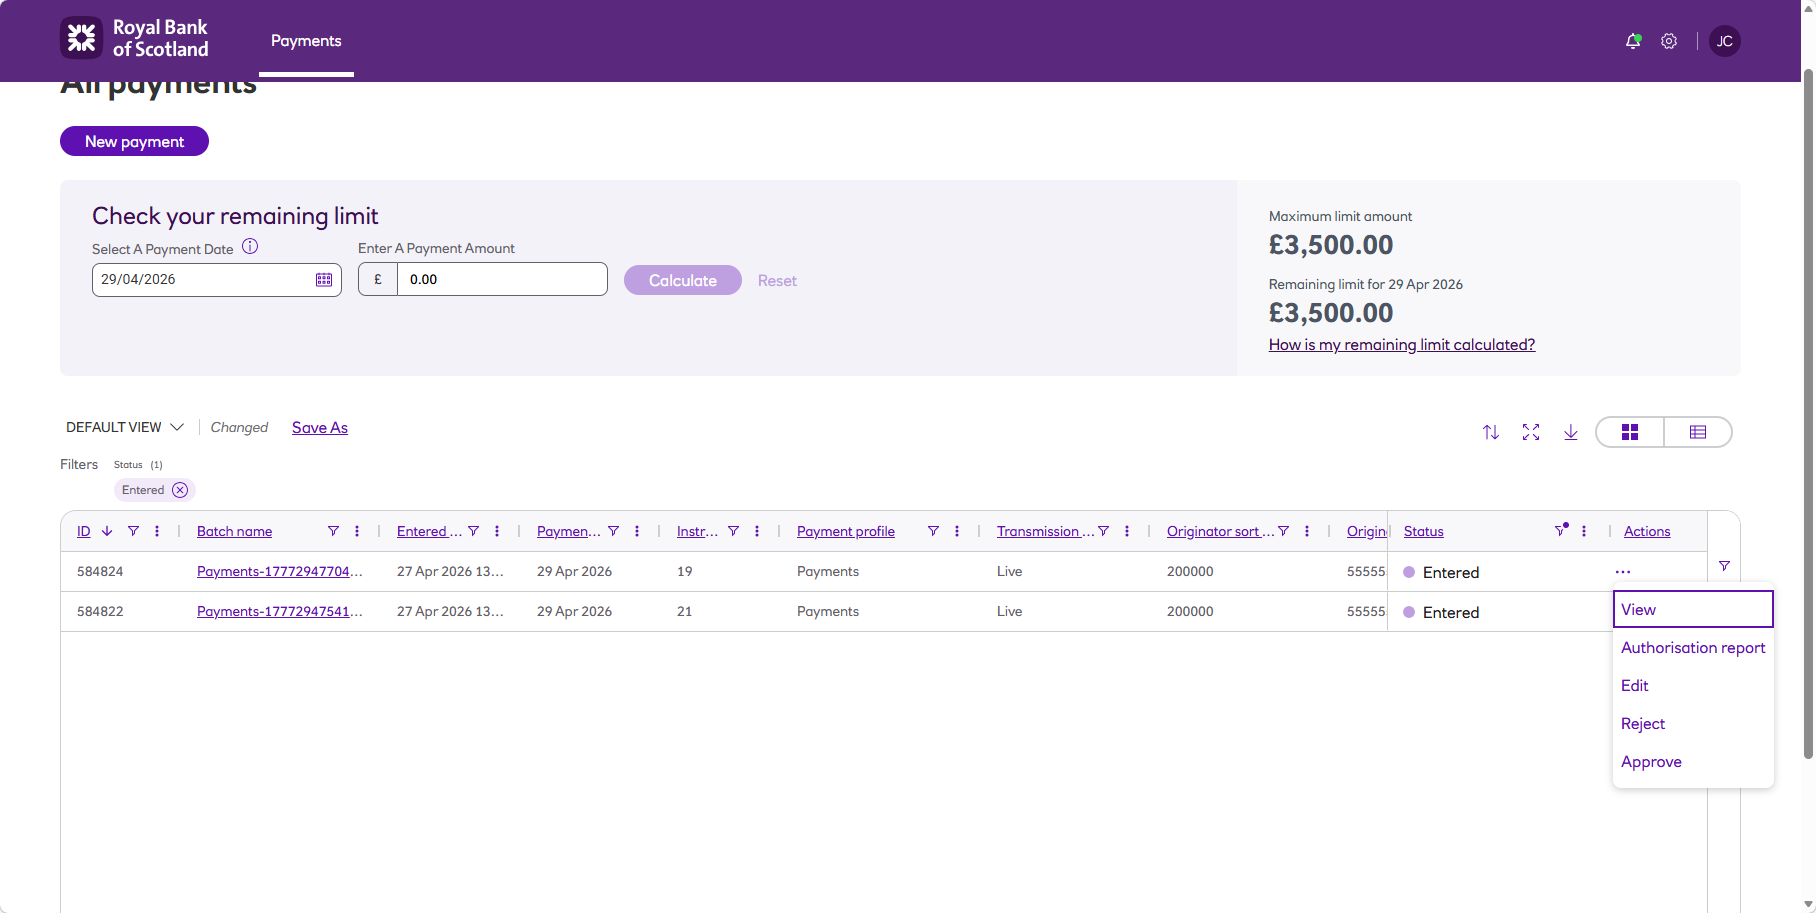
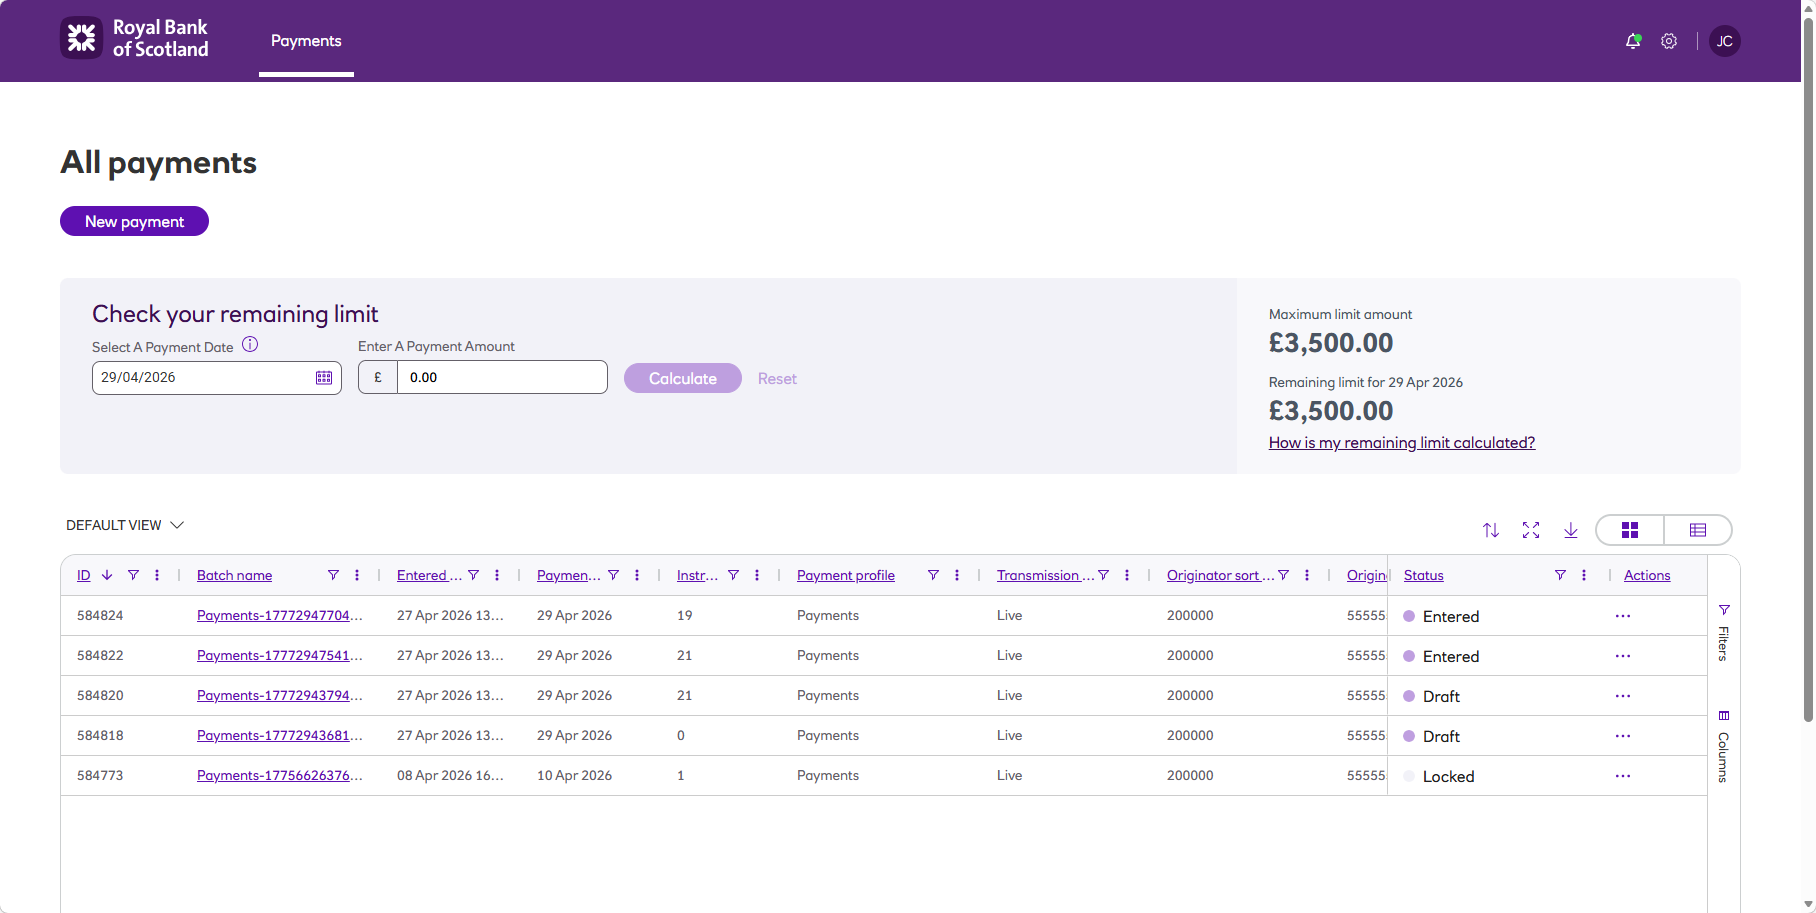
On the All payments screen, under the remaining limit tool, all of your payment files will be listed.

-
You can look for payment files by scrolling through the list of batch names.
-
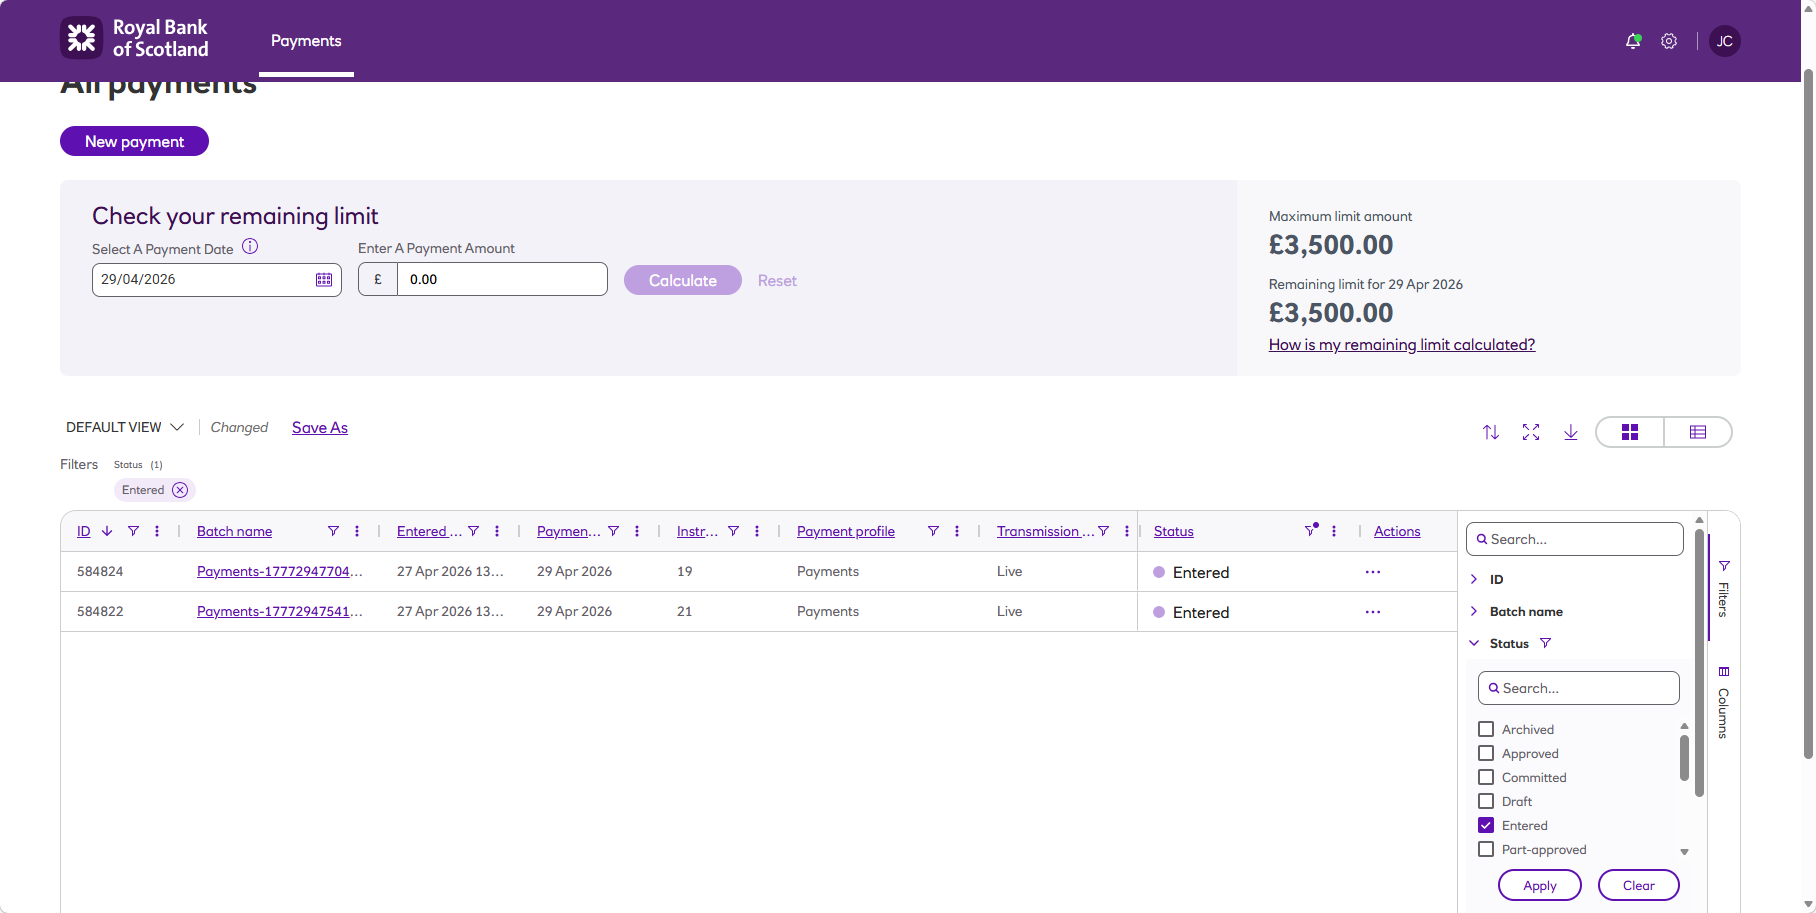
Alternatively, if you have a long list of payment files you can filter by Entered status.

-
Click View next to the entered payments file you want to approve. This will show you all of the payments in that payment file.
-
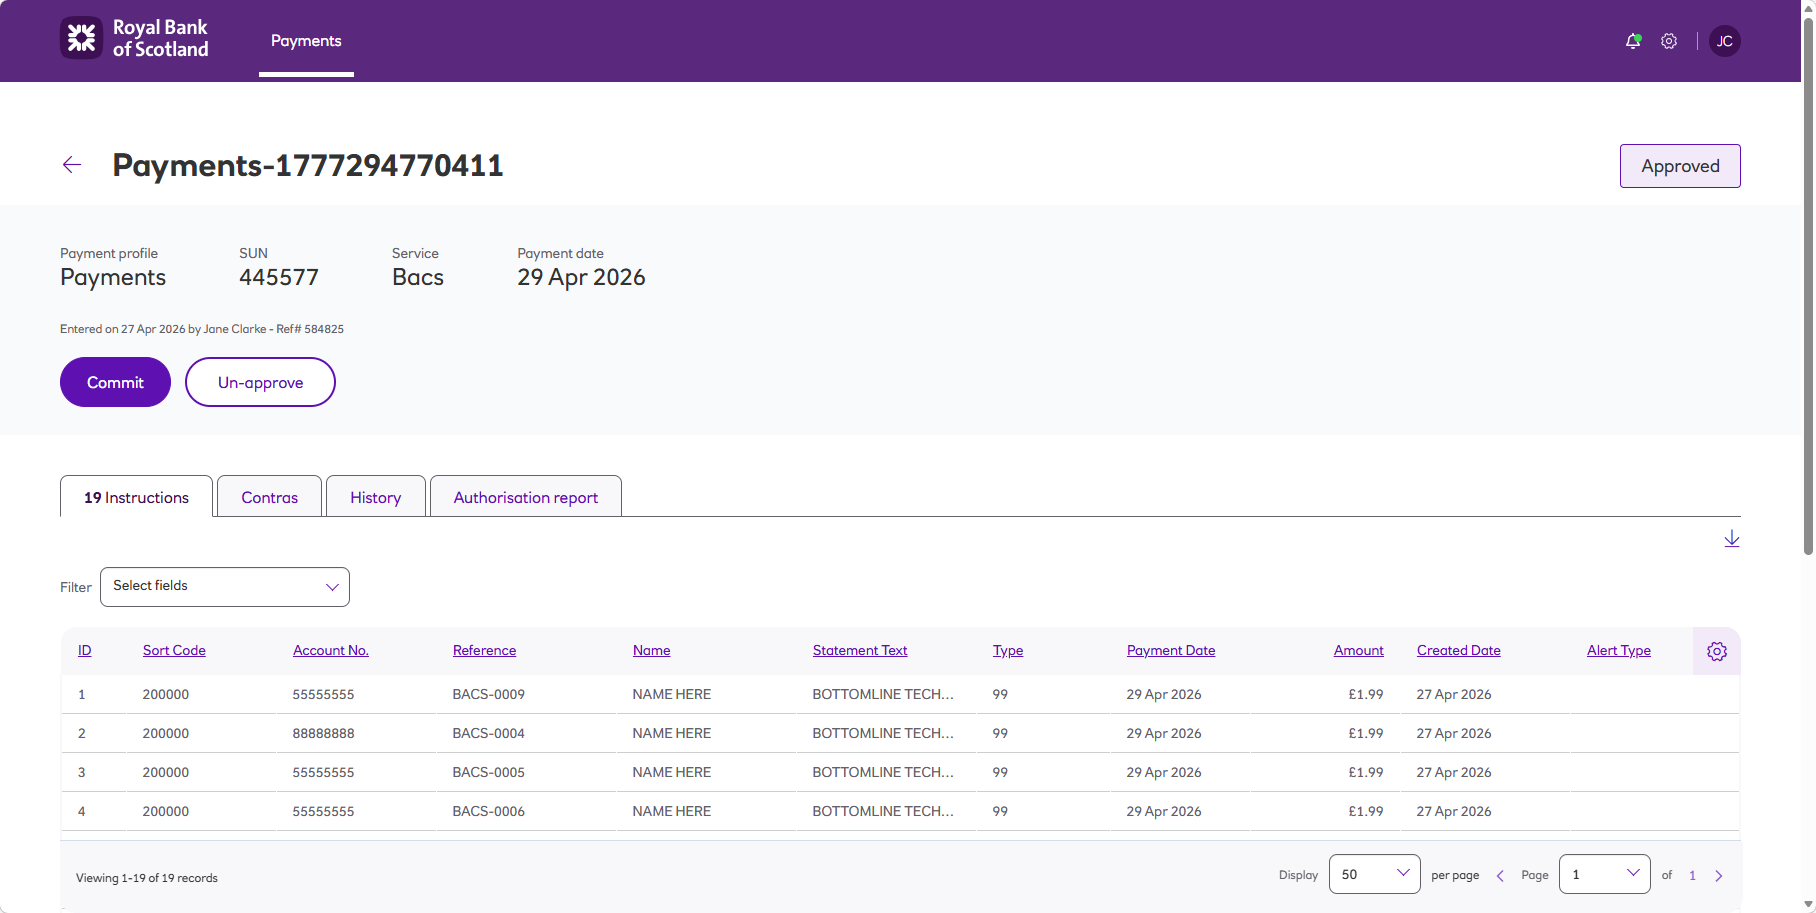
Check the details of the payment file.
-
Click Approve.

-
The status will update to Approved and will be ready to Commit for submission.
-
You’re still able to Un-approve the payment file until it’s committed.
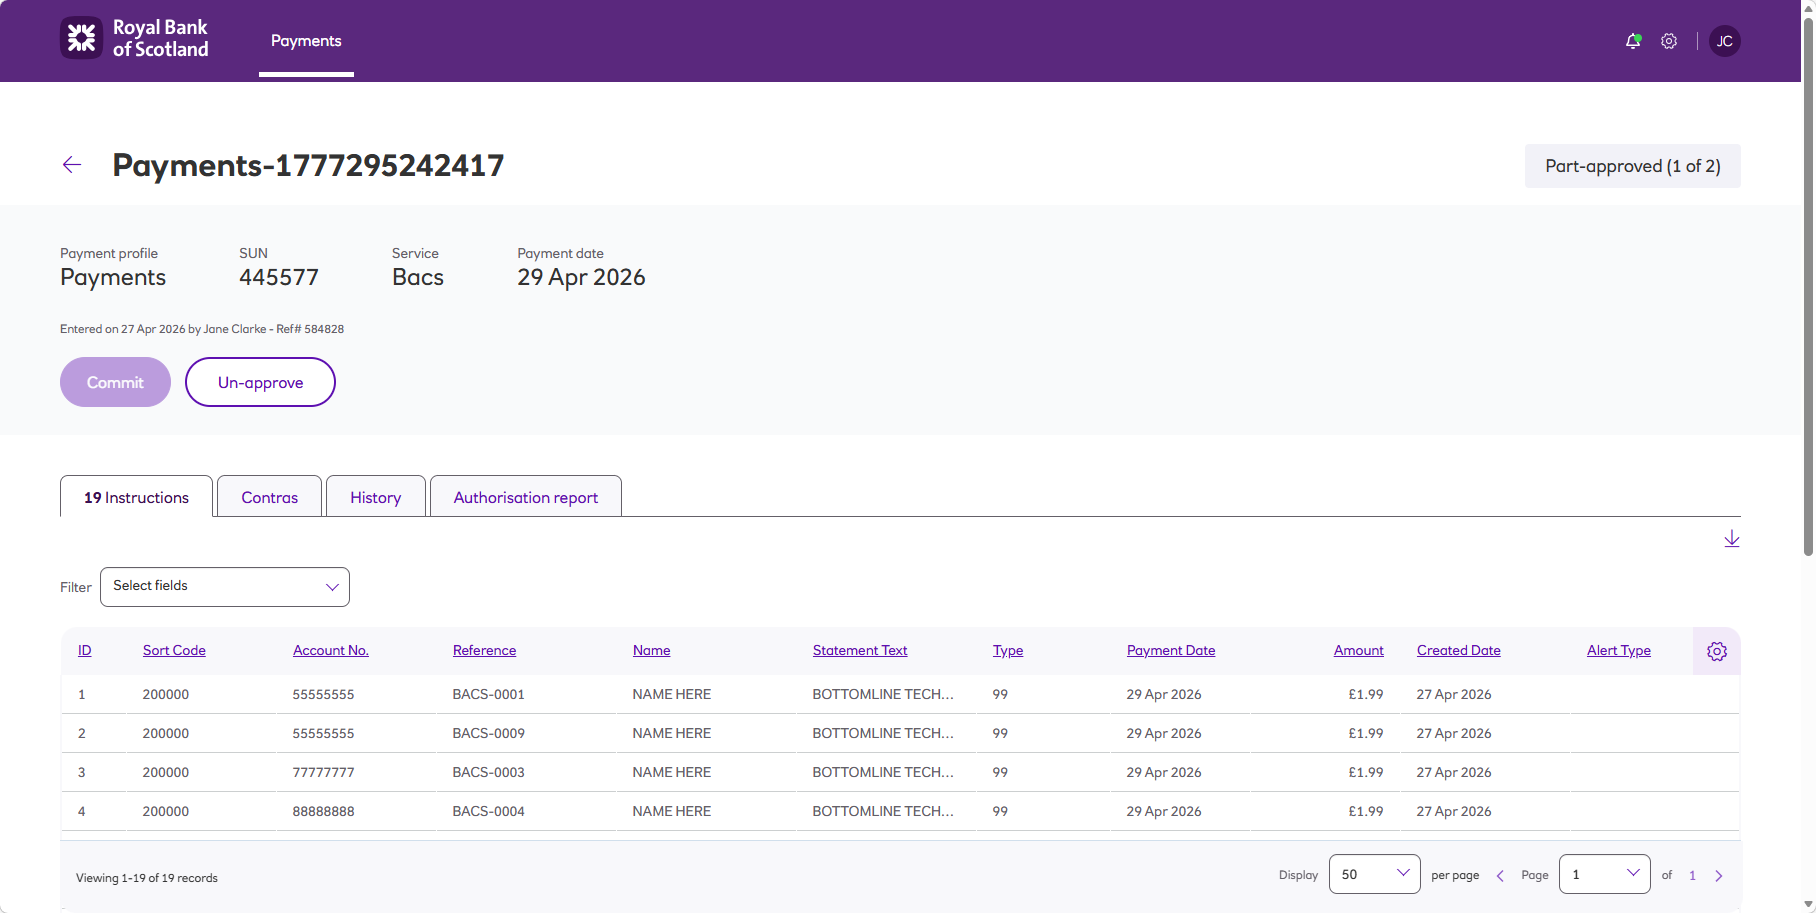
Multiple approval - WO payment profile with multiple approvers
If a payment profile has been configured to require multiple approvers:
-
Log in as a user who has the Approve role.
-
On the All payments screen, under the remaining limit tool, all of your payment files will be listed.
-
You can look for the Entered payment file by scrolling through the list of payment files.
-
Alternatively, if you have a long list of payment files you can filter by Entered status.
-
Click View next to the entered payment file. This will show you all of the payments in that payment file.
-
Check the details of the file.
-
Click Approve.

-
The status will update to part-approved.
-
The payment file is ready for the next approver to approve the payment file.
-
You’re still able to Un-approve the payment file you approved or part approved.
Note
If the payment has not been committed in time for the requested payment date, the payment date will appear as out-of-date. On clicking Approve/Commit, this date will automatically be updated to the next available payment date on submission.
However, if the payment file is in a Draft state, on clicking continue, the date will appear updated, this date will automatically be updated to the next available payment date when moving to the Approved state.
Updated 2 months ago