
Making payments manually
When you need to pay beneficiaries, there are a number of ways in which you can create a file that can be sent to Bacs.
In this section, we’ll describe how to enter beneficiary/payer details into the system to make a payment.
-
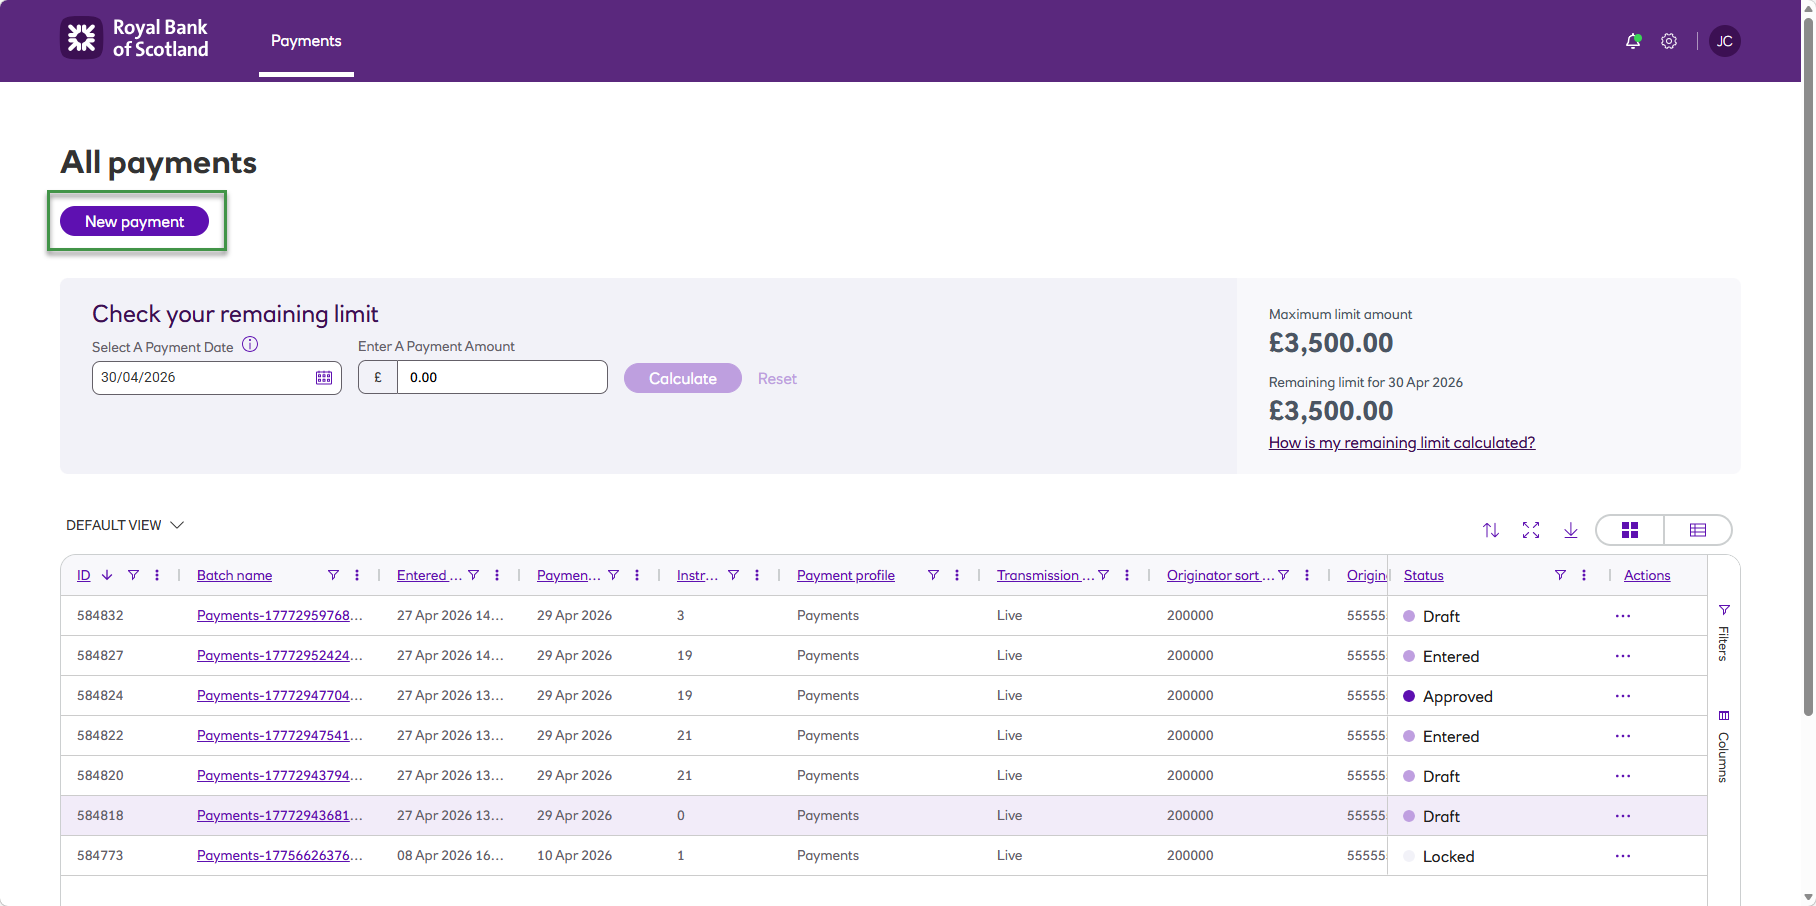
Click New payment from the All payments screen or navigate to the Payments tab on the main menu and click New payment. You will be taken to the New payment screen.|
-
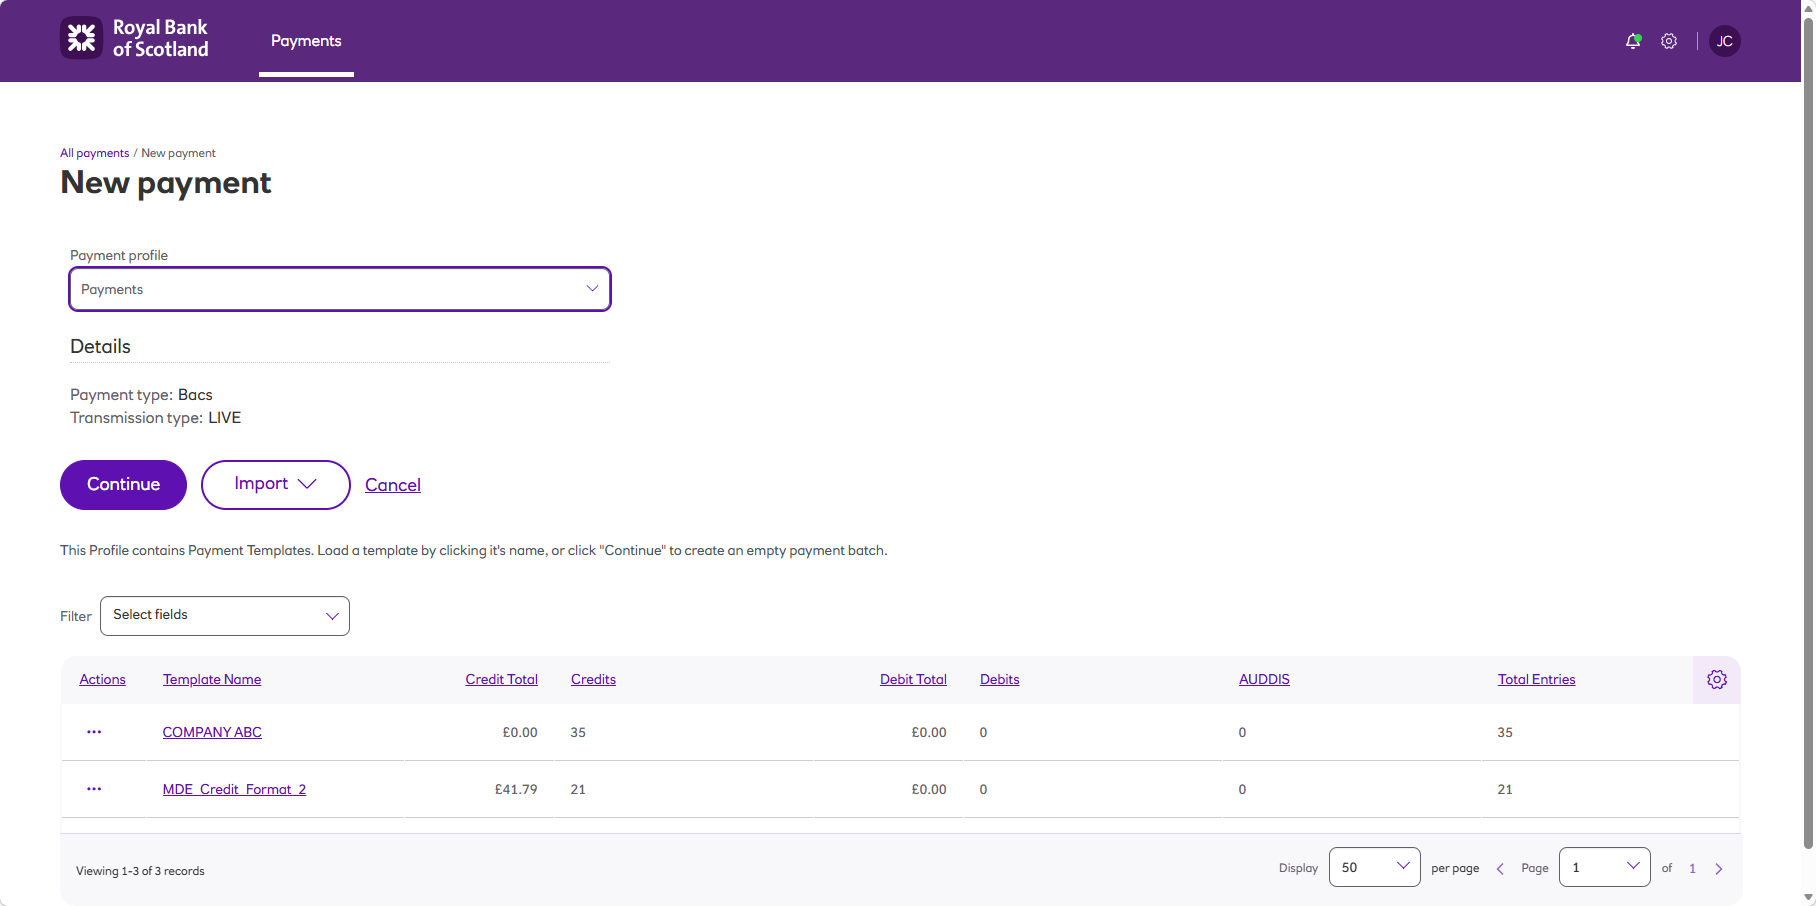
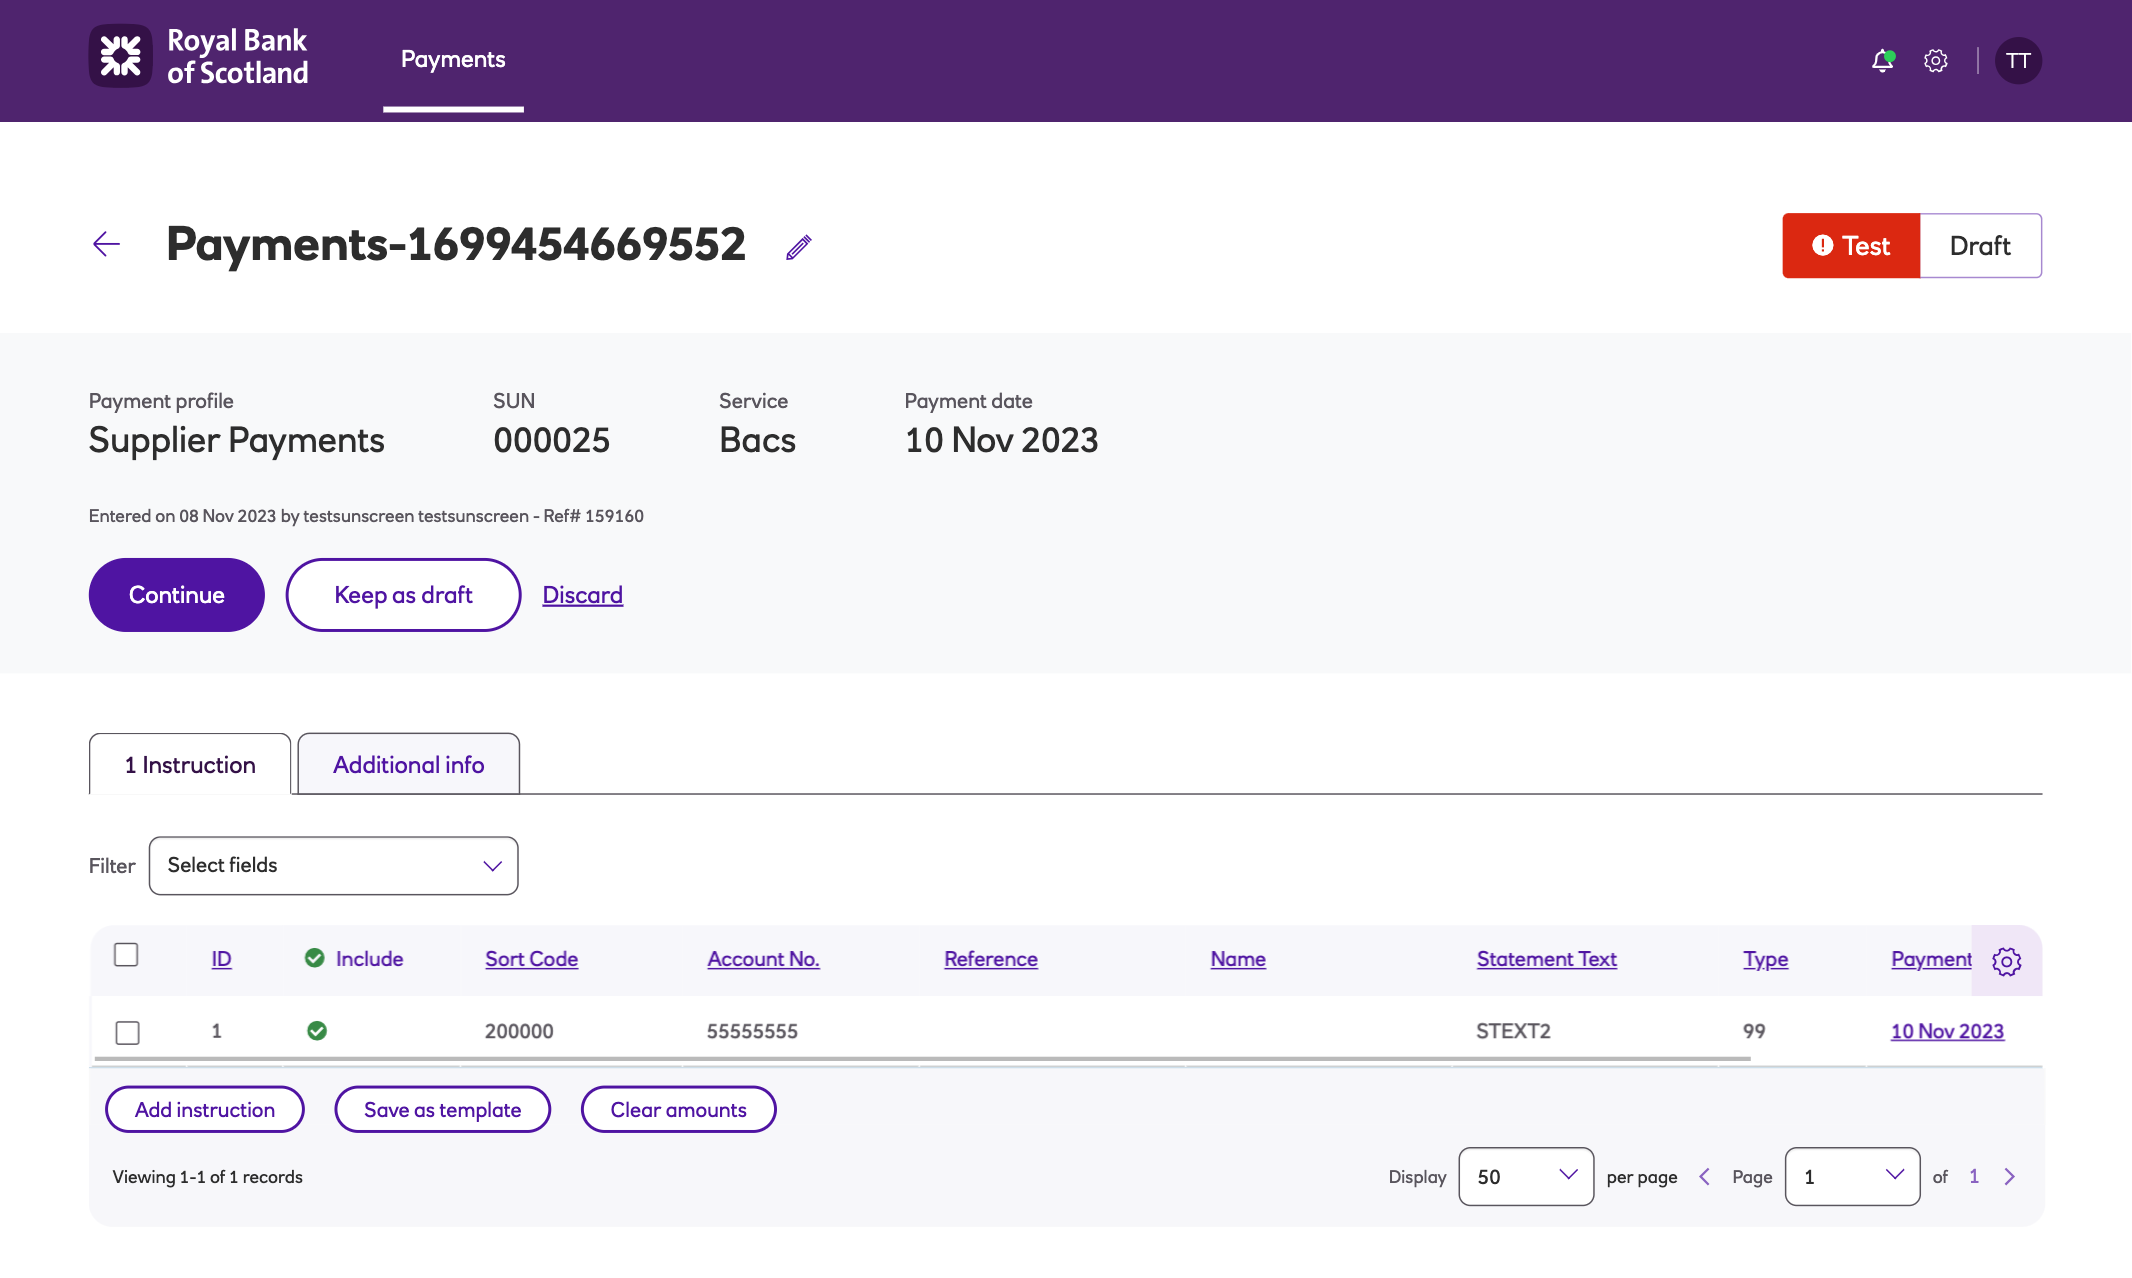
Select the Payment profile that you want to make a payment from.
-
You can select an existing template to amend your current beneficiary list or click Continue to create a new payment file.|
-
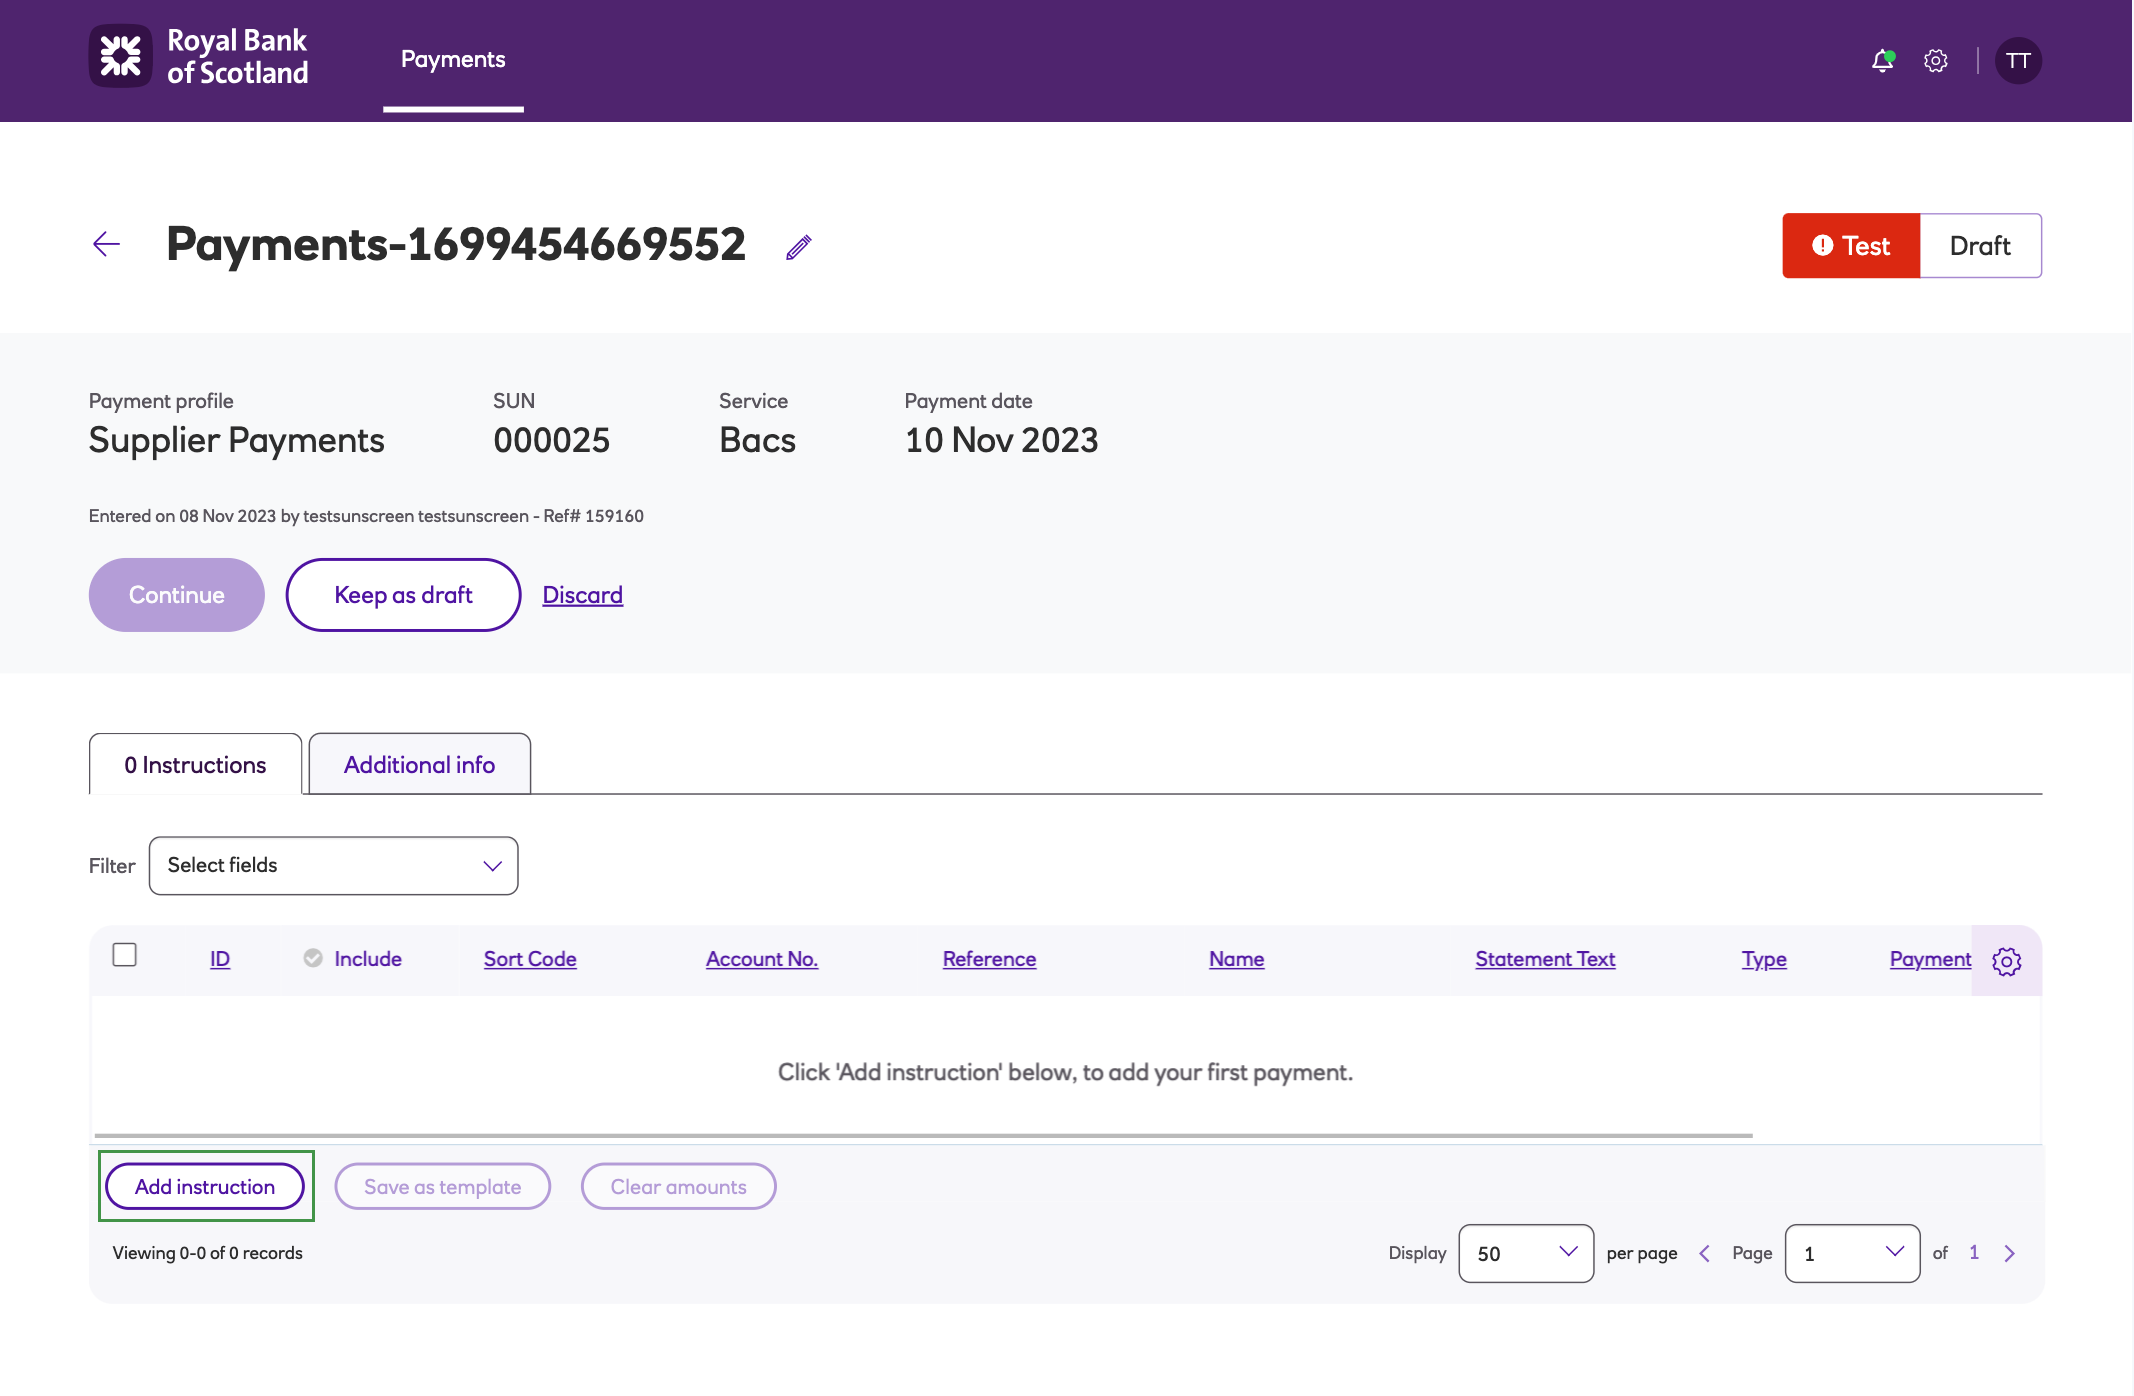
To add a beneficiary click Add instruction.
-
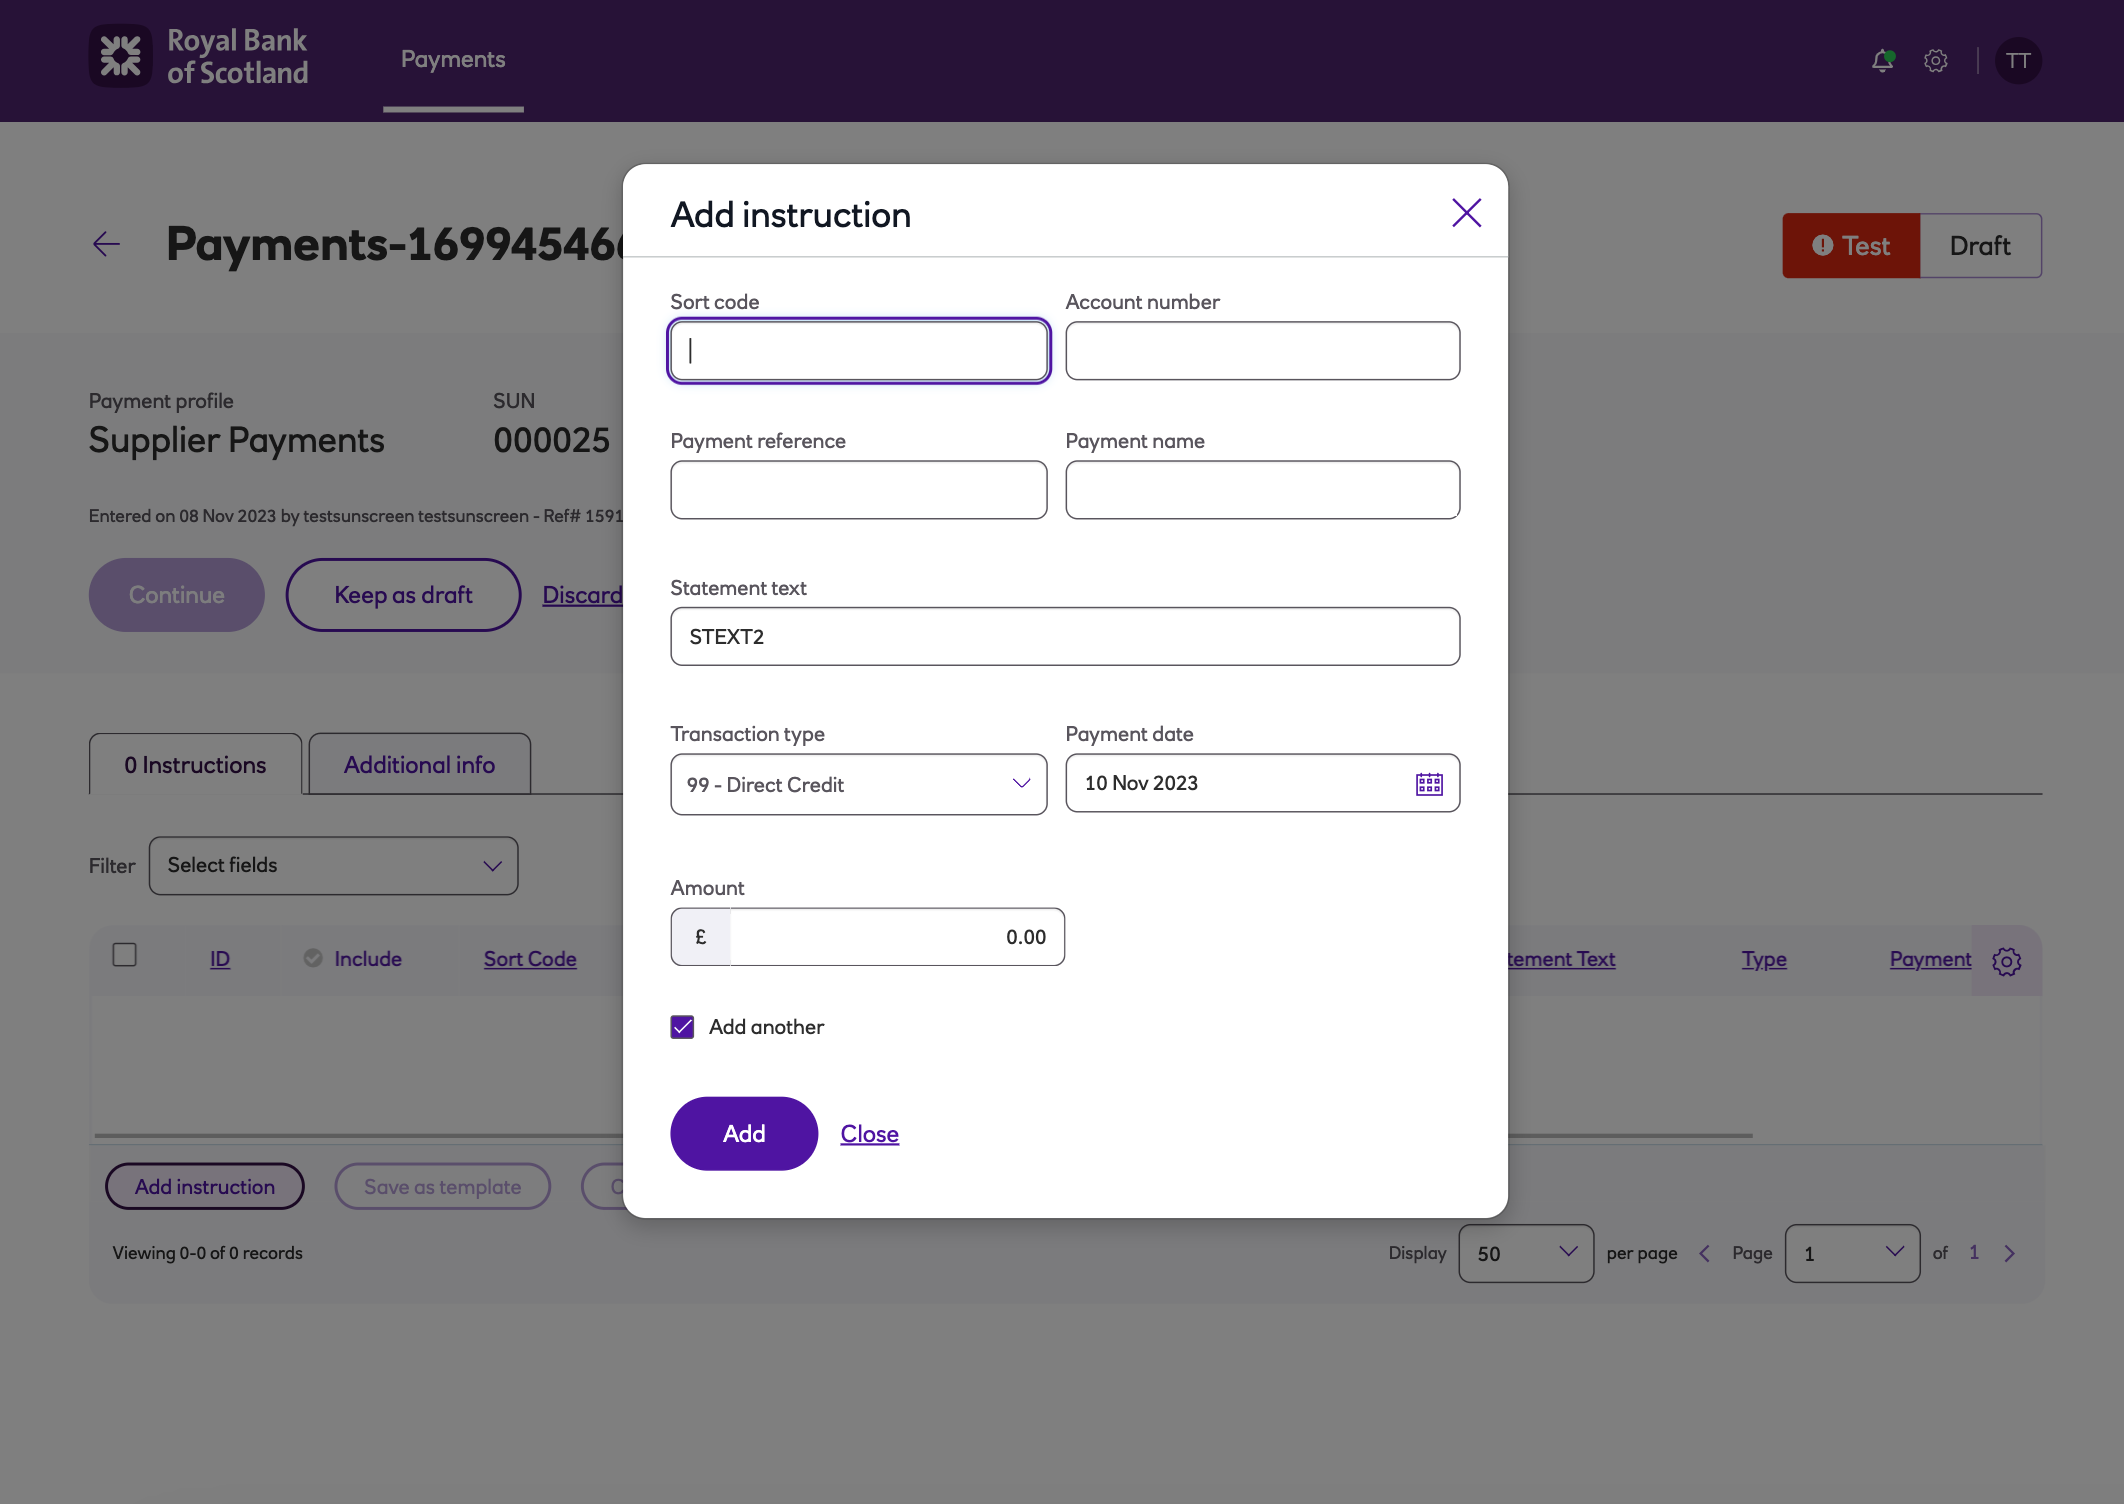
Enter the payment details as prompted on screen, you’ll need to enter a beneficiary’s sort code, bank account number and name. The Payment reference and Statement text that are entered will appear on your beneficiary’s bank statement to help them identify the payment. The payment reference will need to include the roll number for any building society accounts. Enter the amount and payment date (the date you want the beneficiary to receive their money). Select the Transaction type.
Note
The payment reference (mandatory for Direct Debits Collections) must be between 6 and 18
characters in length and beneficiary account name must not exceed 18 characters in length.
-
To include another payment 7 instruction in your payment file, click Add. Your previous beneficiary details are saved in the background while you continue to add further beneficiaries.
-
When you’ve added your final beneficiary to the payment file, untick Add another and click Add once more to complete your list.
-
You will then be taken back to the draft payment screen. Click Save as template if you want to keep this file and any changes made to make future payments with.
-
In the draft payment screen you will also have the following options.
- Continue – if you have finished manually creating instructions and now want the file to progress to the entered state ready for approval.
- Keep as draft – if you want to add more items later, but don’t want the payment file to be progressed further.
- Discard – to delete the draft payment file entirely.
- Add instruction – if you want to key further instructions to this payment file.
- Save as template – you’re able to save the instructions in this list as a template. This will allow you to select the template in the future and just adjust amounts and dates if necessary. If you want to overwrite the existing template with the new template you’ll need to give it the same name as the existing template.
- Clear amounts – you can delete all amounts from the instructions in this payment file.
-
You can delete instructions by clicking on the bin icon at the far right hand side of the screen.
-
You are able to make changes to each instruction by clicking on either the Amounts or Payment dates.
-
If no manual approval is set, click Continue will automatically approve your payment file. If you have manual approval set, the payment file will display in an ‘Entered’ state which you’ll then need to get approved (this is part of the approver's role). Once approved, your payment file will be displayed to you on-screen as Approved.
-
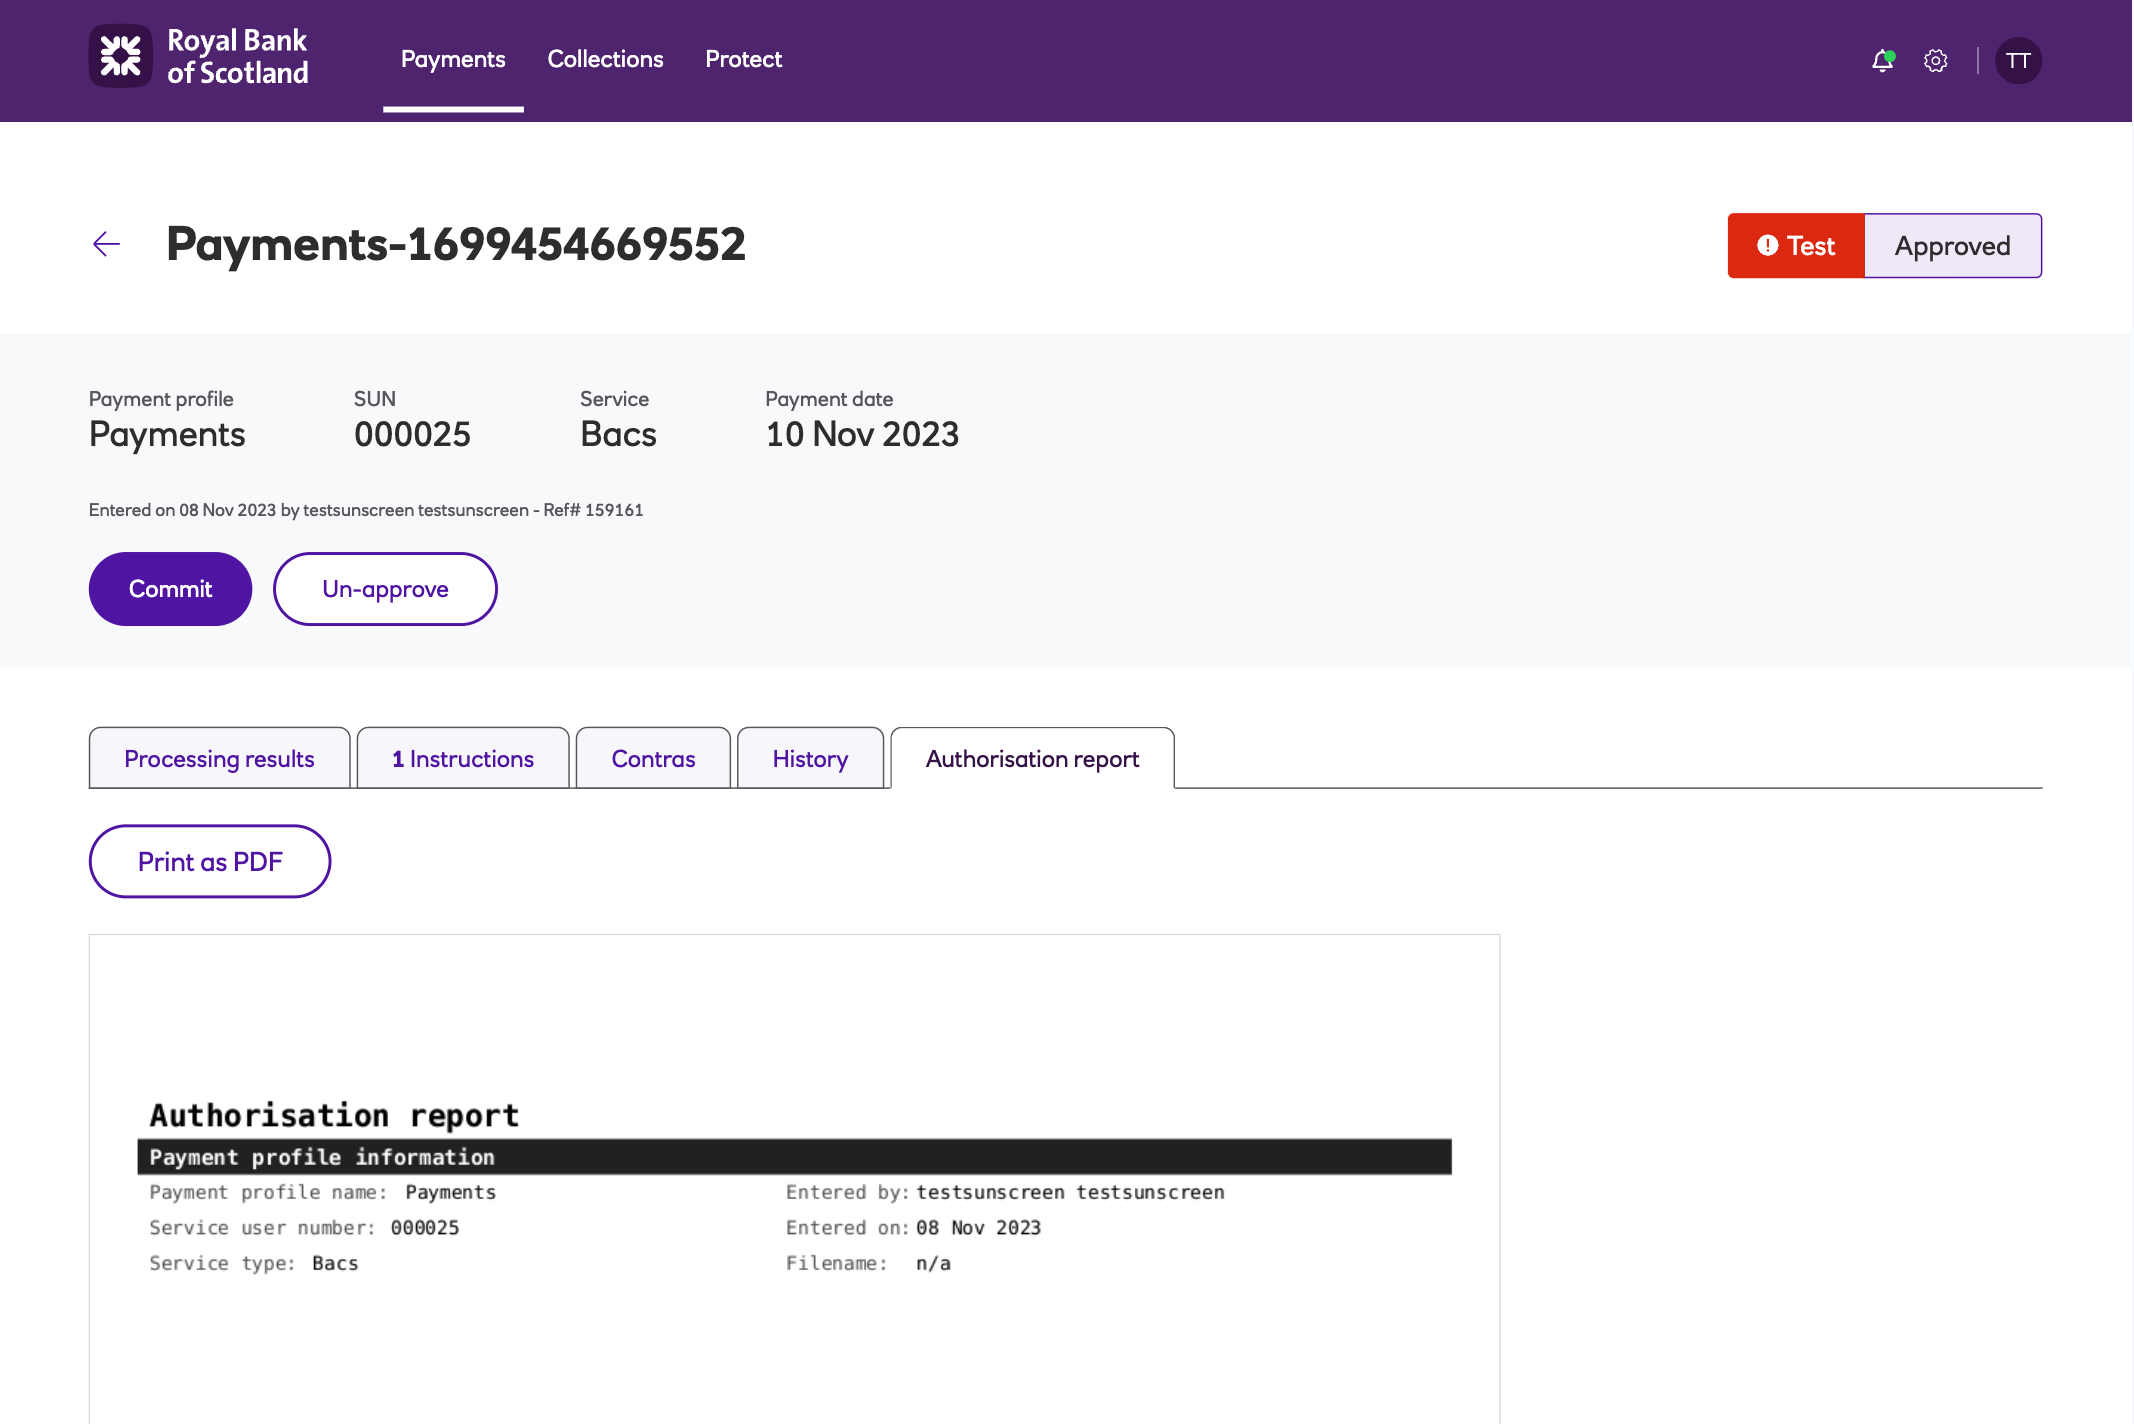
Clicking Continue or Approve will bring you to the Commit screen, where you can review your payment details. You can navigate the Instructions, Contras, Warnings, and History tabs to see more details about this individual file. At this stage, you can also save the authorisation report, a printable document detailing the payment file contents.
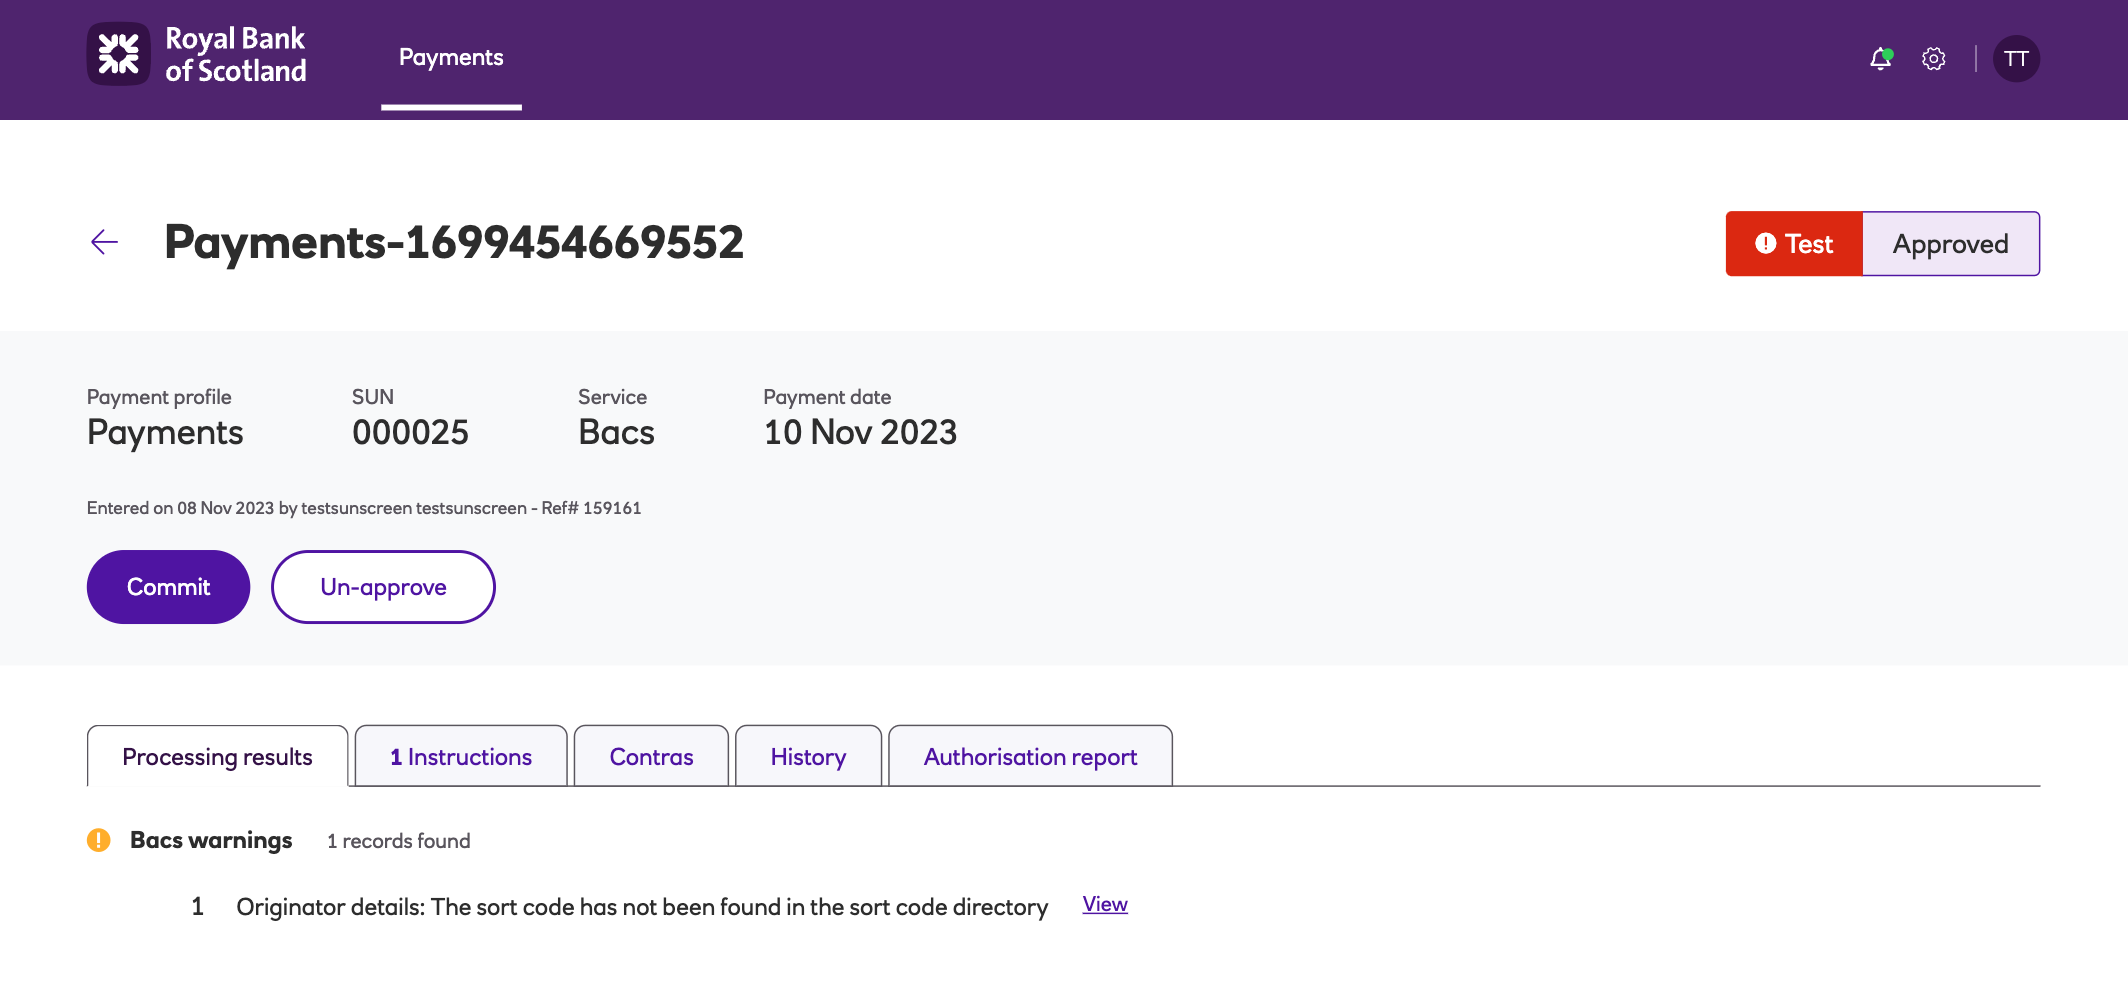
- Instructions: an itemised list of all transactions in this payment file.
- Contras: displays an overall total which is to be debited from the stated originating account.
- Warnings: may include several types of messages, such as modulus checking (account number invalid for sort code) or sort code invalid.
- History: will show you a breakdown of what has happened so far to this payment file.
- Authorisation report: gives you the opportunity to save a printable document detailing the payment file contents – this can be set to include history and warnings if desired in the payment profile settings.
-
If you need to make changes to the payment file you can do so by clicking Un-approve.
- This will take you back to the entered payment screen where you can click Edit.
- Once you have clicked edit you’ll be back at the draft payment screen where you can make the required changes to the payment file.
- Once you’ve checked the payment file and made any required changes, you can now Continue, (and Approve).
-
Commit the payments file for submission.
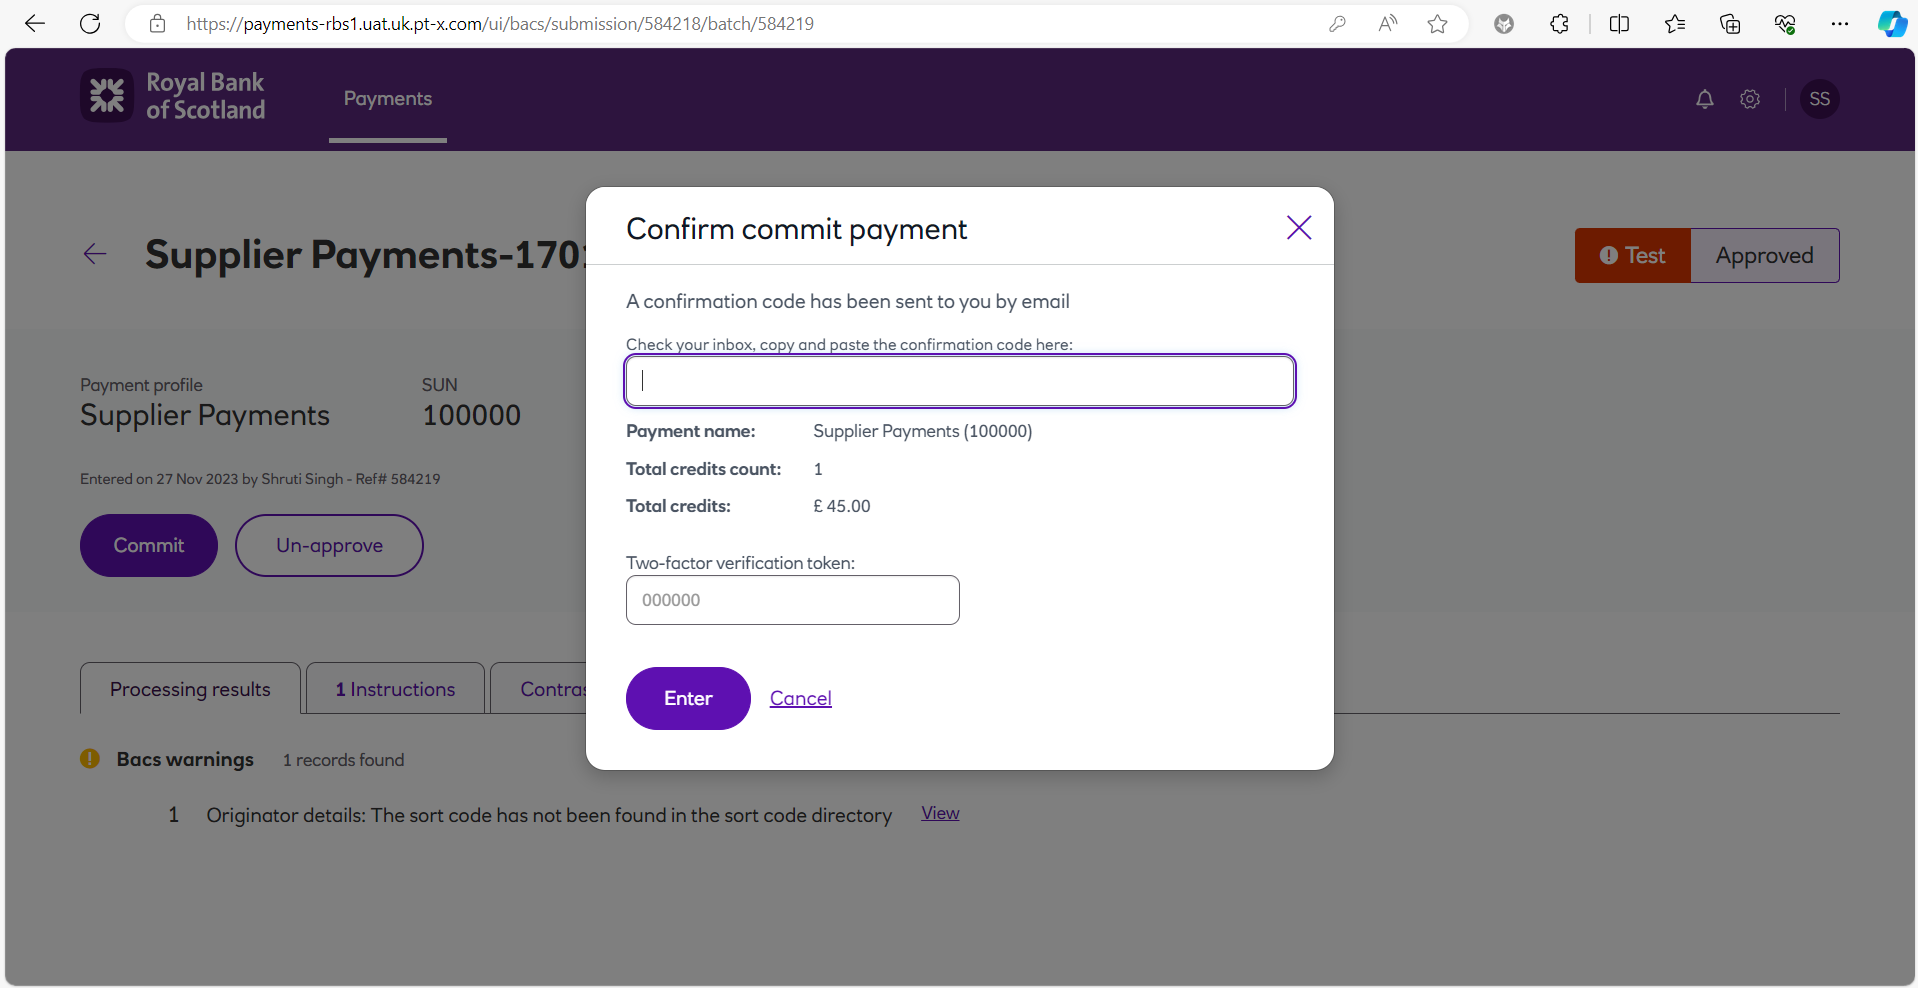
- Clicking Commit will send you a personal one time code via email.
- You will need to copy and paste the code from the email you receive into the first box in the commit payment screen.
- It will also prompt you to enter a verification code into the second box from your MFA key fob or mobile app, the same device used to log in.
-
Once committed your payment file will be added to a queue to be processed. Your file Status will change to locked while this is taking place.
-
It is possible to Un-commit the payment, but only if the file has not yet been locked.
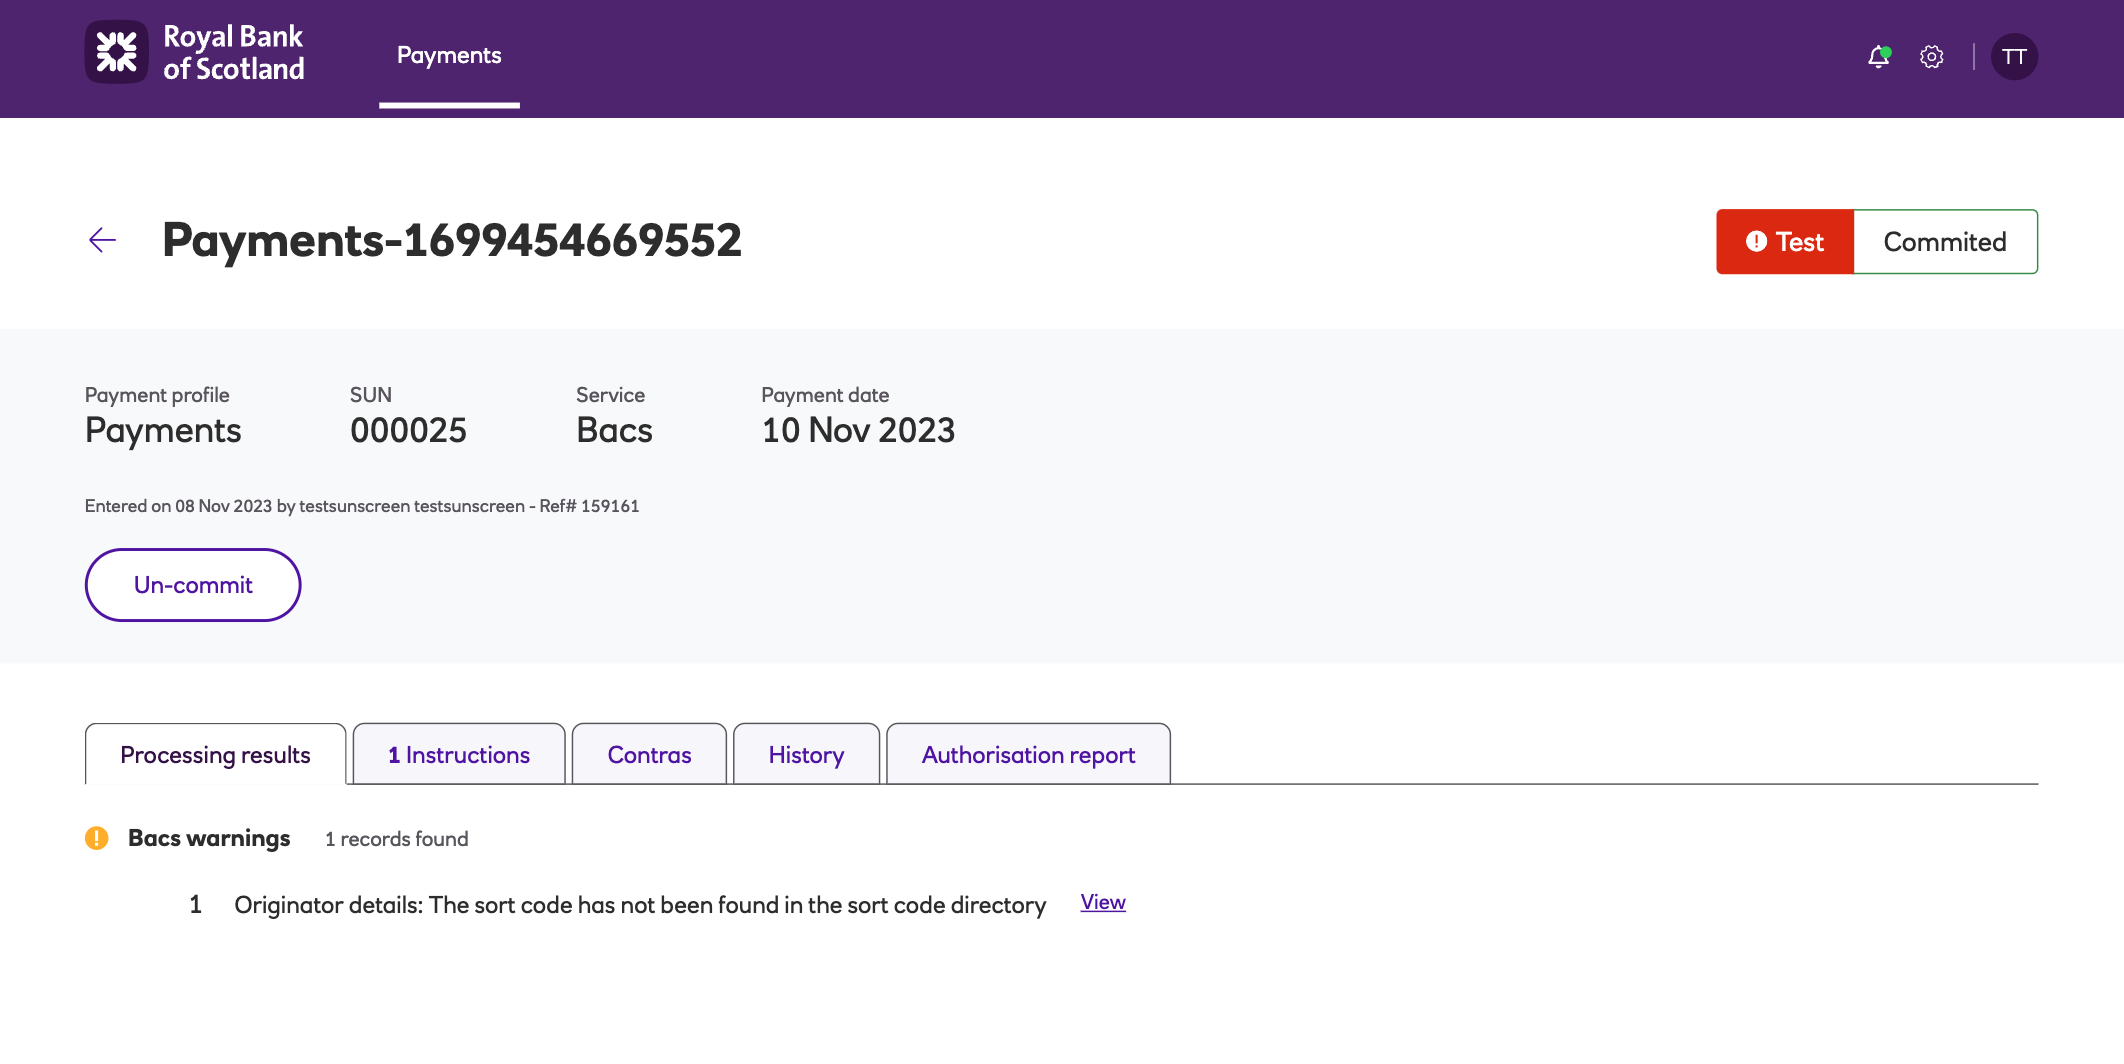
- Your payment file will need to have a status of Committed before 4:45PM to be submitted
the same day (day one of the Bacs cycle).
Note
Payment files may only be committed between 07:00 and 16:45 on each working day.
You can confirm the status by reviewing the text in the top right hand corner of the screen,
which will read Committed (once you’ve committed the file).
-
Once your file has been successfully submitted, the status will be updated from locked to Sent and you’ll receive an email confirming this (depending on your settings).
-
You can locate your file after it has been sent by visiting the All payments screen and clicking View.
As well as manually keying in the payment details you can import the information using a .csv file. Please see Importing payments for more details.
Updated 2 months ago